How to Configure Single Sign-On (SSO) for Accessing AWS EKS Clusters
This article is part two of a series about identity-aware access for Amazon EKS. In Part I, we covered how to use open source Teleport to access Amazon Web Services EKS clusters running in an AWS region. In Part II, we will guide you through the steps to configure single sign-On (SSO) for Amazon EKS clusters with Okta, SAML and Teleport Enterprise.
Once you have followed the steps of this tutorial to configure SSO access to EKS with Teleport, you will be able to enable key functionality such as:
- Zero trust access to Kubernetes
- Just-in-time access and Zero-standing privileges
- Consolidated Access Management backed by a SSO provider.
- Session logging and session recording of Kubectl sessions
- A short lived Kubeconfig linked access from your SSO
- Audited privilege escalation
- Pre-session MFA
- Ability to share AWS IAM Roles via Teleport Application Access
- And more
Single sign-on (SSO) for Amazon EKS with Okta, SAML, and Teleport
Enterprises are adopting single sign-on (SSO) solutions to centralize their identity management tasks. SSO adds security, increases efficiency and delivers a better user experience to employees. While SSO offers many benefits, the challenge remains in mapping the organization's role (e.g., IT, engineers, developers, devops) with infrastructure roles (e.g., Linux user roles, database roles, Kubernetes cluster roles).
Teleport is a unique platform that enables enterprise IT to extend SSO through role-based access control (RBAC) to define fine-grained infrastructure access policies. With Teleport's SAML connector for SSO, customers can easily map the users and groups managed by an SSO provider such as Okta with the cloud-based infrastructure resources such as Amazon EC2 instances, Amazon RDS databases, and Amazon EKS clusters. This is helpful for both internal IT teams and managed service providers handling multiple AWS accounts to manage fine-grained access for all AWS resources in one place.
This tutorial builds on the previous guide, where we configured the Teleport Identity-native Access Proxy, auth server, and an agent running in Amazon EKS clusters. We will extend the scenario to support authenticating against Okta and implementing role-based access control (RBAC) to permit or deny access to a specific EKS cluster based on the user's group membership defined in Okta.
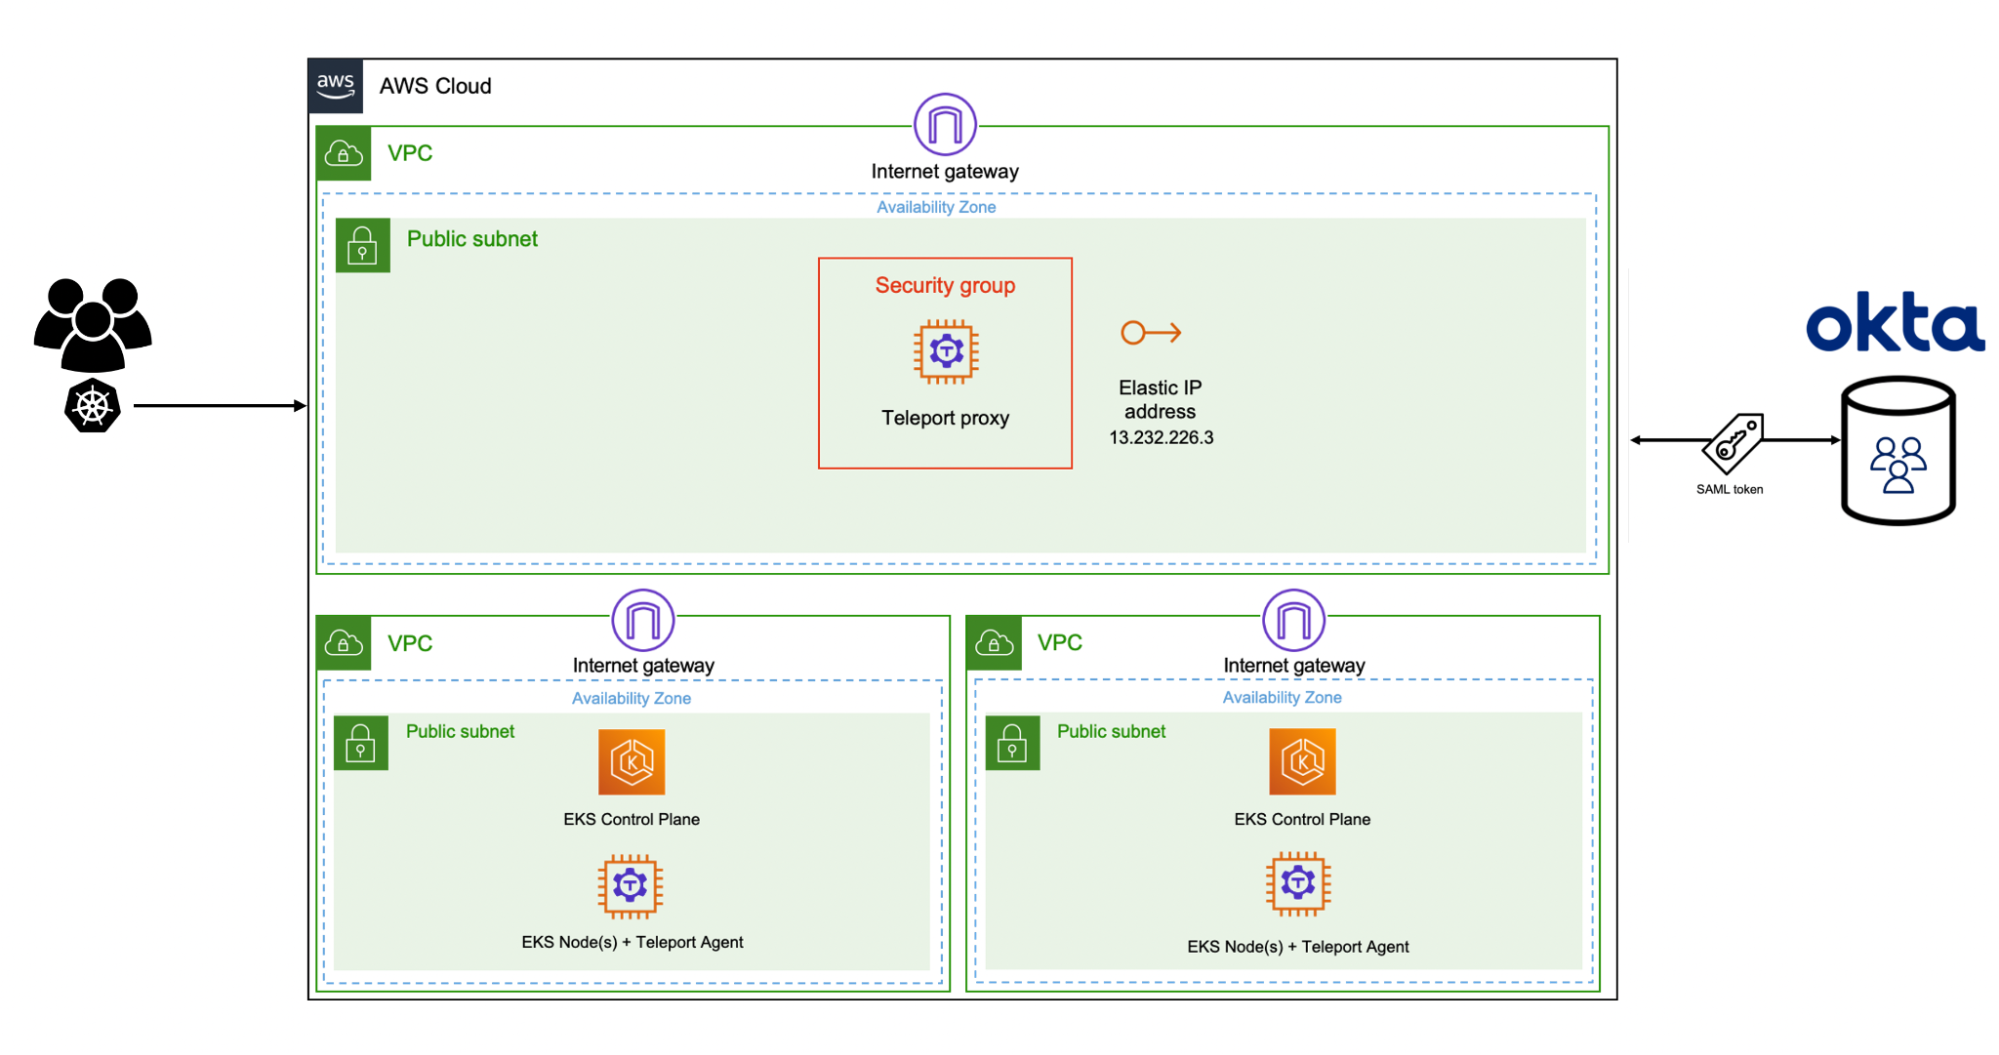
We have two Amazon EKS clusters in this scenario — staging and production. The staging cluster is often accessed by developers and testers to deploy and test nightly builds of an application. The production cluster runs the stable version of the application approved for end-users. Our goal is to map the Okta groups to Teleport roles and then implement RBAC to restrict developers from accessing the production EKS cluster, specific namespaces or workloads. Only Okta users belonging to the cluster administrator group should have access to all the EKS clusters including the staging and production.
For a step-by-step guide on installing Teleport Enterprise in Amazon EC2, refer to the first step of this tutorial. Once Teleport Enterprise is configured, continue with the agent installation in each EKS cluster as described in the previous part of this tutorial series.
Note: Okta SSO is only available in Teleport Enterprise. Teleport Community users can use Github SSO or local users to access their kubernetes cluster.
Step 1 - Configuring Okta as an identity provider for Teleport and Amazon EKS
Please follow the instructions explained in this tutorial to configure Okta groups and users.
In addition to the groups and users created to access Amazon EC2 instances, we will create the Admin user and okta-cluster-admins group meant to access EKS clusters.
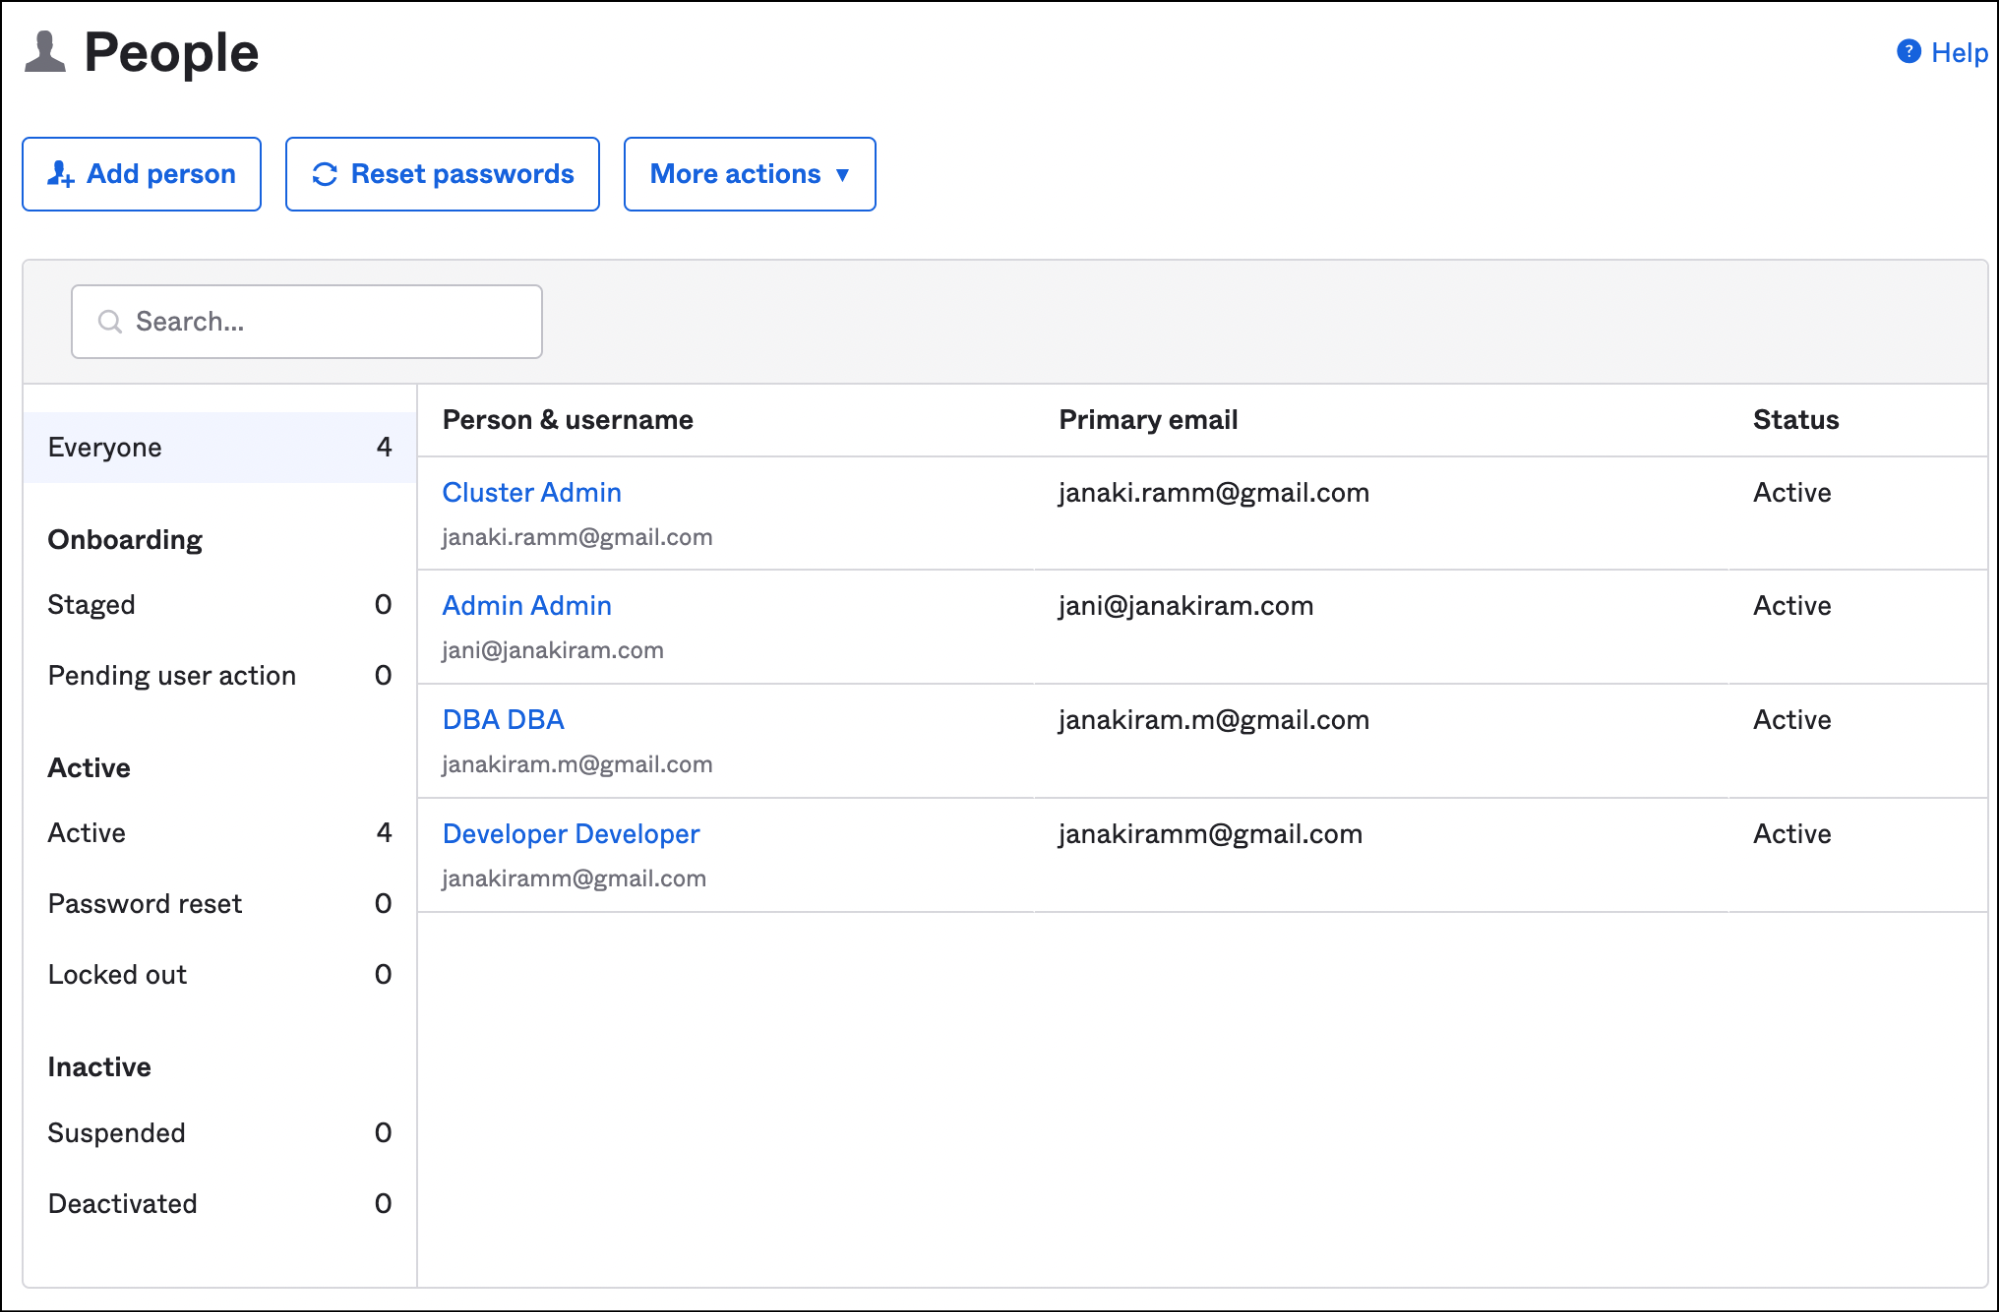
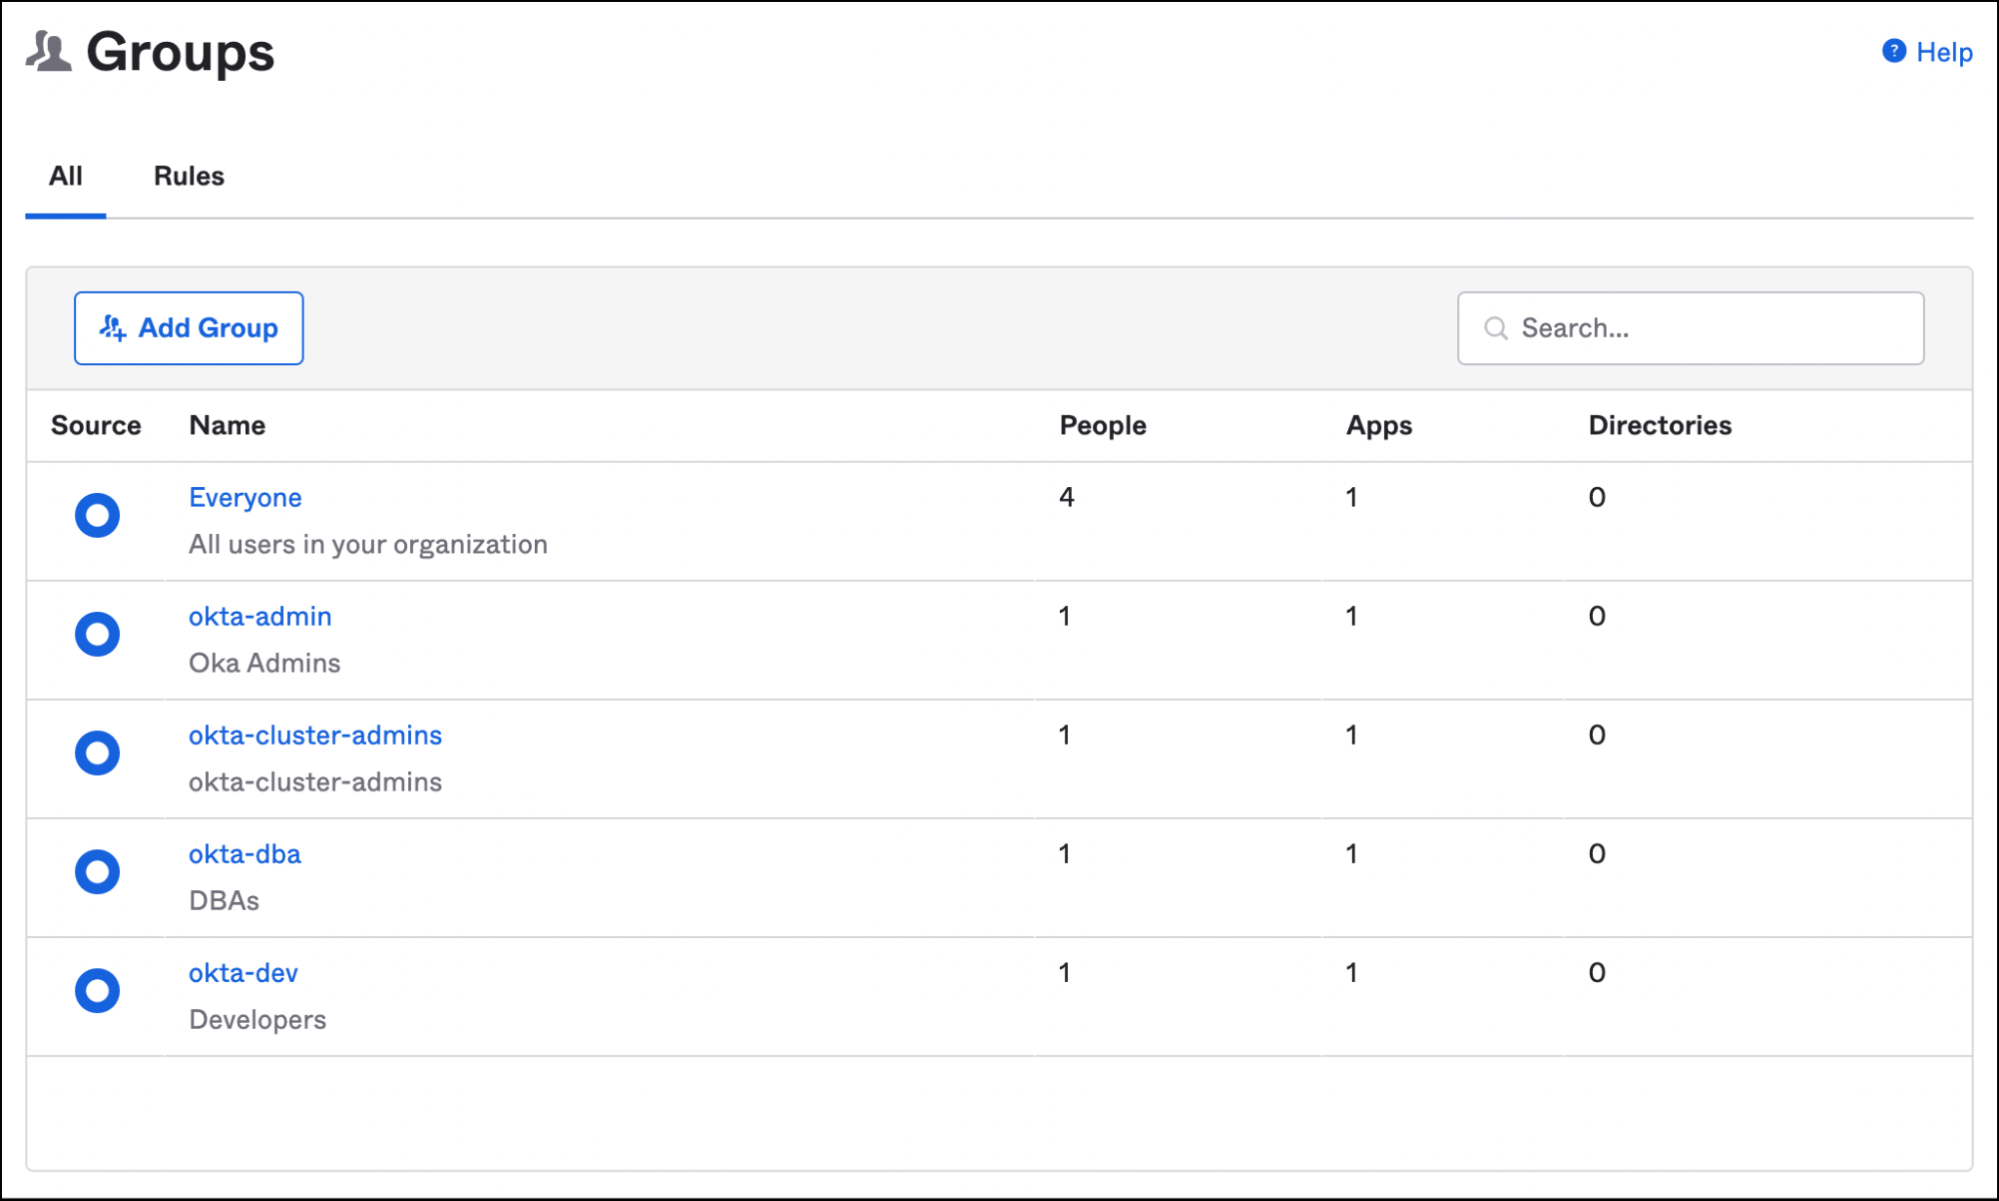
All other steps remain the same from the previous tutorial.
Step 2 - Create Teleport SAML connector and roles
Create the below YAML file by replacing the XML string with the contents of the metadata file downloaded from Okta. Ensure that the formatting is correct by adding 4 spaces to the XML content.
kind: saml
version: v2
metadata:
  name: okta
spec:
  display: Okta
  acs: https://tele.j-access.in:443/v1/webapi/saml/acs
  attributes_to_roles:
    - {name: "groups", value: "okta-admin", roles: ["admin"]}
    - {name: "groups", value: "okta-dev", roles: ["dev-pod-reader"]}
    - {name: "groups", value: "okta-cluster-admins", roles: ["eks-admin"]}
  entity_descriptor: |
      <XML String>
This is the most important step where we map Okta groups to Teleport roles.
Before applying the configuration, login to the Teleport proxy from your workstation as a local user tele-admin that we created earlier.
tsh login --proxy=tele.j-access.in --user=tele-admin --auth=localApply the connector configuration with the below command:
tctl create okta-connector.yamlNow, let’s create the dev and eks-admin roles within Teleport which will map SAML user attributes to Teleport login roles. The Developer role is linked to an internal kubernetes role `dev` role within Kubernetes RBAC. This user only has permission to access the dev namespaces.
First create the `dev-pod-reader` role with the AWS CLI. If you created the cluster using `eksctl` run this commnand (TODO) or update-kubeconfig from the AWS CLI. This is a one-time step, to lay the foundation for EKS roles.
apiVersion: rbac.authorization.k8s.io/v1
kind: Role
metadata:
  namespace: default
  name: dev-pod-reader
rules:
- apiGroups: [""] # "" indicates the core API group
  resources: ["pods"]
  verbs: ["get", "watch", "list"]
kind: role
version: v5
metadata:
name: dev
spec:
allow:
kubernetes_groups: ["dev-prod-reader"]
kubernetes_labels:
'env': 'staging'
deny:
kubernetes_labels:
'env': 'production'
kind: role
version: v5
metadata:
name: eks-admin
spec:
allow:
kubernetes_groups: ["system:masters"]
kubernetes_labels:
'*': '*'
tctl create dev.yaml
tctl create eks-admin.yaml
Notice how an external Okta user is mapped to the Kubernetes internal roles. The eks-admin role explicitly allows access to any EKS cluster while the developer role allows access only to the staging cluster. This is a simple yet powerful mechanism for defining RBAC in Teleport.
Finally, we will switch the authentication mode of the Teleport proxy on the bastion to use SAML.
Edit the file, /etc/teleport.yaml, to add the below lines under the auth_service section:
auth_service:
  authentication:
    type: saml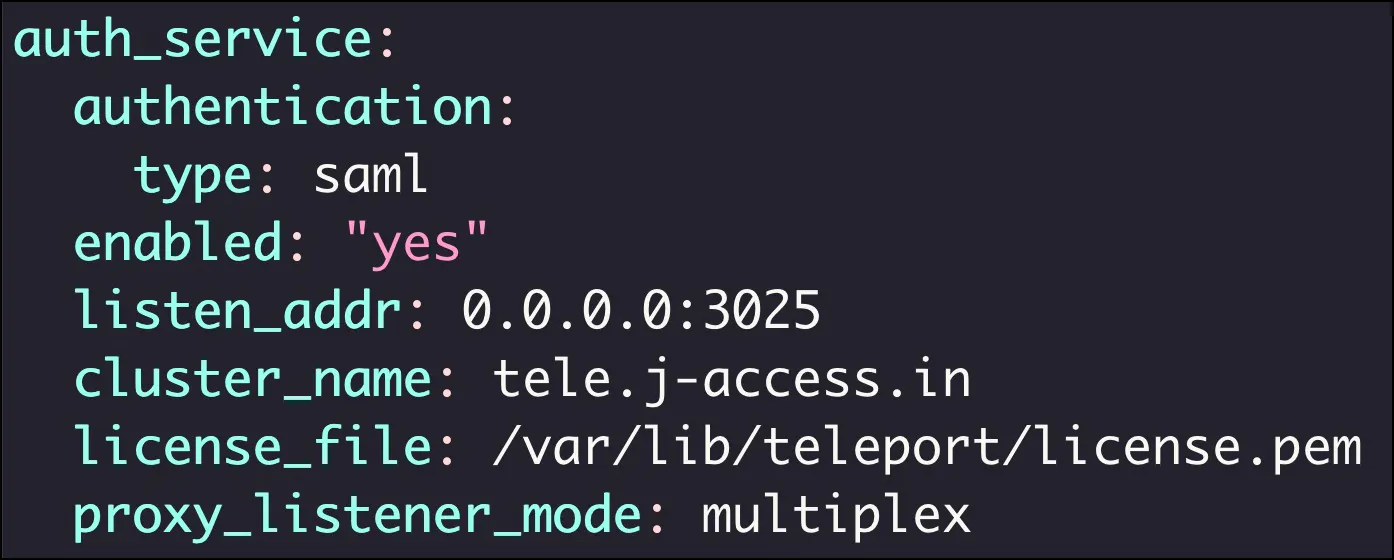
Restart the Teleport daemon on the bastion for the changes to take effect.
If you are using Teleport Cloud, create a file called cap.yaml:
kind: cluster_auth_preference
metadata:
  name: cluster-auth-preference
spec:
  authentication:
    type: saml
version: v2
Create a resource by running the below command:
tctl create -f cap.yamlThe above step configures Teleport Cloud to use SAML authentication as the default instead of the local user database.
Step 3 - Verifying cluster access with SSO and RBAC
On the workstation, try to login to Teleport without mentioning the user or authentication type.
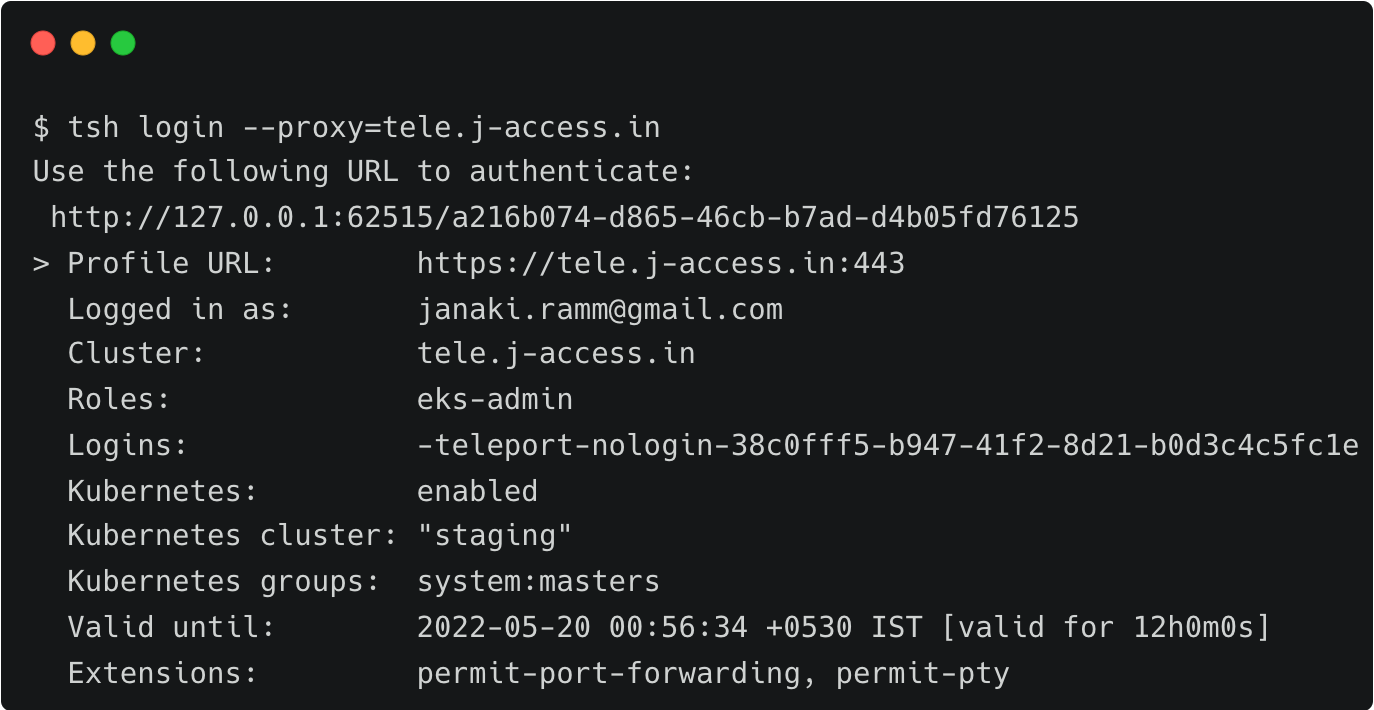
tsh login --proxy=tele.j-access.inThis opens the browser prompting the credentials of the Okta user. Once signed in, the browser confirms that the login is successful.
Sign in as an Okta user belonging to the developer group. This action has now saved a 12hr short-lived kubeconfig file and updated the current context.
List the clusters to see to check the visibility.
tsh kube lsNotice that the production cluster is hidden from the list since the role doesn’t permit access to it.
Then, perform a login to the cluster to use kubectl CLI on the command line.
tsh kube login stagingNow, we can access the staging cluster through usual kubectl commands.
kubectl get nodesRepeat the steps by logging in as an Okta user from the cluster admins group. You should be able to access both the EKS clusters.
Verify if both clusters are visible and accessible.
tsh kube lsSince the current user has no restrictions, you can switch to the production cluster.
tsh kube login production
kubectl get nodes
As we can see, the cluster-admins Okta group mapped to the Teleport eks-admin role has access to all the clusters with no restrictions.
Teleport Kubectl Audit, one of the key pillars of the platform, logs all the activities performed by users through session recording and audit trails. While acting as a single source of truth for all the security events generated by pods, it provides an interactive mechanism to playback sessions recorded and stored in a centralized location
Conclusion
This tutorial demonstrated how to leverage an SSO provider such as Okta to define fine-grained access policies through Teleport's RBAC. In this case, Okta works as an external identity provider (or user's identity source) for Teleport. With this setup, Okta users can be mapped with Teleport roles to access both as a one-to-one user and application mapping or with group membership in Okta. This mapping provides the ability to selectively provide access to specific Kubernetes clusters provisioned through Amazon EKS. Signup for a free trial of Teleport Enterprise today so you can do everything you saw in this tutorial. Or start for free using our open-source Community Edition.
Please see our other guides for accessing AWS EKS using Github, AWS SSO and Google Workspaces.
Teleport can also be used to access the AWS CLI and AWS Console using Teleport Application Access.
