Configure RBAC for Kubernetes EKS
An overview of best practices for how to configure RBAC for Kubernetes running AWS EKS.
Article Contents
In this article, we will explore configuring role-based access control (RBAC) for Amazon Elastic Kubernetes Service (EKS). Amazon EKS is Amazon's managed Kubernetes service that makes it easy for you to run Kubernetes on AWS and on-premises. EKS has many large customers, and it’s become the preferred way of running Kubernetes in EKS. Amazon EKS Anywhere lets teams create and operate Kubernetes clusters on your own infrastructure. As teams have adopted Kubernetes, they quickly need to set up role-based access control (RBAC) to limit who can access which pods, namespace, users and roles.
This post will provide a range of options for RBAC for EKS, with practical guides for using open-source Teleport to provide RBAC for both clouds and on-premises EKS clusters.
Key takeaways:
- Learn the basics of configuring RBAC for Kubernetes
- How to provide pod-level access and RBAC to your team
- Best practices for providing access to a Kubernetes user
- How to securely share a Kubernetes group amount users
- How to audit access to the Kubernetes API, including kubectl exec session recordings
Prerequisites: This article assumes that you have deployed a Teleport cluster and an EKS cluster, either with your EKS cluster via our helm chart or connected via Teleport Cloud. If you don’t have an EKS cluster, we recommend using `eksctl` to create the appropriate resources.
Options for configuring RBAC
Role-based access control is a method of regulating access to resources based on the roles of an individual user. For example, the DevOps team may need full access to Kubernetes, but software engineering might only have access to pods in the development namespace. RBAC is often combined with a central IDP and SSO provider, such as Okta, ActiveDirectory or GitHub. These IDPs often contain extra metadata, such as groups. These groups are often used in combination with IDPs.
The core logical components of RBAC are:
- Entity: A group, user, or service account (an identity representing an application that wants to execute certain operations (actions) and requires permissions to do so).
- Resource: A pod, service or secret that the entity wants to access using certain operations.
- Role: Used to define rules for the actions the entity can take on various resources.
- Role binding: This attaches (binds) a role to an entity, stating that the set of rules defines the actions permitted by the attached entity on the specified resources.
There are two types of Roles (Role, ClusterRole) and their respective bindings (RoleBinding, ClusterRoleBinding). These differentiate between authorization in a namespace or cluster-wide. For this article, we’ll be mainly focusing on how end users access a Kubernetes cluster and will focus on Kubernetes groups, users, and namespaces. For the purposes of this tutorial, we’re focused on human operators accessing Kubernetes. If you’re interested in machines / CI/CD interacting with Kubernetes, we recommend using MachineID.
A good way to know what a Kubernetes / kubectl user can currently do is to use `kubectl auth can-i --list`.
$ kubectl auth can-i --list$ kubectl auth can-i create pods --all-namespacesMap IAM roles to Kubernetes
AWS EKS lets teams use an IAM Principal to access Kubernetes. An IAM principle is an entity that can perform actions and access resources. When creating a EKS cluster, an IAM principal is automatically granted access to the ‘system:masters’ role. This is a highly elevated permission, and we would recommend only using this in a break glass scenario.
Using or sharing an IAM principle can also result in other issues, such as not knowing who’s performing which actions on the cluster, with extra audit logging needed. It’s instead better to map SSO users to Kubernetes using a 3rd party IDP and SSO provider.
Map SSO users to Kubernetes users and groups
Using Single Sign-On (SSO) for accessing the Kubernetes API offers several benefits that can enhance the security and usability of your Kubernetes clusters. Here are some reasons to consider SSO for Kubernetes API access:
- Simplified user management: SSO allows users to have a single set of credentials to access multiple applications, including the Kubernetes API.
- Improved security: By centralizing user authentication, SSO enables organizations to implement consistent security policies, such as multi-factor authentication (MFA) and password complexity requirements, across all applications, including Kubernetes.
- Role-based access control (RBAC) Integration: SSO can be easily integrated with Kubernetes RBAC, allowing administrators to map roles and permissions to users or groups managed by the IDP. This enables fine-grained access control over Kubernetes resources, ensuring that users only have access to the resources they need.
While this article is focused on RBAC, we have a complete guide for setting up SSO with EKS.
RBAC to Kubernetes Users
In this section, we’ll look into authenticating to a Kubernetes cluster via Teleport; your Teleport roles must allow access as at least one Kubernetes user or group.
Create a ServiceAccount, say 'readonlyuser'.
kubectl create serviceaccount readonlyuserCreate cluster role, say 'readonlyuser'.
kubectl create clusterrole readonlyuser --verb=get --verb=list --verb=watch --resource=podsCreate cluster role binding, say 'readonlyuser'.
kubectl create clusterrolebinding readonlyuser --serviceaccount=default:readonlyuser --clusterrole=readonlyuserThis will create a new read only users that’s only able to watch pods. This is a restricted role.
Create a file called kube-access.yaml with the following content, replacing USER with the output of the command above.
kind: role
metadata:
  name: kube-access-readonly
version: v6
spec:
  allow:
    kubernetes_labels:
      '*': '*'
    kubernetes_resources:
      - kind: pod
        namespace: "*"
        name: "*"
    kubernetes_users:
    - readonlyuser
  deny: {}
Apply your changes:
tctl create -f kube-access-readonly.yamlAssign the kube-access role to your Teleport user by running the following commands, depending on whether you authenticate as a local Teleport user or via the GitHub, SAML, or OIDC authentication connectors. See Getting Started With Access Controls. For our example, we'll add `kube-access-readonly` to the user.
Now that Teleport RBAC is configured, you can authenticate to your Kubernetes cluster via Teleport. Log out of Teleport and log in again; when you log in using `tsh kube login` you’ll get a new kubeconfig with the current permissions.
tsh login --proxy=teleport example.com --auth=github
tsh kube login cookie
kubectl version
kubectl get pods
RBAC for Kubernetes namespaces and pods
In this section, we’ll set up RBAC that’ll limit access to Kubernetes resources, by limiting access to pods and nodes using Kubernetes namespaces. Note: namespaces are often used as a security boundary, but a Kubernetes namespace is not a security boundary in itself because there are things that are not namespaced, so there is no way to accurately correlate security criteria to the namespace. Learn more about securing Kubernetes from our podcast Hacking Kubernetes - Overview.
Before setting up per-pod RBAC, it’s important to know what namespaces and pods you have within a cluster. `kubectl get pods –all-namespaces` is a helpful command to list all pods within a cluster.
kubectl get pods --all-namespaces

NAMESPACE        NAME                                       READY   STATUS        RESTARTS   AGE
kube-system      coredns-6f5f9b5d74-7g8rz                   1/1     Running       0          14d
kube-system      calico-node-4d7fz                          1/1     Running       0          14d
ingress          nginx-ingress-microk8s-controller-h56nn    0/1     Pending       0          14d
kube-system      hostpath-provisioner-69cd9ff5b8-wtqt6      1/1     Running       0          14d
ingress          nginx-ingress-microk8s-controller-l7hj5    1/1     Running       0          14d
kube-system      calico-node-vkfpl                          1/1     Running       0          18d
default          shell-demo                                 1/1     Running       0          14d
kube-system      calico-kube-controllers-69f8d4c8f6-2j6dg   0/1     Terminating   0          18d
kube-system      calico-kube-controllers-69f8d4c8f6-hz2wf   1/1     Running       0          14d
colormatic       colormatic-784db57b6-j7v6p                 1/1     Running       0          11d
teleport-agent   teleport-agent-0                           1/1     Running       0          14d
Next we’ll define a new Teleport Role, kube-access. This role has a few RBAC mechanisms.
Here is a summary of what this role can do:
- Kubernetes Labels: The role allows access to resources with specific labels. In this case, it permits access to resources with the label 'region' set to any value (denoted by '*') and the label 'platform' set to 'minikube'.
- Kubernetes Resources: The role permits access to certain Kubernetes resources based on their kind, namespace, and name.
- For resources of kind 'pod' in the 'production' namespace, access is granted only if the name matches the regular expression "^webapp-[a-z0-9-]+$". This means that the name must start with "webapp-" followed by lowercase letters, digits, or hyphens.
- For resources of kind 'pod' in the 'development' namespace, access is granted for all names (denoted by '*').
- Kubernetes Groups: The role grants access to the 'developers' group.
- Kubernetes Users: The role grants access to the 'minikube' user.
- Deny: There are no explicit deny rules in this role configuration.
kind: role
metadata:
  name: kube-access
version: v6
spec:
  allow:
    kubernetes_labels:
      'region': '*'
      'platform': 'minikube'
    kubernetes_resources:
      - kind: pod
        namespace: "production"
        name: "^webapp-[a-z0-9-]+$"
      - kind: pod
        namespace: "development"
        name: "*"
    kubernetes_groups:
    - developers
    kubernetes_users:
    - minikube
  deny: {}
Create the role using ‘tctl create’.
tctl create kube-access.yamlNext, we’ll assign this new role to our GitHub SSO connector. In this case, we’ve added ‘kube-acess’ to the `trainee-graviton` group.
kind: github
metadata:
  name: github
spec:
  client_id: x
  client_secret: x
  display: github
  endpoint_url: https://github.com
  redirect_url: https://teleport.example.com:443/v1/webapi/github/callback
  teams_to_roles:
  - organization: asteroid-earth
    roles:
    - access
    - kube-access
    team: trainee-graviton
version: v3
See this documentation page for other options.
The last step is to test the setup. In this case we’ll use GitHub SSO provider via Teleport to obtain a new kubeconfig.
tsh login --proxy=teleport example.com --auth=github
tsh kube login cookie
kubectl version
kubectl get pods
RBAC for Kubernetes Group
Kubernetes groups are useful for sharing a specific set of permissions for a group. For example, the SRE team can access resources, and Developers can only view deployed pods. When combined with SSO, using external groups and Kubernetes groups, it can greatly simplify the access controls for kubernetes. By using Kubernetes groups in combination with Teleport, teams also get a per-user audit log for actions on the kubectl API or via kubectl execs.
Create a file called viewers-bind.yaml with the following contents:
apiVersion: rbac.authorization.k8s.io/v1
kind: ClusterRoleBinding
metadata:
  name: viewers-crb
subjects:
- kind: Group
  # Bind the group "viewers", corresponding to the kubernetes_groups we assigned our "kube-access" role above
  name: viewers
  apiGroup: rbac.authorization.k8s.io
roleRef:
  kind: ClusterRole
  # "view" is a default ClusterRole that grants read-only access to resources
  # See: https://kubernetes.io/docs/reference/access-authn-authz/rbac/#user-facing-roles
  name: view
  apiGroup: rbac.authorization.k8s.io
Apply the ClusterRoleBinding with kubectl:
kubectl apply -f viewers-bind.yamlNext we’ll create a Teleport RBAC mapping. This yaml file is used to provide access to the viewer group above.
kind: role
metadata:
  name: kube-access
version: v6
spec:
  allow:
    kubernetes_labels:
      '*': '*'
    kubernetes_resources:
      - kind: pod
        namespace: "*"
        name: "*"
    kubernetes_groups:
    - viewers
    kubernetes_users:
    - USER
  deny: {}
Apply your changes:
tctl create -f kube-access.yamlThe last step is to test the setup. In this case we’ll use GitHub SSO provider via Teleport to obtain a new kubeconfig.
tsh login --proxy=teleport example.com --auth=github
tsh kube login cookie
kubectl version
kubectl get pods
Authentication flow for Kubernetes
If you’ve followed any of the above guides for setting up Kubernetes RBAC with Teleport, the end flow will look something like this.
tsh login --proxy=teleport example.com --auth=github
tsh kube login cookie
kubectl exec --stdin --tty shell-demo -- /bin/bash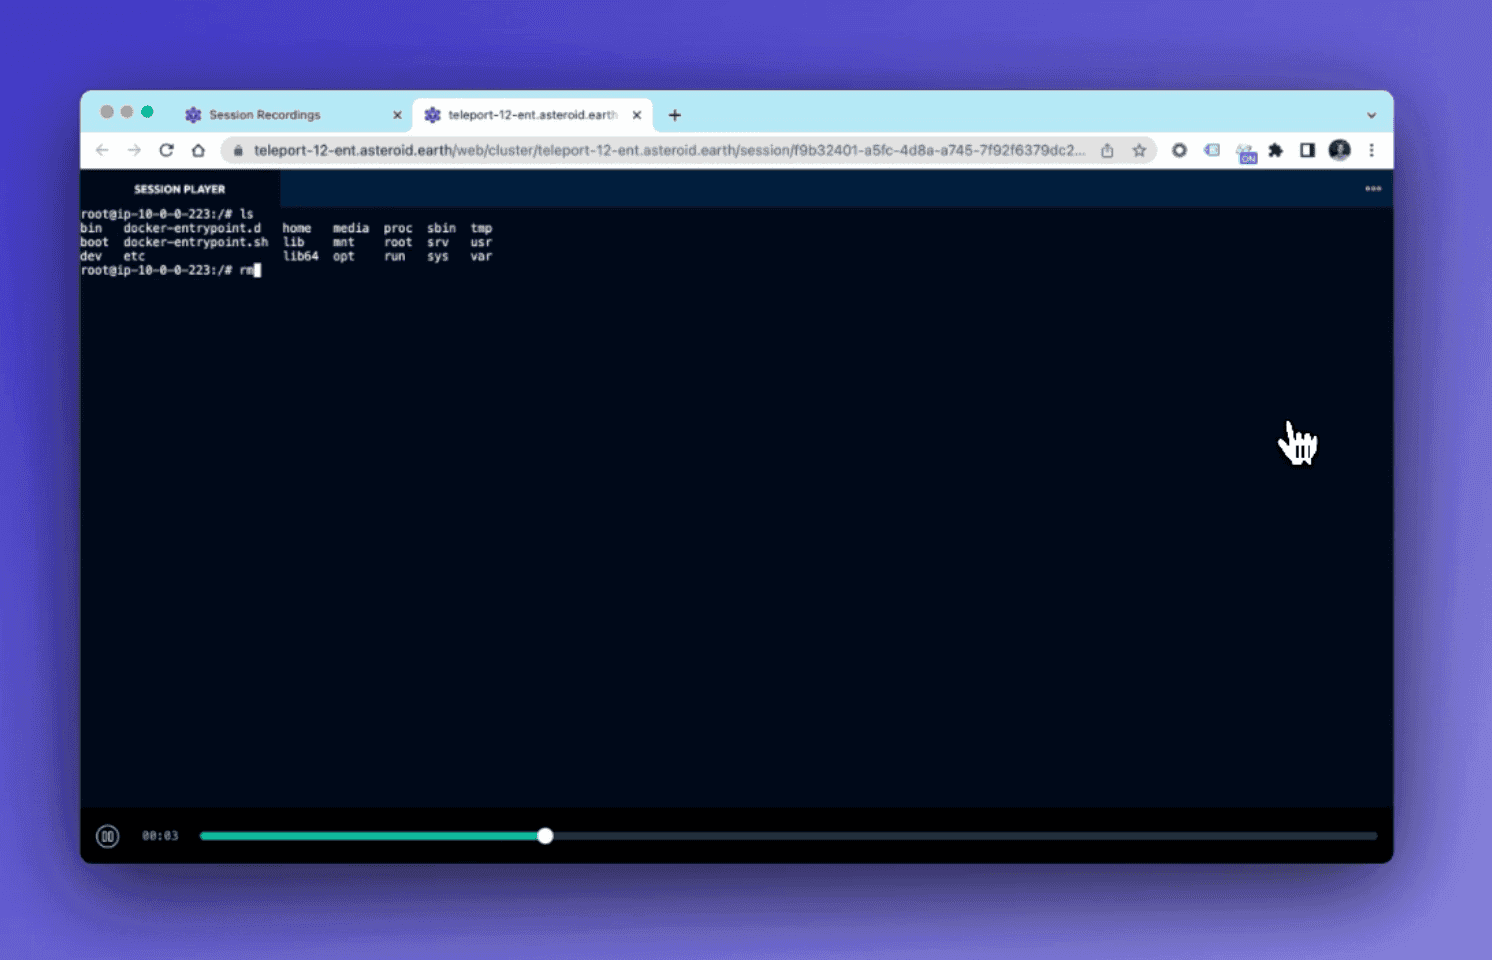
RBAC to Kubernetes dashboard
Along with the underlying Kubernetes API, it’s important to secure any apps or admins tools such as the Kubernetes dashboard that also run in Kubernetes.
Sharing IAM users for Kubernetes and AWS CLI
Under the section `Map IAM roles to Kubernetes` we discussed that using an IAM user defaults to the ‘system:masters’ role. We recommend using a SSO for your AWS account and AWS CLI command line tool to improve auditing and access to that role. Teleport Application Access lets teams share a AWS IAM role arn between users.
We cover this topic in more detail in this post Access AWS With Teleport Application Access.
Conclusion
This article has covered three main areas that you may consider for Kubernetes RBAC for teams accessing k8s: providing access to Kubernetes Users, Groups and Per-Pod RBAC. The examples highlight the capabilities of Teleport. Try Teleport Team for 14 days free.
Other related posts:
- Kubernetes RBAC Tips
- Kubernetes Access Requests
- Kubernetes API Server Security Hardening
- Setting Up Teleport Access Controls for Kubernetes
- 6 Best Practices for Kubernetes Audit Logging