Authenticating GCP GKE with Google Workspace SSO
Authenticating Google Kubernetes Engine Clusters with Google Workspace SSO
Article Contents
In the fourth part of this series on securing access to Kubernetes, we will explore how Teleport brings an additional layer of security to clusters based on Google Kubernetes Engine (GKE) managed service from Google Cloud Platform (GCP).
Before proceeding further, ensure you have configured the Teleport authentication server to work with Google Workspace SSO. Refer to the guide and the documentation for the setup.
This guide will use a configured Google Workspace. The configuration will use the domain cloudnativelabs.in while the Teleport proxy and authentication server are associated with the proxy.teleport-demo.in domain.
Step 1 - Provisioning a Google Kubernetes Engine (GKE) cluster
This tutorial will launch a GKE cluster with three Ubuntu nodes and the most recent version of Kubernetes. You can replace the parameters such as the zone and number of nodes. Download the CLI for Google Cloud SDK and configure the gcloud CLI to follow along.
touch gke-config
export KUBECONFIG=gke-config

# set GCP Project
PROJECT_NAME=<YOUR PROJECT>

gcloud container clusters create "cluster1" \
	--project "$PROJECT_NAME"  \
	--zone "asia-south1-a" \
	--node-locations "asia-south1-a" \
	--no-enable-basic-auth \
	--cluster-version "1.24.7-gke.900" \
	--release-channel "regular" \
	--machine-type "e2-standard-8" \
	--image-type "UBUNTU_CONTAINERD" \
	--disk-type "pd-balanced" \
	--disk-size "100" \
	--metadata disable-legacy-endpoints=true \
	--scopes "https://www.googleapis.com/auth/cloud-platform" \
	--max-pods-per-node "110" \
	--num-nodes "3" \
	--logging=SYSTEM,WORKLOAD \
	--monitoring=SYSTEM \
	--enable-ip-alias \
	--network "projects/$PROJECT_NAME/global/networks/default" \
	--subnetwork "projects/$PROJECT_NAME/regions/asia-south1/subnetworks/default" \
	--no-enable-intra-node-visibility \
	--default-max-pods-per-node "110" \
	--no-enable-master-authorized-networks \
	--addons HorizontalPodAutoscaling,HttpLoadBalancing,GcePersistentDiskCsiDriver \
	--enable-autoupgrade \
	--enable-autorepair \
	--max-surge-upgrade 1 \
	--max-unavailable-upgrade 0 \
	--enable-shielded-nodes
When the provisioning is complete, the kubeconfig contents are written to gke-config file in the current directory.
gcloud container clusters get-credentials cluster1 \
	--zone asia-south1-a \
	--project $PROJECT_NAME
You can now list the nodes and verify the access to the cluster.

Let’s create a cluster binding to associate the current user with the cluster-admin role.
kubectl create clusterrolebinding cluster-admin-binding \
	--clusterrole cluster-admin \
	--user $(gcloud config get-value account)
Step 2 - Registering GKE cluster with Teleport
Similar to other configurations, such as servers, Teleport expects an agent to run within the target cluster. This agent can be installed through a Helm chart by pointing it to the Teleport proxy server endpoint.

Before proceeding further, we need to get the token responsible for validating the agent. Run the below command to create the token based on the Kubernetes role. Make sure you log in to Teleport as a user with roles editor and access.

TOKEN=$(tctl nodes add --roles=kube --ttl=10000h --format=json | jq -r '.[0]')The next step is to add Teleport’s repo and update Helm, which provides us access to the Helm chart.
helm repo add teleport https://charts.releases.teleport.dev
helm repo update
The below environment variables contain key parameters needed by the Helm chart.
PROXY_ADDR=proxy.teleport-demo.in:443
CLUSTER=gke-cluster

helm install teleport-agent teleport/teleport-kube-agent \
  --set kubeClusterName=${CLUSTER?} \
  --set proxyAddr=${PROXY_ADDR?} \
  --set authToken=${TOKEN?} \
  --create-namespace \
  --namespace=teleport-agent \
  --version 11.2.3
Wait for a few minutes and check if the agent pod is up and running within the teleport-agent namespace.
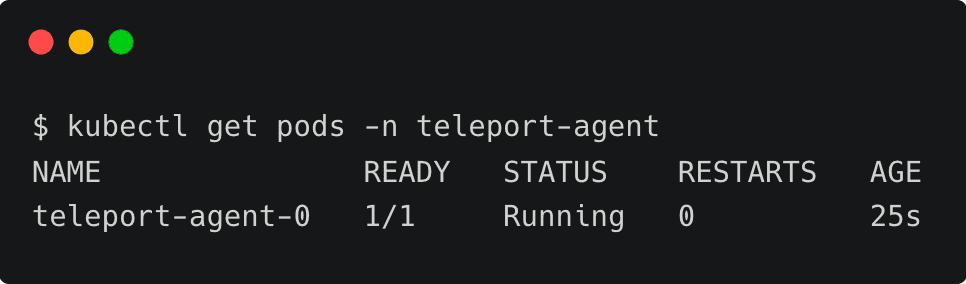
You can also verify the logs with the below command:
kubectl logs teleport-agent-0 -n teleport-agentStep 3 - Configuring Google Workspace as SSO provider for GKE cluster
Kubernetes uses an identity embedded within the kubeconfig file to access the cluster. We need to add that identity to Teleport’s kubernetes_users role for the user to assume the role.
First, let’s get the current user from the kubeconfig file.
kubectl config view -o jsonpath="{.contexts[?(@.name==\"$(kubectl config current-context)\")].context.user}"By default, GKE creates a user based on the format gke_PROJECTNAME_ZONE_CLUSTERNAME. Let’s tell Teleport that this user will assume the role of kubernetes_users by creating an RBAC definition in a file by name kube-access.yaml and applying it.
kind: role
metadata:
  name: kube-access
version: v5
spec:
  allow:
    kubernetes_labels:
      '*': '*'
    kubernetes_groups:
    - viewers
    kubernetes_users:
    - gke_janakiramm-sandbox_asia-south1-a_cluster1
  deny: {}
tctl create -f kube-access.yamlAfter this, we must update the ODIC connector created in the previous tutorial. This step ensures that users belonging to specific groups within the Google Workspace directory can gain access to the cluster.
Let’s retrieve the current connector definition with the below command:
tctl get oidc/google > google-sso.yamlThe definition will have everything except the client_secret, which is not populated due to security reasons. You can get the value of the client secret from Google Cloud Console’s service account or from the original OIDC connector YAML file.

Edit the file to add kube-access role to the claims and apply it back with the tctl command.

Notice how the admins group configured in Google Workspace is mapped to the Teleport roles.
  name: viewers
  apiGroup: rbac.authorization.k8s.io
roleRef:
  kind: ClusterRole
  name: view
  apiGroup: rbac.authorization.k8s.io
kubectl apply -f viewers-bind.yamlThis step essentially closes the loop by mapping Teleport roles with local Kubernetes cluster roles.
Step 4 - Accessing Kubernetes clusters through Google Workspace identity
It’s time to test the configuration by signing into Teleport as a Google Workspace user and then using the tsh CLI to list the registered clusters.
tsh --proxy=proxy.teleport-demo.in login --auth=googleThis opens up the browser window for entering the Google Workspace credentials. Once you login, the CLI confirms the identity.

Notice that the current user is [email protected]. Now, let’s list the registered Kubernetes clusters and log onto the GKE cluster, which is running in GCP.


tsh kube login gke-cluster
At this point, Teleport client has added another context into the original kubeconfig file. You can verify it by running the following command:
kubectl config view
Notice the current context pointing to proxy.teleport-demo.in-gke-cluster. You can continue to use the standard Kubernetes client CLI, kubectl, to access the cluster through Teleport’s proxy server transparently.
Let’s try to list all the pods running in the kube-system namespace.

Since the Kubernetes role has view permission, we are able to list the pods. To verify the policy, let’s try to create a namespace.
kubectl create ns test
This results in error due to the lack of permission to create resources.
Since the action violates the access policy defined by the RBAC, it is also visible in Teleport audit logs, and any kubectl execs are recorded.

The details clearly explain that a POST request has been made to the Kubernetes API server attempting to create the namespace, which was declined.

We can define fine-grained RBAC policies that map the users from the Google Workspace groups to Teleport users to Kubernetes roles. This gives ultimate control to cluster administrators and DevOps teams to allow or restrict access to Kubernetes resources.
In this tutorial, we have learned how to leverage Google Workspace as an SSO provider for Teleport to define access policies for Google Kubernetes Engine-based Kubernetes cluster.
Try using Teleport to connect your Google Workspace with your GKE cluster, by signing up for our 14-day Teleport Cloud trial.