
Teleport
SFTP with JetBrains IDE
- Version 17.x
- Version 16.x
- Version 15.x
- Version 14.x
- Older Versions
JetBrain's IDEs, like PyCharm, GoLand, and IntelliJ, allow browsing, copying, and editing files on a remote server using the SFTP protocol. You can integrate Teleport with your IDE so you can copy files to and from a remote machine without using a third-party client.
This guide explains how to use Teleport and a JetBrains IDE to access files with SFTP.
Prerequisites
-
A running Teleport cluster version 16.1.0 or above. If you want to get started with Teleport, sign up for a free trial or set up a demo environment.
-
The
tctladmin tool andtshclient tool.Visit Installation for instructions on downloading
tctlandtsh.
- JetBrains IDE like PyCharm, IntelliJ, GoLand etc. See Products for a full list of JetBrains IDEs.
- One or more Teleport SSH Service instances. If you have not yet done this, read the Server Access Getting Started Guide to learn how.
Step 1/3. First-time setup
Configure your local SSH client to access servers, assigning the --proxy flag to the address of your Teleport Proxy Service (e.g., mytenant.teleport.sh for Teleport Cloud users).
log in to your proxy:
tsh login --proxy proxy.foo.example.com --user alicegenerate the OpenSSH config for the proxy:
tsh config --proxy proxy.foo.example.com
Append the resulting configuration snippet into your SSH config file located in the path below:
$HOME/.ssh/config
%UserProfile%\.ssh\config
If using PowerShell on Windows to write your SSH config, note that normal shell redirection may write the file with the incorrect encoding. To ensure it's written properly, try the following:
tsh.exe config | out-file .ssh\config -encoding utf8 -append
You should be able to connect to the desired server using the following command, replacing user with the username you would like to assume on the server:
ssh user@[server name].[cluster name]
The SSH config you generated earlier instructs your SSH client to run tsh proxy ssh to access a server in your Teleport cluster.
However, running an ssh command against the Teleport Proxy Service at yourtenant.teleport.sh will result in an error.
Include the port number for OpenSSH servers, by default 22, or you can experience an error.
See the OpenSSH guide for more information.
Example connecting to a OpenSSH server:
ssh -p 22 user@[server name].[cluster name]
Step 2/3. Configure your JetBrains IDE
After opening your IDE go to Tools -> Deployment -> Browse Remote Host.
Then click the plus sign in the top-left corner to add a new server.
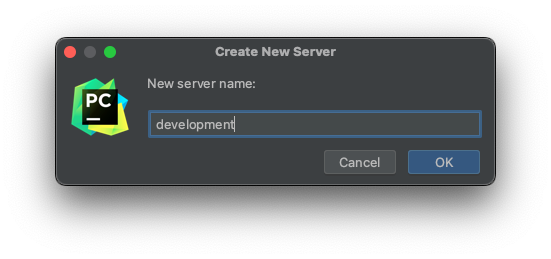
Enter a name for your new server.
Click the three dots next to SSH configuration as in the picture above.
Create a new configuration by clicking the plus sign on the top left and providing:
Host- name of the Teleport server.Port- the Teleport server's SSH port (3022by default or22for OpenSSH servers).Username- the system username.
As an Authentication type pick OpenSSH config and authentication agent.
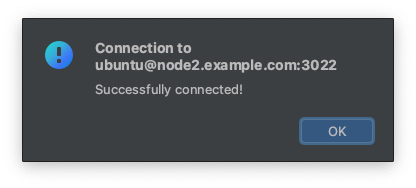
Next, you can click Test Connection.
Step 3/3. Browse a remote host
After closing the SSH configuration window, you should see Remote Host menu in your IDE.
Teleport's certificates expire fairly quickly, after which SSH attempts will fail with an error like the following:
[email protected]: Permission denied (publickey).
ERROR: exit status 255

kex_exchange_identification: Connection closed by remote host
When you see this error, re-run tsh login to refresh your local certificate.
Next steps
Using OpenSSH clients
This guide makes use of tsh config; refer to the
dedicated guide for additional information.