
Teleport
Database Access with Cloud SQL for MySQL
- Version 17.x
- Version 16.x
- Version 15.x
- Version 14.x
- Older Versions
Teleport can provide secure access to MySQL on Google Cloud SQL via the Teleport Database Service. This allows for fine-grained access control through Teleport's RBAC.
In this guide, you will:
- Configure your MySQL on Google Cloud SQL database with a service account.
- Add the database to your Teleport cluster.
- Connect to the database via Teleport
How it works
The Teleport Database Service uses IAM authentication to communicate with MySQL. When a user connects to the database via Teleport, the Teleport Database Service obtains Google Cloud credentials and authenticates to Google Cloud as an IAM principal with permissions to manage the database.
Prerequisites
-
A running Teleport cluster version 16.1.0 or above. If you want to get started with Teleport, sign up for a free trial or set up a demo environment.
-
The
tctladmin tool andtshclient tool.Visit Installation for instructions on downloading
tctlandtsh.
- Google Cloud account
- A host, e.g., a Compute Engine instance, where you will run the Teleport Database Service
- To check that you can connect to your Teleport cluster, sign in with
tsh login, then verify that you can runtctlcommands using your current credentials.tctlis supported on macOS and Linux machines. For example:If you can connect to the cluster and run thetsh login --proxy=teleport.example.com --user=[email protected]tctl statusCluster teleport.example.com
Version 16.1.0
CA pin sha256:abdc1245efgh5678abdc1245efgh5678abdc1245efgh5678abdc1245efgh5678
tctl statuscommand, you can use your current credentials to run subsequenttctlcommands from your workstation. If you host your own Teleport cluster, you can also runtctlcommands on the computer that hosts the Teleport Auth Service for full permissions.
Step 1/9. Create a service account for the Teleport Database Service
A GCP service account will be used by the Teleport Database Service to create ephemeral access tokens for other GCP service accounts when it's acting on the behalf of authorized Teleport users.
Create a service account
Go to the Service Accounts page and create a service account:
(Optional) Grant permissions
The Teleport Database Service needs permissions to automatically download your Cloud SQL instance's root CA certificate and to general an ephemeral client certificate.
If you intend to download the CA certificate manually and your Cloud SQL instance SSL mode is not "require trusted client certificates", then you can skip this step.
Otherwise, in the second step of the service account creation dialogue, assign the service account the pre-defined GCP IAM role "Cloud SQL Client", then click "Done".
The "Cloud SQL Client" role has the following permissions:
# Used to auto-download the instance's root CA certificate and check SSL mode.
cloudsql.instances.get
# Used to generate an ephemeral client certificate
cloudsql.instances.connect
If you only need one of these permissions, you can define and assign a custom IAM role to the service account instead.
(Optional) Grant permission to check user type
When users connect to the Cloud SQL database via Teleport, they must specify
the name of the service account that they intend to use as a database user.
They can use either the short name or the full email of the service account,
e.g. if the account email is [email protected]
then they can use "cloudsql-user" instead of the full email.
However, if they use the short name of the service account, then Teleport will need permissions to determine the kind of authentication that it should use: IAM auth or legacy one-time password auth. If it does not have this permission, then it will attempt to use a one-time password by default. The following permission is required to support IAM auth with the short name of a service account:
# Used to check database user type.
cloudsql.users.get
The pre-defined "Cloud SQL Viewer" role has this permission, but also has other permissions that are not needed. Define and bind a custom role to the service account to follow the principal of least privilege.
Support for legacy one-time password authentication will be deprecated. If you are following this guide and have already set up Teleport prior to the introduction of support for IAM database user authentication, then you should configure your database users to use IAM auth as described in this guide.
Step 2/9. Create a service account for a database user
Teleport uses service accounts to connect to Cloud SQL databases.
Create a service account
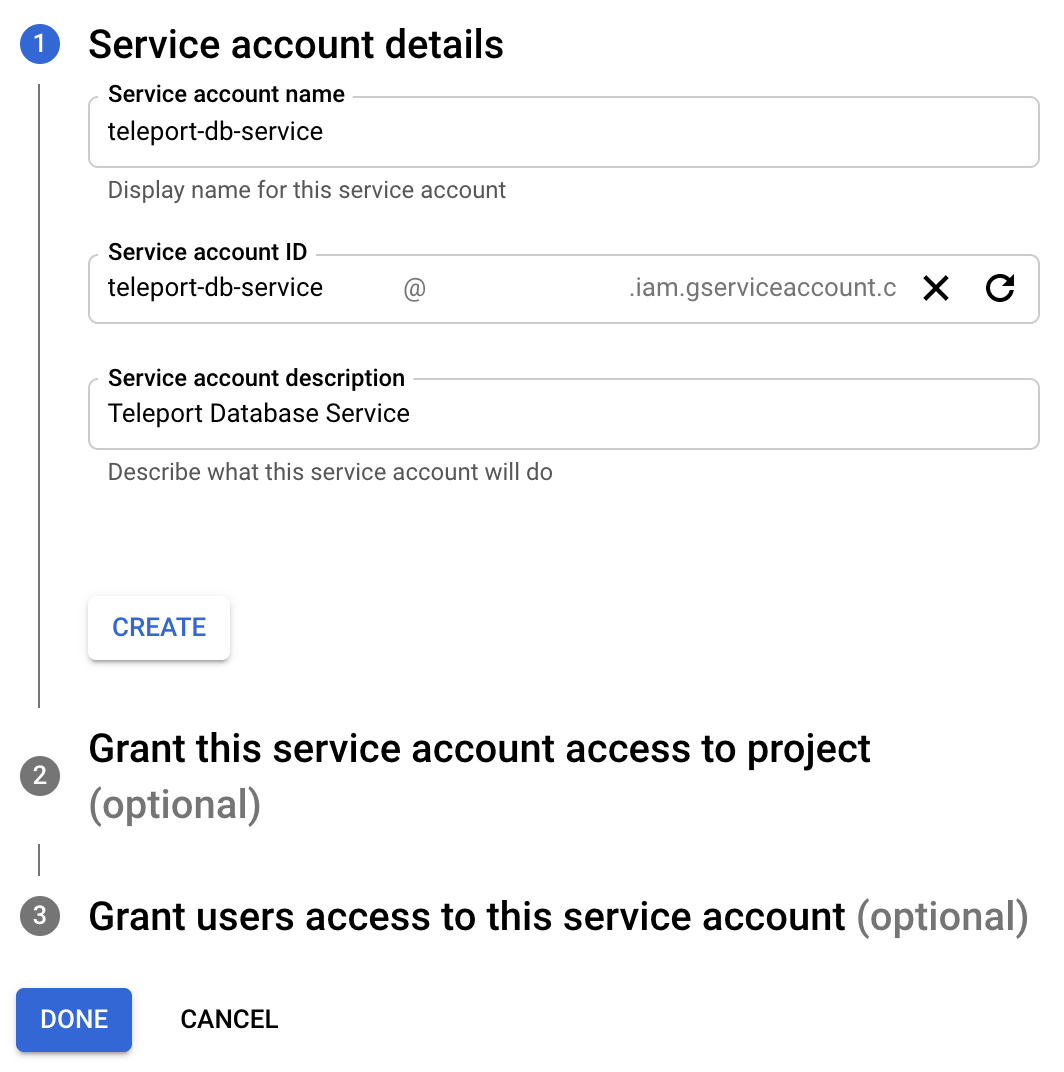
Go to the IAM & Admin Service Accounts page and create a new service account named "cloudsql-user":

Click "Create and continue".
Grant permissions
On the second step grant this service account the "Cloud SQL Instance User" role which will allow it to connect to Cloud SQL instances using an IAM token for authentication:
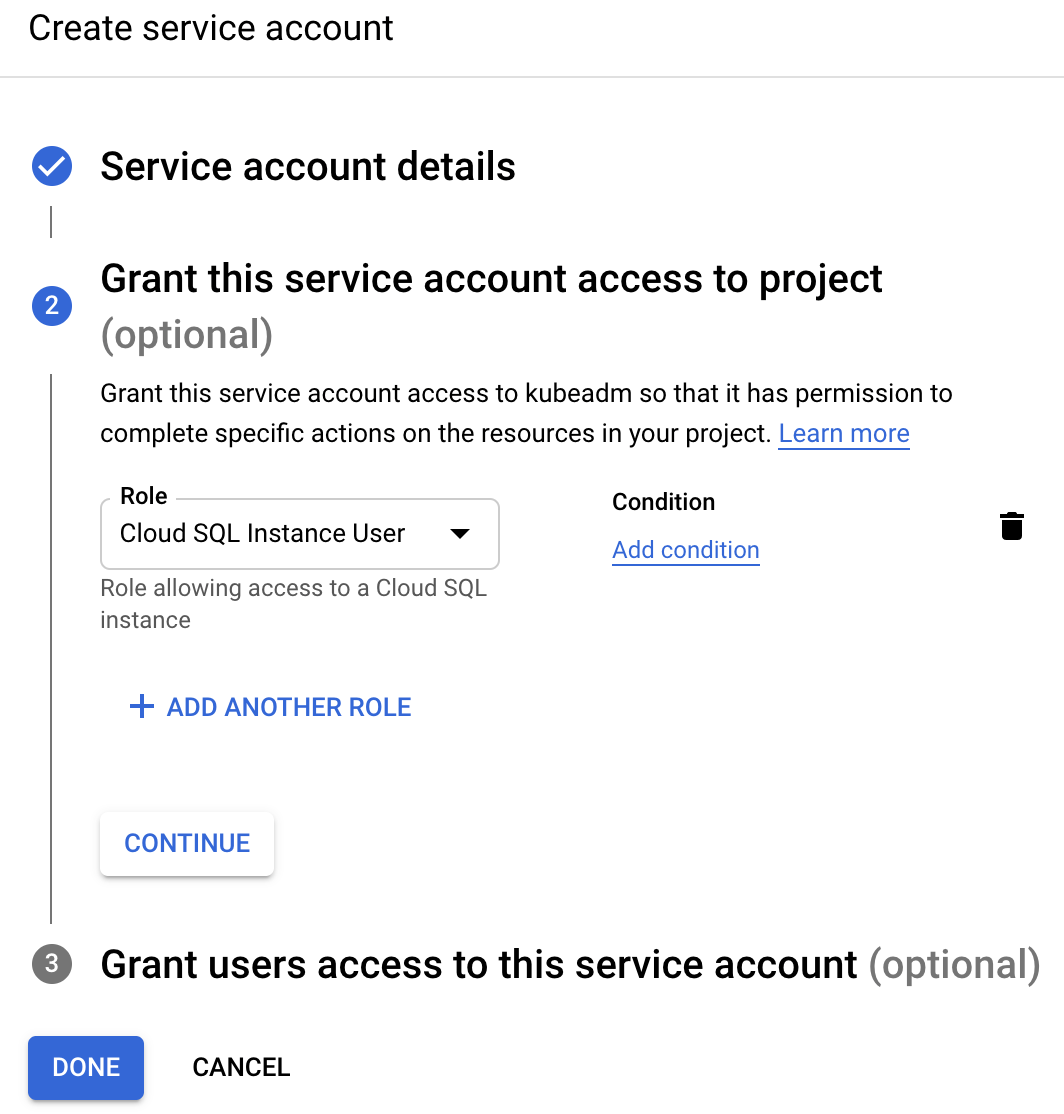
Click "Done".
Grant access to the service account
The Teleport Database Service must be able to impersonate this service account. Navigate to the "cloudsql-user" service account overview page and select the "permissions" tab:

Click "Grant Access" and add the "teleport-db-service" principal ID. Select the "Service Account Token Creator" role and save the change:

The "Service Account Token Creator" IAM role includes more permissions than the Teleport Database Service needs. To further restrict the service account, you can create a role that includes only the following permission:
# Used to generate IAM auth tokens when connecting to a database instance.
iam.serviceAccounts.getAccessToken
Step 3/9. Configure your Cloud SQL database
Enable Cloud SQL IAM authentication
Teleport uses IAM authentication with Cloud SQL MySQL instances.
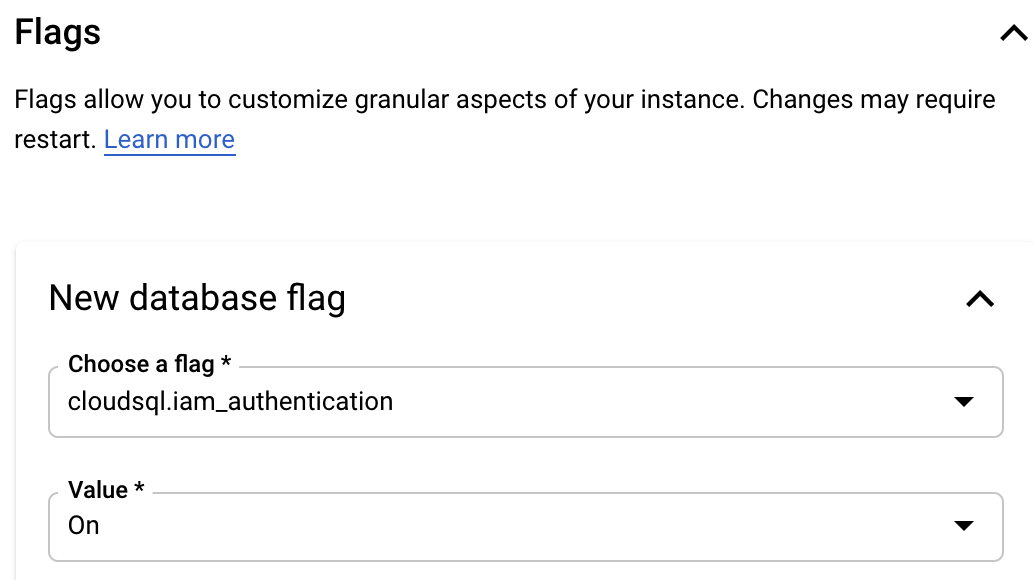
If you're creating
a new MySQL instance, make sure to add the cloudsql.iam_authentication
database flag under "Customize your instance / Flags" section:
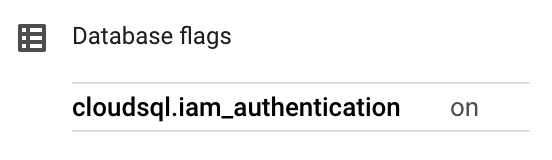
To check whether IAM authentication is enabled for an existing Cloud SQL instance, look for the flag on the Configuration panel on the instance's Overview page:
If it isn't enabled, you can add this flag using the "Edit configuration" dialog at the bottom of the Configuration panel. Changing this setting may require a database instance reboot.
(Optional) SSL mode "require trusted client certificates"
When using Cloud SQL MySQL with "require trusted client certificates" enabled, Teleport connects to the database's Cloud SQL Proxy port 3307 instead of the default 3306 as the default Cloud SQL MySQL listener does not trust generated ephemeral certificates. For this reason, you should make sure to allow port 3307 when using "require trusted client certificates".
The "require trusted client certificates" SSL mode only forces the client (Teleport) to provide a trusted client certificate. Teleport will always connect to the database over encrypted TLS regardless of the instance's SSL mode setting.
Create a database user
Now go back to the Users page of your Cloud SQL instance and add a new user account. In the sidebar, choose "Cloud IAM" authentication type and add the "cloudsql-user" service account you created in the second step:

Press "Add". See Creating and managing IAM users in Google Cloud documentation for more info.
Step 4/9. Install Teleport
Install Teleport on your Linux server:
-
Assign edition to one of the following, depending on your Teleport edition:
Edition Value Teleport Enterprise Cloud cloudTeleport Enterprise (Self-Hosted) enterpriseTeleport Community Edition oss -
Get the version of Teleport to install. If you have automatic agent updates enabled in your cluster, query the latest Teleport version that is compatible with the updater:
TELEPORT_DOMAIN=example.teleport.comTELEPORT_VERSION="$(curl https://$TELEPORT_DOMAIN/v1/webapi/automaticupgrades/channel/default/version | sed 's/v//')"Otherwise, get the version of your Teleport cluster:
TELEPORT_DOMAIN=example.teleport.comTELEPORT_VERSION="$(curl https://$TELEPORT_DOMAIN/v1/webapi/ping | jq -r '.server_version')" -
Install Teleport on your Linux server:
curl https://goteleport.com/static/install.sh | bash -s ${TELEPORT_VERSION} editionThe installation script detects the package manager on your Linux server and uses it to install Teleport binaries. To customize your installation, learn about the Teleport package repositories in the installation guide.
Step 5/9. Configure the Teleport Database Service
Create a join token
The Database Service requires a valid join token to join your Teleport cluster.
Run the following tctl command and save the token output in /tmp/token
on the server that will run the Database Service:
tctl tokens add --type=db --format=textabcd123-insecure-do-not-use-this
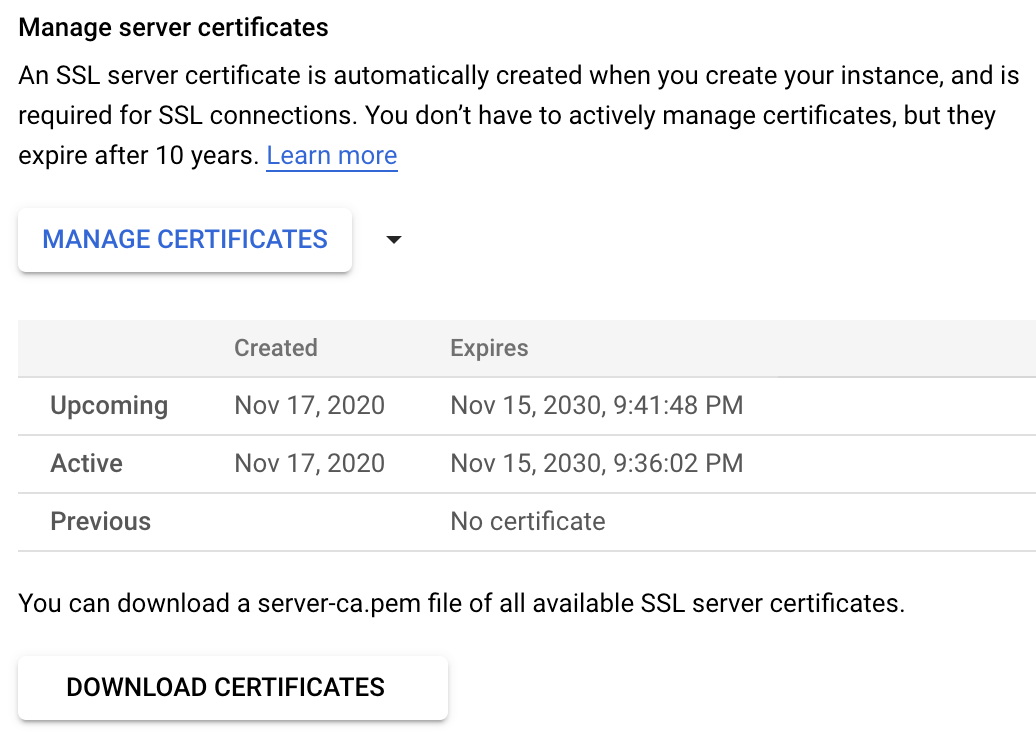
(Optional) Download the Cloud SQL CA certificate
The Cloud SQL instance's root CA certificate is required so that the Teleport Database Service can validate the certificate presented by the database instance.
The Teleport Database Service can automatically download the instance's root CA certificate if it is granted the "cloudsql.instances.get" permission.
Alternatively, you can download the instance's CA certificate file from the "Connections" tab under the "Security" section:
Generate Teleport config
Provide the following information and then generate a configuration file for the Teleport Database Service:
- example.teleport.sh:443 The host and port of your Teleport Proxy Service or Enterprise Cloud site
- public-ip The Cloud SQL instance public IP address. The address can be found on the "Connect to this instance" panel on the "Overview" page in the Cloud SQL instance's dashboard.
- project-id The GCP project ID. You can normally see it in the organization view at the top of the GCP dashboard.
- instance-id The name of your Cloud SQL instance.
sudo teleport db configure create \ -o file \ --name=cloudsql \ --protocol=mysql \ --labels=env=dev \ --token=/tmp/token \ --proxy=example.teleport.sh:443 \ --uri=public-ip:3306 \ --gcp-project-id=project-id \ --gcp-instance-id=instance-id
Provide the following information and then generate a configuration file for the Teleport Database Service:
- example.teleport.sh:443 The host and port of your Teleport Proxy Service or Enterprise Cloud site
- public-ip The Cloud SQL instance public IP address. The address can be found on the "Connect to this instance" panel on the "Overview" page in the Cloud SQL instance's dashboard.
- project-id The GCP project ID. You can normally see it in the organization view at the top of the GCP dashboard.
- instance-id The name of your Cloud SQL instance.
- /path/to/cloudsql/instance/server-ca.pem The path to the Cloud SQL instance root CA certificate
sudo teleport db configure create \ -o file \ --name=cloudsql \ --protocol=mysql \ --labels=env=dev \ --token=/tmp/token \ --proxy=example.teleport.sh:443 \ --uri=public-ip:3306 \ --gcp-project-id=project-id \ --gcp-instance-id=instance-id \ --ca-cert-file=/path/to/cloudsql/instance/server-ca.pem
This command will generate a Teleport Database Service configuration file and
save it to /etc/teleport.yaml.
Step 6/9. Configure GCP credentials
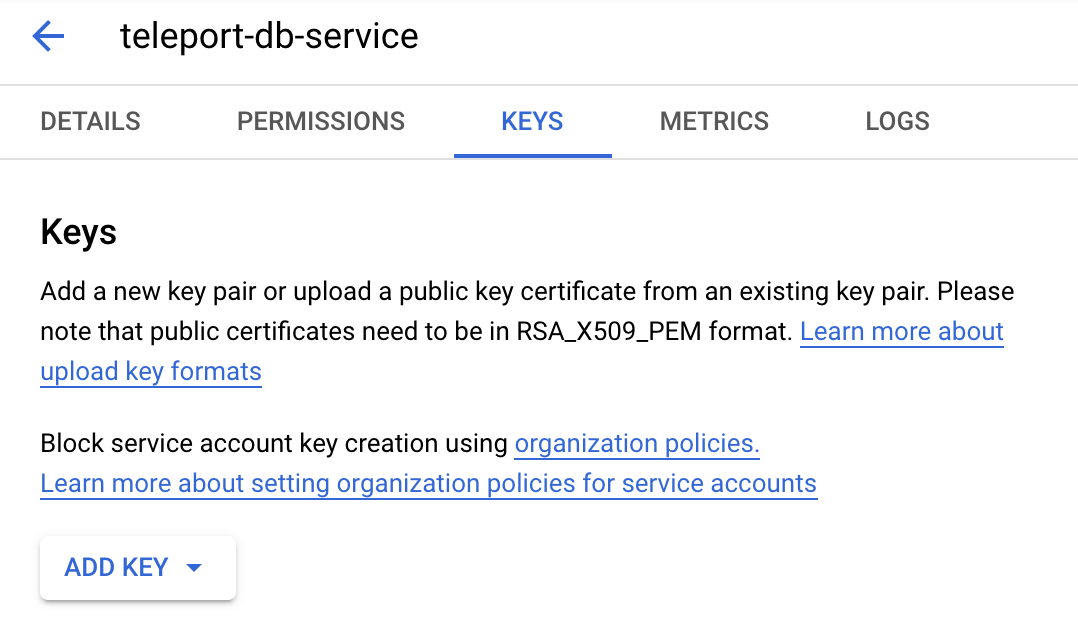
The Teleport Database Service must have credentials for the "teleport-db-service" GCP service account.
If the Teleport Database Service is hosted on a GCE instance, you can change the attached service account. For non-GCE deployments of Teleport, we recommend using workload identity.
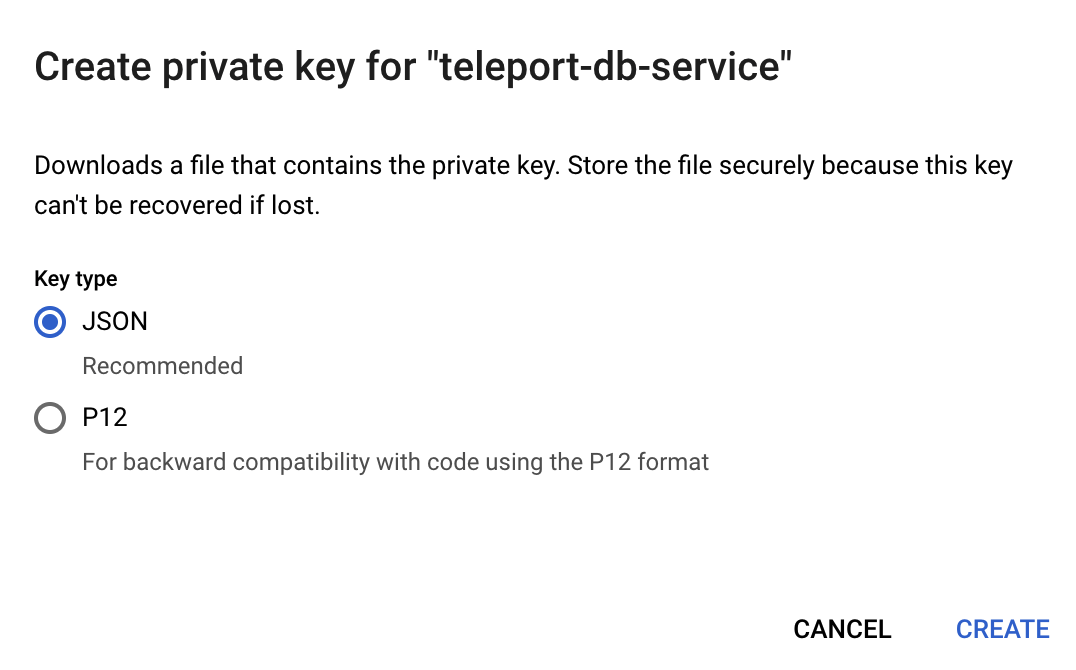
Alternatively, go to that service account's Keys tab and create a new key:
Make sure to choose JSON format:
Save the file. Set the GOOGLE_APPLICATION_CREDENTIALS environment variable to
point to the JSON credentials file you downloaded earlier. For example, if you
use systemd to start teleport, then you should edit the service's
EnvironmentFile to include the env var:
echo 'GOOGLE_APPLICATION_CREDENTIALS=/path/to/credentials.json' | sudo tee -a /etc/default/teleport
A service account key can be a security risk - we only describe using a key in this guide for simplicity. We do not recommend using service account keys in production. See authentication in the Google Cloud documentation for more information about service account authentication methods.
Step 7/9. Start the Teleport Database Service
Configure the Teleport Database Service to start automatically when the host boots up by creating a systemd service for it. The instructions depend on how you installed the Teleport Database Service.
On the host where you will run the Teleport Database Service, enable and start Teleport:
sudo systemctl enable teleportsudo systemctl start teleport
On the host where you will run the Teleport Database Service, create a systemd service configuration for Teleport, enable the Teleport service, and start Teleport:
sudo teleport install systemd -o /etc/systemd/system/teleport.servicesudo systemctl enable teleportsudo systemctl start teleport
You can check the status of the Teleport Database Service with systemctl status teleport
and view its logs with journalctl -fu teleport.
Step 8/9. Create a Teleport user
To modify an existing user to provide access to the Database Service, see Database Access Access Controls
Create a local Teleport user with the built-in access role:
tctl users add \ --roles=access \ --db-users="*" \ --db-names="*" \ alice
Create a local Teleport user with the built-in access and requester roles:
tctl users add \ --roles=access,requester \ --db-users="*" \ --db-names="*" \ alice
| Flag | Description |
|---|---|
--roles | List of roles to assign to the user. The builtin access role allows them to connect to any database server registered with Teleport. |
--db-users | List of database usernames the user will be allowed to use when connecting to the databases. A wildcard allows any user. |
--db-names | List of logical databases (aka schemas) the user will be allowed to connect to within a database server. A wildcard allows any database. |
Database names are only enforced for PostgreSQL, MongoDB, and Cloud Spanner databases.
For more detailed information about database access controls and how to restrict access see RBAC documentation.
Step 9/9. Connect
Once the Teleport Database Service has joined the cluster, log in to see the available databases:
tsh login --proxy=teleport.example.com --user=alicetsh db lsName Description Labels
-------- ------------------- --------
cloudsql GCP Cloud SQL MySQL env=dev
tsh login --proxy=mytenant.teleport.sh --user=alicetsh db lsName Description Labels
-------- ------------------- --------
cloudsql GCP Cloud SQL MySQL env=dev
You will only be able to see databases that your Teleport role has access to. See our RBAC guide for more details.
When connecting to the database, use either the database user name or the service account's Email ID. Both the user name and the service account's Email ID are shown on the Users page of your Cloud SQL instance. Retrieve credentials for the "cloudsql" example database and connect to it:
Connect with the short name of the database user service account:
tsh db connect --db-user=cloudsql-user --db-name=mysql cloudsqlOr connect the full email ID:
tsh db connect --db-user=cloudsql-user@project-id.iam.gserviceaccount.com --db-name=mysql cloudsql
To log out of the database and remove credentials:
Remove credentials for a particular database instance:
tsh db logout cloudsqlOr remove credentials for all databases:
tsh db logout
Troubleshooting
Error when connecting to a replica instance
You may encounter the following error when connecting to a replica instance:
tsh db connect --db-user=cloudsql-user --db-name=test cloudsql-replicaERROR 1105 (HY000): Could not update Cloud SQL user "<username>" password:
  The requested operation is not valid for a replica instance.
...
Connecting as built-in database users with passwords are not supported for Cloud SQL replica instances. Please follow this guide to use IAM authentication instead.
Could not find default credentials
This error can come from either your client application or Teleport.
For a client application, ensure that you disable GCP credential loading. Your client should not attempt to load credentials because GCP credentials will be provided by the Teleport Database Service.
If you see the credentials error message in the Teleport Database Service logs (at DEBUG log level), then the Teleport Database Service does not have GCP credentials configured correctly.
If you are using a service account key, then ensure that the environment
variable
GOOGLE_APPLICATION_CREDENTIALS=/path/to/credentials.json is set and restart
your Teleport Database Service to ensure that the env var is available to
teleport.
For example, if your Teleport Database Service runs as a systemd service:
echo 'GOOGLE_APPLICATION_CREDENTIALS=/path/to/credentials.json' | sudo tee -a /etc/default/teleportsudo systemctl restart teleport
See authentication in the Google Cloud documentation for more information about service account authentication methods.
Next steps
- Learn how to restrict access to certain users and databases.
- View the High Availability (HA) guide.
- Take a look at the YAML configuration reference.
- See the full CLI reference.
- Learn more about authenticating as a service account in Google Cloud.