
Teleport
Database Access with Azure PostgreSQL and MySQL
- Version 17.x
- Version 16.x
- Version 15.x
- Version 14.x
- Older Versions
Teleport can provide secure access to Azure PostgreSQL or MySQL via the Teleport Database Service. This allows for fine-grained access control through Teleport's RBAC.
In this guide, you will:
- Configure your Azure PostgreSQL or MySQL database with Microsoft Entra ID-based authentication.
- Add the database to your Teleport cluster.
- Connect to the database via Teleport
Database auto-discovery for Azure PostgreSQL/MySQL flexible servers is available starting from
Teleport 12.0.
How it works
The Teleport Database Service proxies traffic between Teleport users and Azure PostgreSQL and MySQL. When a user connects to the database via Teleport, the Database Service obtains an access token from Microsoft Entra ID (formerly Azure AD) and authenticates to Azure as a principal with permissions to manage the database.
Prerequisites
-
A running Teleport cluster version 16.1.0 or above. If you want to get started with Teleport, sign up for a free trial or set up a demo environment.
-
The
tctladmin tool andtshclient tool.Visit Installation for instructions on downloading
tctlandtsh.
- Deployed Azure Database for PostgreSQL or MySQL server.
- Azure Active Directory administrative privileges.
- A host, e.g., an Azure VM instance, where you will run the Teleport Database Service.
- To check that you can connect to your Teleport cluster, sign in with
tsh login, then verify that you can runtctlcommands using your current credentials.tctlis supported on macOS and Linux machines. For example:If you can connect to the cluster and run thetsh login --proxy=teleport.example.com --user=[email protected]tctl statusCluster teleport.example.com
Version 16.1.0
CA pin sha256:abdc1245efgh5678abdc1245efgh5678abdc1245efgh5678abdc1245efgh5678
tctl statuscommand, you can use your current credentials to run subsequenttctlcommands from your workstation. If you host your own Teleport cluster, you can also runtctlcommands on the computer that hosts the Teleport Auth Service for full permissions.
Step 1/5. Install the Teleport Database Service
The Database Service requires a valid join token to join your Teleport cluster.
Run the following tctl command and save the token output in /tmp/token
on the server that will run the Database Service:
tctl tokens add --type=db --format=textabcd123-insecure-do-not-use-this
Install Teleport on the host where you will run the Teleport Database Service:
Install Teleport on your Linux server:
-
Assign edition to one of the following, depending on your Teleport edition:
Edition Value Teleport Enterprise Cloud cloudTeleport Enterprise (Self-Hosted) enterpriseTeleport Community Edition oss -
Get the version of Teleport to install. If you have automatic agent updates enabled in your cluster, query the latest Teleport version that is compatible with the updater:
TELEPORT_DOMAIN=example.teleport.comTELEPORT_VERSION="$(curl https://$TELEPORT_DOMAIN/v1/webapi/automaticupgrades/channel/default/version | sed 's/v//')"Otherwise, get the version of your Teleport cluster:
TELEPORT_DOMAIN=example.teleport.comTELEPORT_VERSION="$(curl https://$TELEPORT_DOMAIN/v1/webapi/ping | jq -r '.server_version')" -
Install Teleport on your Linux server:
curl https://goteleport.com/static/install.sh | bash -s ${TELEPORT_VERSION} editionThe installation script detects the package manager on your Linux server and uses it to install Teleport binaries. To customize your installation, learn about the Teleport package repositories in the installation guide.
Create the Database Service configuration.
-
Specify the region for your database(s) in
--azure-postgres-discovery. -
Replace the
--proxyvalue with your Teleport proxy address or Teleport cloud URI (e.g.mytenant.teleport.sh:443):sudo teleport db configure create \ -o file \ --proxy=teleport.example.com:443 \ --token=/tmp/token \ --azure-postgres-discovery=eastus
-
Specify the region for your database(s) in
--azure-mysql-discovery. -
Replace the
--proxyvalue with your Teleport proxy address or Teleport cloud URI (e.g.mytenant.teleport.sh:443):sudo teleport db configure create \ -o file \ --proxy=teleport.example.com:443 \ --token=/tmp/token \ --azure-mysql-discovery=eastus
Run the following command on your Database Service host:
sudo teleport db configure create \ -o file \ --proxy=teleport.example.com:443 \ --token=/tmp/token \ --azure-mysql-discovery=eastus \ --azure-postgres-discovery=eastus
This will create two types entities in teleport.yaml, one for each database
type. This is useful if you want different regions, tags, or labels for each
database type.
Alternatively, you can edit teleport.yaml to include both database types in a
single entry:
db_service:
  azure:
  - types: ["mysql", "postgres"]
  ...
This command will generate a Database Service configuration with Azure MySQL/Postgres
database auto-discovery enabled in the eastus region and place it at the
/etc/teleport.yaml location.
Create a Teleport role
On your workstation logged in to your Teleport cluster with tsh, define a new
role to provide access to your Azure database. Create a file called azure-database-role.yaml with the following content:
version: v7
kind: role
metadata:
  name: azure-database-access
spec:
  allow:
    db_labels:
      'engine':
        - "Microsoft.DBforMySQL/servers"
        - "Microsoft.DBforMySQL/flexibleServers"
        - "Microsoft.DBforPostgreSQL/servers"
        - "Microsoft.DBforPostgreSQL/flexibleServers"
    db_names:
    - '*'
    db_users:
    - teleport
| Flag | Description |
|---|---|
--db-users | List of database usernames the user will be allowed to use when connecting to the databases. A wildcard allows any user. |
--db-names | List of logical databases (aka schemas) the user will be allowed to connect to within a database server. A wildcard allows any database. |
--db-labels | List of labels assigned to the database the user will be able to access. A wildcard entry allows any database. |
Save this file and apply it to your Teleport cluster:
tctl create -f azure-database-role.yamlrole 'azure-database-role.yaml' has been created
Assign the azure-database-access role to your Teleport user by running the appropriate
commands for your authentication provider:
-
Retrieve your local user's roles as a comma-separated list:
ROLES=$(tsh status -f json | jq -r '.active.roles | join(",")') -
Edit your local user to add the new role:
tctl users update $(tsh status -f json | jq -r '.active.username') \ --set-roles "${ROLES?},azure-database-access" -
Sign out of the Teleport cluster and sign in again to assume the new role.
-
Retrieve your
githubauthentication connector:tctl get github/github --with-secrets > github.yamlNote that the
--with-secretsflag adds the value ofspec.signing_key_pair.private_keyto thegithub.yamlfile. Because this key contains a sensitive value, you should remove the github.yaml file immediately after updating the resource. -
Edit
github.yaml, addingazure-database-accessto theteams_to_rolessection.The team you should map to this role depends on how you have designed your organization's role-based access controls (RBAC). However, the team must include your user account and should be the smallest team possible within your organization.
Here is an example:
teams_to_roles: - organization: octocats team: admins roles: - access + - azure-database-access -
Apply your changes:
tctl create -f github.yaml -
Sign out of the Teleport cluster and sign in again to assume the new role.
-
Retrieve your
samlconfiguration resource:tctl get --with-secrets saml/mysaml > saml.yamlNote that the
--with-secretsflag adds the value ofspec.signing_key_pair.private_keyto thesaml.yamlfile. Because this key contains a sensitive value, you should remove the saml.yaml file immediately after updating the resource. -
Edit
saml.yaml, addingazure-database-accessto theattributes_to_rolessection.The attribute you should map to this role depends on how you have designed your organization's role-based access controls (RBAC). However, the group must include your user account and should be the smallest group possible within your organization.
Here is an example:
attributes_to_roles: - name: "groups" value: "my-group" roles: - access + - azure-database-access -
Apply your changes:
tctl create -f saml.yaml -
Sign out of the Teleport cluster and sign in again to assume the new role.
-
Retrieve your
oidcconfiguration resource:tctl get oidc/myoidc --with-secrets > oidc.yamlNote that the
--with-secretsflag adds the value ofspec.signing_key_pair.private_keyto theoidc.yamlfile. Because this key contains a sensitive value, you should remove the oidc.yaml file immediately after updating the resource. -
Edit
oidc.yaml, addingazure-database-accessto theclaims_to_rolessection.The claim you should map to this role depends on how you have designed your organization's role-based access controls (RBAC). However, the group must include your user account and should be the smallest group possible within your organization.
Here is an example:
claims_to_roles: - name: "groups" value: "my-group" roles: - access + - azure-database-access -
Apply your changes:
tctl create -f oidc.yaml -
Sign out of the Teleport cluster and sign in again to assume the new role.
Step 2/5. Configure Azure service principal
To authenticate with PostgreSQL or MySQL databases, Teleport Database Service needs to obtain access tokens from Azure AD.
There are a couple of ways for the Teleport Database Service to access Azure resources:
- The Database Service can run on an Azure VM with attached managed identity. This is the recommended way of deploying the Database Service in production since it eliminates the need to manage Azure credentials.
- The Database Service can be registered as an Azure AD application (via AD's "App registrations") and configured with its credentials. This is only recommended for development and testing purposes since it requires Azure credentials to be present in the Database Service's environment.
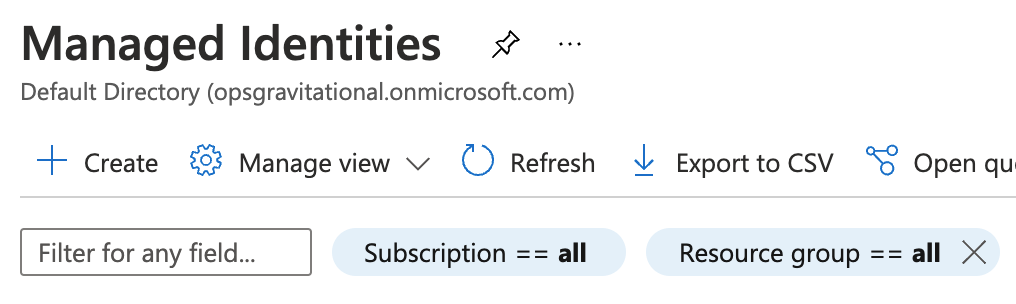
Go to the Managed Identities page in your Azure portal and click Create to create a new user-assigned managed identity:
Pick a name and resource group for the new identity and create it:
Take note of the created identity's Client ID:
Next, navigate to the Azure VM that will run your Database Service instance and add the identity you've just created to it:

Attach this identity to all Azure VMs that will be running the Database Service.
Registering the Database Service as Azure AD application is suitable for test and development scenarios, or if your Database Service does not run on an Azure VM. For production scenarios prefer to use the managed identity approach.
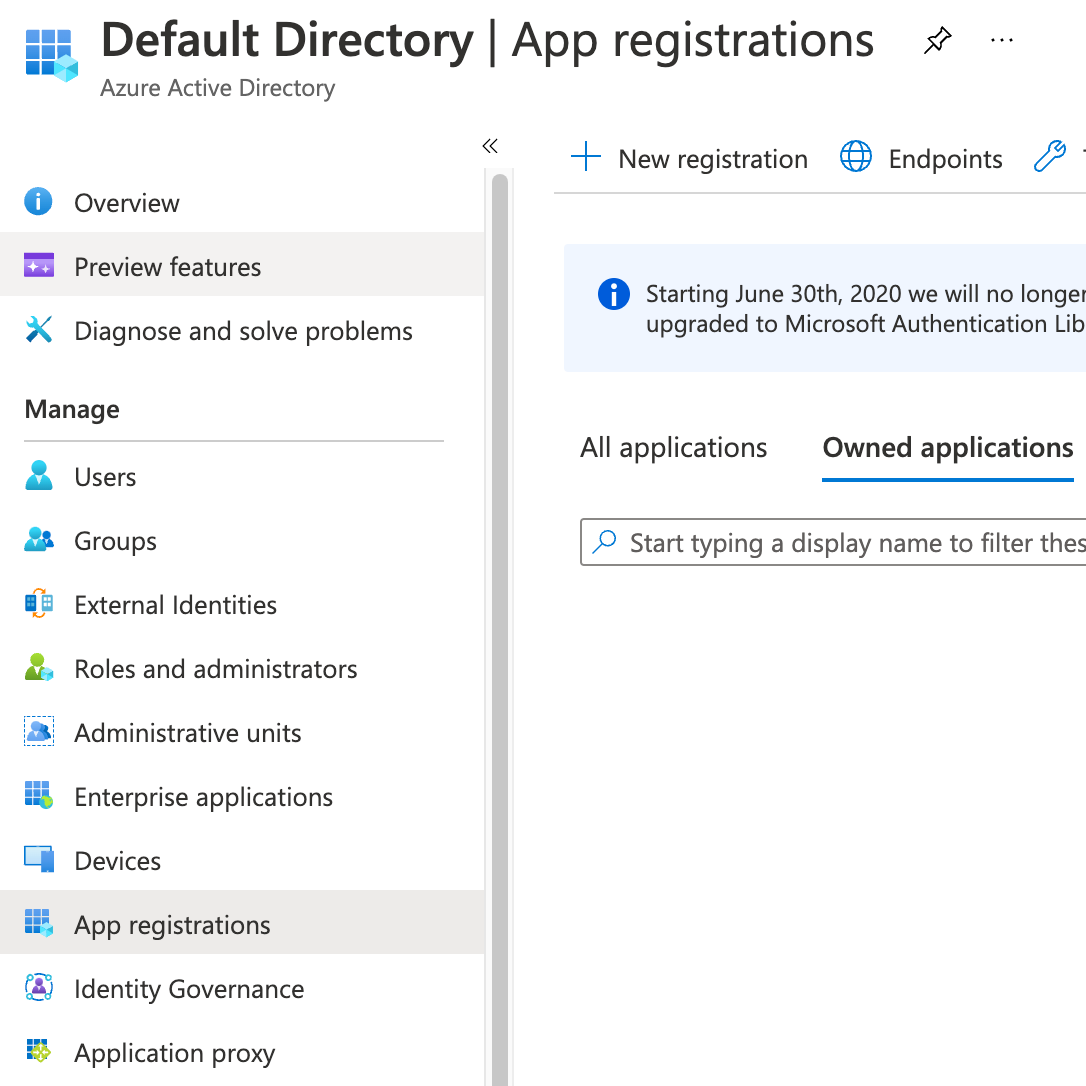
Go to the App registrations page of your Azure Active Directory and click on New registration:
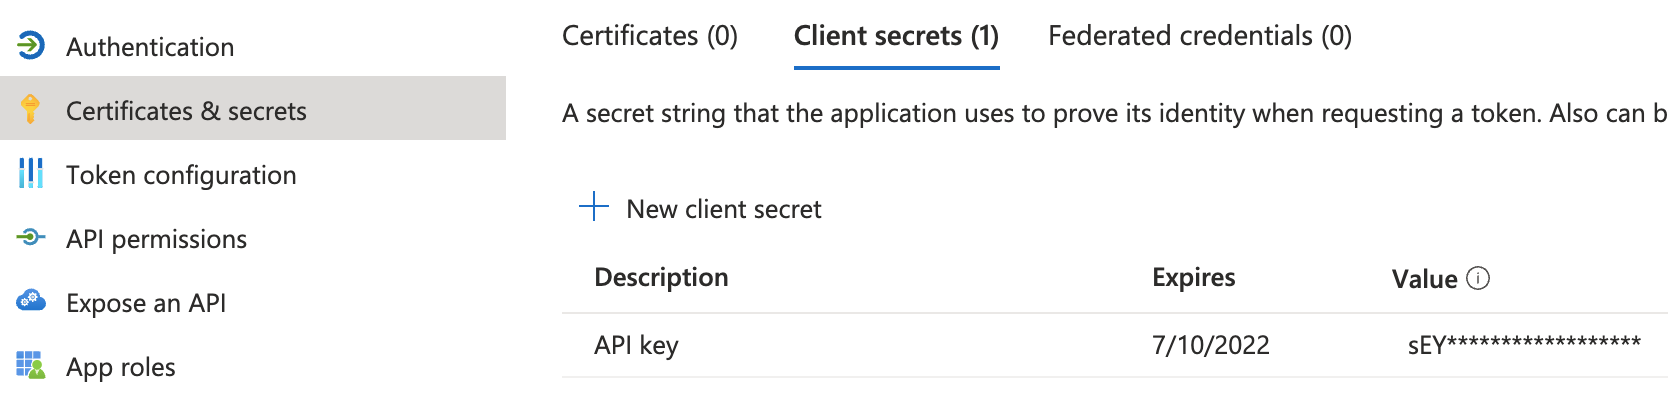
Pick a name (e.g. DatabaseService) and register a new application. Once the app has been created, take note of its Application (client) ID and click on Add a certificate or secret:
Create a new client secret that the Database Service agent will use to authenticate with the Azure API:
The Teleport Database Service uses Azure SDK's default credential provider chain to look for credentials. Refer to Azure SDK Authorization to pick a method suitable for your use-case. For example, to use environment-based authentication with a client secret, the Database Service should have the following environment variables set:
export AZURE_TENANT_ID=export AZURE_CLIENT_ID=export AZURE_CLIENT_SECRET=
Step 3/5. Configure IAM permissions for Teleport
Create a custom role
Teleport needs Azure IAM permissions to discover and register MySQL and PostgreSQL databases. Create a role with assignable scope(s) that include all databases that Teleport should discover. For example:
{
    "properties": {
        "roleName": "TeleportDiscovery",
        "description": "Allows Teleport to discover MySQL and PostgreSQL databases",
        "assignableScopes": [
            "/subscriptions/11111111-2222-3333-4444-555555555555"
        ],
        "permissions": [
            {
                "actions": [
                    "Microsoft.DBforMySQL/servers/read",
                    "Microsoft.DBforPostgreSQL/servers/read",
                    "Microsoft.DBforMySQL/flexibleServers/read",
                    "Microsoft.DBforPostgreSQL/flexibleServers/read"
                ],
                "notActions": [],
                "dataActions": [],
                "notDataActions": []
            }
        ]
    }
}
This role definition allows Teleport to discover MySQL and PostgreSQL databases, but Teleport only needs permissions for the database types you have. The assignable scopes include a subscription, so the role can be assigned at any resource scope within that subscription, or assigned using the subscription scope itself.
Custom roles, unlike Azure built-in roles, can not have a root assignable scope. The highest assignable scope that can be used in a custom role is subscription scope. Using a management group scope is currently an Azure preview feature, and only allows for a single management group in the "assignableScopes" of a role definition. See Azure RBAC custom roles for more information.
Go to the Subscriptions page and select a subscription.
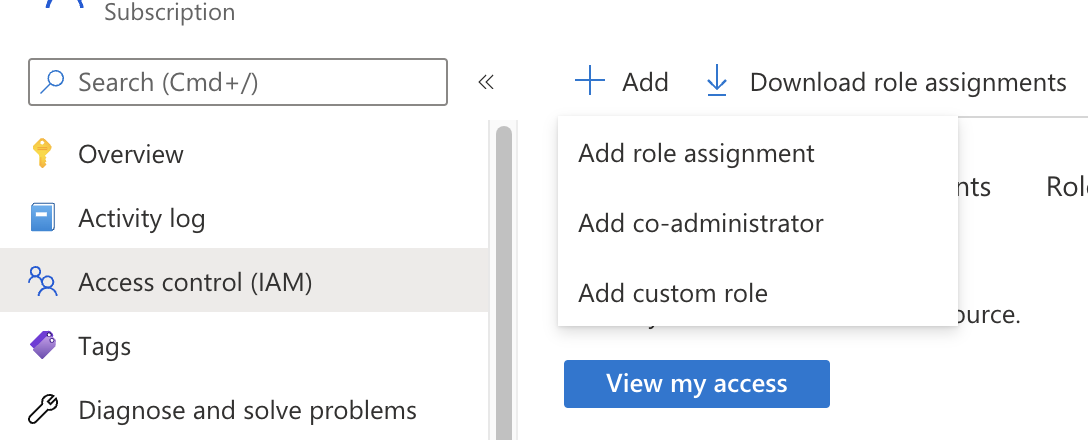
Click on Access control (IAM) in the subscription and select Add > Add custom role:
In the custom role creation page, click the JSON tab and click Edit, then paste the JSON example and replace the subscription in "assignableScopes" with your own subscription id:
Create a role assignment for the Teleport Database Service principal
To grant Teleport permissions, the custom role you created must be assigned to the Teleport service principal - either the managed identity or the app registration you created earlier.
Navigate to the resource scope where you want to make the role assignment. Click Access control (IAM) and select Add > Add role assignment. Choose the custom role you created as the role and the Teleport service principal as a member.
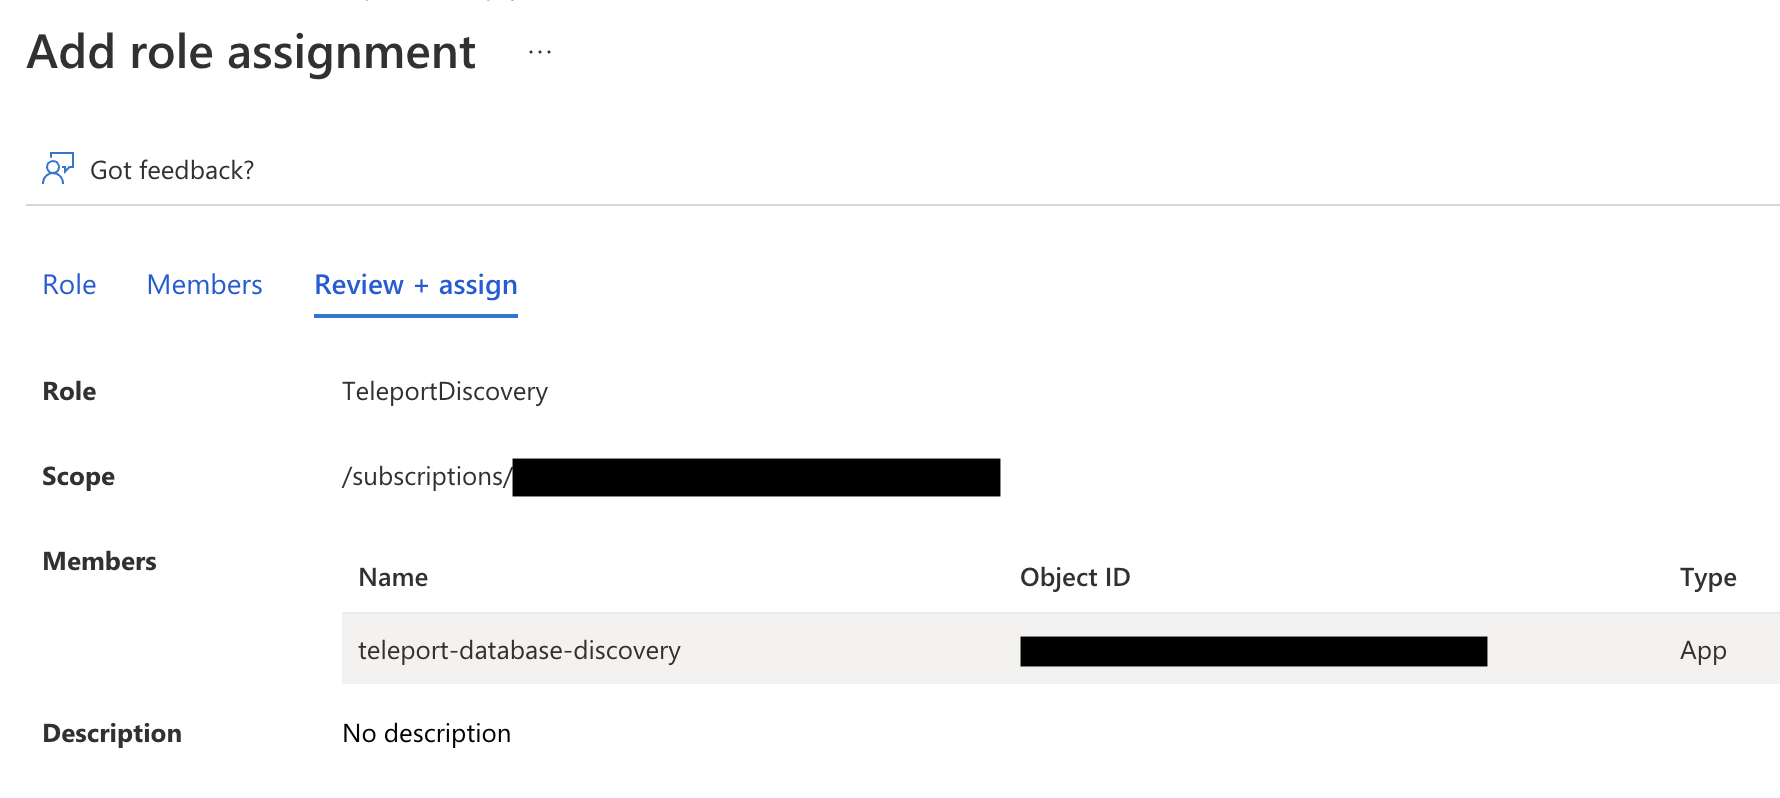
The role assignment should be at a high enough scope to allow the Teleport Database Service to discover all matching databases. See Identify the needed scope for more information about Azure scopes and creating role assignments.
Step 4/5. Create Azure database users
To let Teleport connect to your Azure database authenticating as a service principal, you need to create Azure AD users authenticated by that principal in the database.
Assign Azure AD administrator
Only the Azure AD administrator for the database can connect to it and create Azure AD users.
Go to your database's Authentication page and set the AD admin using the edit button:
Go to your database's Authentication page and set the AD admin by selecting + Add Azure AD Admins:
Go to your database's Active Directory admin page and set the AD admin using the Set admin button:
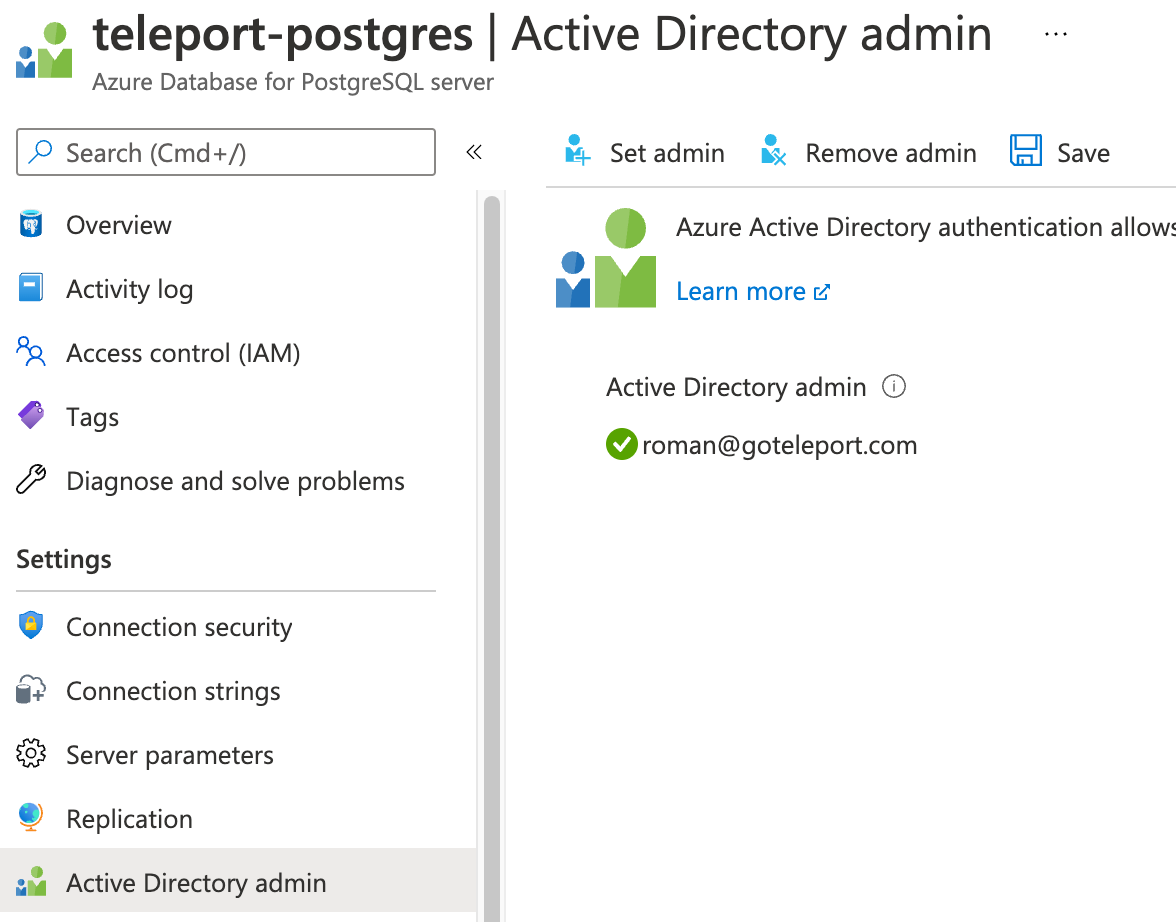
Only one Azure user (or group) can be set as an Azure AD admin for the database. If the Azure AD admin is removed from the server, all Azure AD logins will be disabled for the server. Adding a new Azure AD admin from the same tenant will re-enable Azure AD logins. Refer to Use Azure Active Directory for authenticating with PostgreSQL for more information.
Connect to the database as an AD admin
Next, you need to connect to your database as the AD admin user.
Use the Azure az CLI utility to log in as the user that you set as the AD admin,
fetch the access token and use it as a password when connecting to the database:
az login -u [email protected]TOKEN=`az account get-access-token --resource-type oss-rdbms --output tsv --query accessToken`PGPASSWORD=$TOKEN psql "host=example.postgres.database.azure.com [email protected] sslmode=require dbname=postgres"
az login -u [email protected]TOKEN=`az account get-access-token --resource-type oss-rdbms --output tsv --query accessToken`PGPASSWORD=$TOKEN psql "host=example.postgres.database.azure.com [email protected]@instance-name sslmode=require dbname=postgres"
az login -u [email protected]TOKEN=`az account get-access-token --resource-type oss-rdbms --output tsv --query accessToken`mysql -h example.mysql.database.azure.com -P 3306 -u [email protected] --enable-cleartext-plugin --password=$TOKEN
az login -u [email protected]TOKEN=`az account get-access-token --resource-type oss-rdbms --output tsv --query accessToken`mysql -h example.mysql.database.azure.com -P 3306 -u [email protected]@instance-name --enable-cleartext-plugin --password=$TOKEN
Note that the database username must include @instance-name suffix with the
name of the Azure database instance you're connecting to.
Create AD users
Once connected to the database as AD admin, create database users for the
service principal that Teleport Database Service will be using. Use Client ID
when using managed identities and Application (client) ID when using app
registrations:
postgres=> SET aad_validate_oids_in_tenant = off;
SET
postgres=> CREATE ROLE teleport WITH LOGIN PASSWORD '11111111-2222-3333-4444-555555555555' IN ROLE azure_ad_user;
CREATE ROLE
postgres=> SELECT * FROM pgaadauth_create_principal_with_oid('teleport', '11111111-2222-3333-4444-555555555555', 'service', false, false);
-------------------------------------
 Created role for teleport
(1 row)
mysql> SET aad_auth_validate_oids_in_tenant = OFF;
mysql> CREATE AADUSER 'teleport' IDENTIFIED BY '11111111-2222-3333-4444-555555555555';
Query OK, 0 rows affected (0.92 sec)
The created user may not have access to anything by default so let's grant it some permissions:
GRANT ALL ON `%`.* TO 'teleport'@'%';
You can create multiple database users identified by the same service principal.
Step 5/5. Connect
Log in to your Teleport cluster. Your Azure database should appear in the list of available databases:
tsh login --proxy=teleport.example.com --user=alicetsh db lsName Description Labels
-------- ------------------- -------
azure-db env=dev
tsh login --proxy=mytenant.teleport.sh --user=alicetsh db lsName Description Labels
-------- ------------------- -------
azure-db env=dev
To retrieve credentials for a database and connect to it:
tsh db connect --db-user=teleport azure-db
tsh db connect --db-user=teleport --db-name=postgres azure-db
The appropriate database command-line client (psql, mysql) should be
available in the PATH of the machine you're running tsh db connect from.
To log out of the database and remove credentials:
tsh db logout azure-db
Troubleshooting
No credential providers error
If you see the error DefaultAzureCredential: failed to acquire a token. in Database Service logs then Teleport
is not detecting the required credentials to connect to the Azure SDK. Check whether
the credentials have been applied in the machine running the Teleport Database Service and restart
the Teleport Database Service.
Refer to Azure SDK Authorization
for more information.
Timeout errors
The Teleport Database Service needs connectivity to your database endpoints. That may require
enabling inbound traffic on the database from the Database Service on the same VPC or routing rules from another VPC. Using the nc
program you can verify connections to databases:
nc -zv server-name.postgres.database.azure.com 5432Connection to server-name.postgres.database.azure.com 5432 port [tcp/postgresql] succeeded!
Unable to cancel a query
If you use a PostgreSQL cli client like psql, and you try to cancel a query
with ctrl+c, but it doesn't cancel the query, then you need to connect using a
tsh local proxy instead.
When psql cancels a query, it establishes a new connection without TLS
certificates, however Teleport requires TLS certificates not only for
authentication, but also to route database connections.
If you
enable TLS Routing in Teleport
then tsh db connect will automatically start a local proxy for every
connection.
Alternatively, you can connect via
Teleport Connect
which also uses a local proxy.
Otherwise, you need to start a tsh local proxy manually using tsh proxy db
and connect via the local proxy.
If you have already started a long-running query in a psql session that you
cannot cancel with ctrl+c, you can start a new client session to cancel that
query manually:
First, find the query's process identifier (PID):
SELECT pid,usename,backend_start,query FROM pg_stat_activity WHERE state = 'active';
Next, gracefully cancel the query using its PID. This will send a SIGINT signal to the postgres backend process for that query:
SELECT pg_cancel_backend(<PID>);
You should always try to gracefully terminate a query first, but if graceful cancellation is taking too long, then you can forcefully terminate the query instead. This will send a SIGTERM signal to the postgres backend process for that query:
SELECT pg_terminate_backend(<PID>);
See the PostgreSQL documentation on
admin functions
for more information about the pg_cancel_backend and pg_terminate_backend
functions.
SSL SYSCALL error
You may encounter the following error when your local psql is not compatible
with newer versions of OpenSSL:
tsh db connect --db-user postgres --db-name postgres postgrespsql: error: connection to server at "localhost" (::1), port 12345 failed: Connection refused Is the server running on that host and accepting TCP/IP connections?connection to server at "localhost" (127.0.0.1), port 12345 failed: SSL SYSCALL error: Undefined error: 0
Please upgrade your local psql to the latest version.
Next steps
- Learn how to restrict access to certain users and databases.
- View the High Availability (HA) guide.
- Take a look at the YAML configuration reference.
- See the full CLI reference.