
Teleport
Database Access with AWS OpenSearch
- Version 17.x
- Version 16.x
- Version 15.x
- Version 14.x
- Older Versions
Teleport can provide secure access to Amazon OpenSearch via the Teleport Database Service. This allows for fine-grained access control through Teleport's RBAC.
In this guide, you will:
- Configure your Amazon OpenSearch database via REST API with IAM Authentication.
- Add the database to your Teleport cluster.
- Connect to the database via Teleport
How it works
The Teleport Database Service makes use of fine-grained access control, which maps an IAM role to a backend OpenSearch role. Teleport users choose an IAM role and connect to OpenSearch via a local proxy server. The local proxy server forwards requests to the Teleport Database Service via the Teleport Proxy Service. The Database Service assumes the user's chosen IAM role, rewrites requests with AWS credentials, and forwards them to the OpenSearch API.
This guide shows how to register a single OpenSearch database with your Teleport cluster. For a more scalable approach, learn how to set up Database Auto-Discovery to automatically enroll all databases in your infrastructure.
Prerequisites
- AWS OpenSearch domain.
- Enabled AWS OpenSearch Service fine-grained access control
- IAM permissions to create IAM roles.
- opensearchsql Command Line
Interface (CLI) tool installed in
$PATH.
-
A running Teleport cluster version 16.1.0 or above. If you want to get started with Teleport, sign up for a free trial or set up a demo environment.
-
The
tctladmin tool andtshclient tool.Visit Installation for instructions on downloading
tctlandtsh.
- A host, e.g., an EC2 instance, where you will run the Teleport Database Service. This guide assumes an EC2 instance when creating and applying IAM roles, and must be adjusted accordingly for custom configurations.
- To check that you can connect to your Teleport cluster, sign in with
tsh login, then verify that you can runtctlcommands using your current credentials.tctlis supported on macOS and Linux machines. For example:If you can connect to the cluster and run thetsh login --proxy=teleport.example.com --user=[email protected]tctl statusCluster teleport.example.com
Version 16.1.0
CA pin sha256:abdc1245efgh5678abdc1245efgh5678abdc1245efgh5678abdc1245efgh5678
tctl statuscommand, you can use your current credentials to run subsequenttctlcommands from your workstation. If you host your own Teleport cluster, you can also runtctlcommands on the computer that hosts the Teleport Auth Service for full permissions.
This guide provides an example configuration of IAM access roles as a model, and uses an EC2 instance to serve the Teleport Database Service. The level of access provided may not suit your needs, or may not fit your organization's access conventions. You should adjust the AWS IAM permissions to fit your needs.
Step 1/4. Create IAM roles for OpenSearch Managed Cluster access
The setup described in this guide requires two IAM roles:
- One associated with the EC2 instance running the Teleport Database Service, which lets it assume additional roles granted to the user.
- One that can be assumed by the EC2 instance role and grants access to OpenSearch manage cluster to users.
EC2 instance role
Visit the IAM > Roles page of the AWS Console, then press "Create Role". Under Trusted entity type select "AWS service". Under Use case select "EC2", then click Next.
On the "Add Permissions" page, you can simply click Next since this role
does not require any permissions. In this guide, we will use the example name
TeleportDatabaseService for this role. Once you have chosen a name, click
Create Role to complete the process.
OpenSearch Service cluster access role
Navigate back to the Roles page and create a new role. Select the "AWS account" option, which creates a default trust policy to allow other entities in this account to assume this role:
Click Next. On the next page, enter a role name. In this guide we'll use
the example name ExampleTeleportOpenSearchRole for this role.
Under "Select trusted entities", update the JSON to allow the TeleportDatabaseService
role to assume this role:
{
    "Version": "2012-10-17",
    "Statement": [
        {
            "Effect": "Allow",
            "Principal": {
                "AWS": [
                    "arn:aws:iam::abcd1234-this-is-an-example:role/TeleportDatabaseService"
                ]
            },
            "Action": "sts:AssumeRole",
            "Condition": {}
        }
    ]
}
Finally, click Create Role.
Configure Cluster Fine-grained access control IAM Role mapping in Amazon OpenSearch Managed Custer
Teleport AWS OpenSearch service integration leverages the OpenSearch Fine-grained access control where the IAM role or user is mapped to the OpenSearch role.
In order to configure Role Mapping log into OpenSearch Domain Dashboard using
the master user and go to the Security settings:
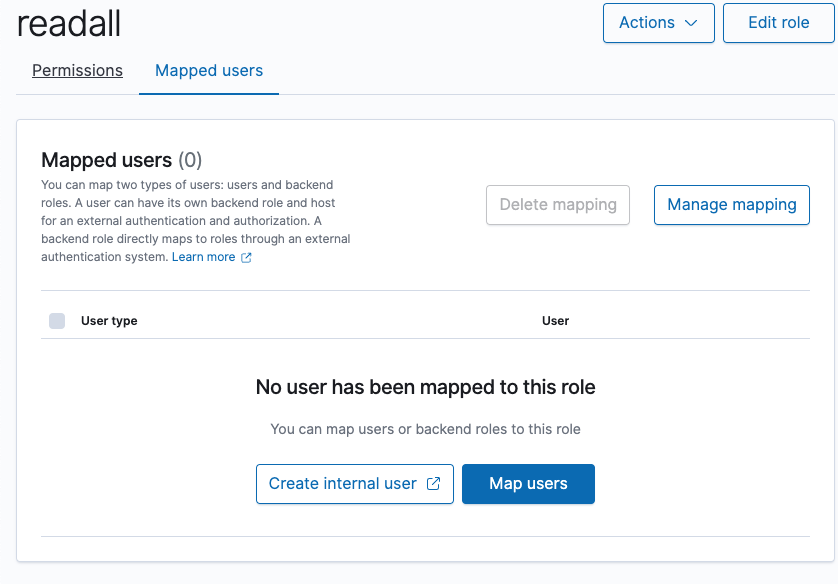
Create a new role with least privilege permissions, or select an existing one.
For the purpose of this example the readall OpenSearch role will be used.
Select the OpenSearch role and go to the Mapped users tab:
Add mapping between the OpenSearch role and AWS IAM ExampleTeleportOpenSearchRole
role created in the previous step.
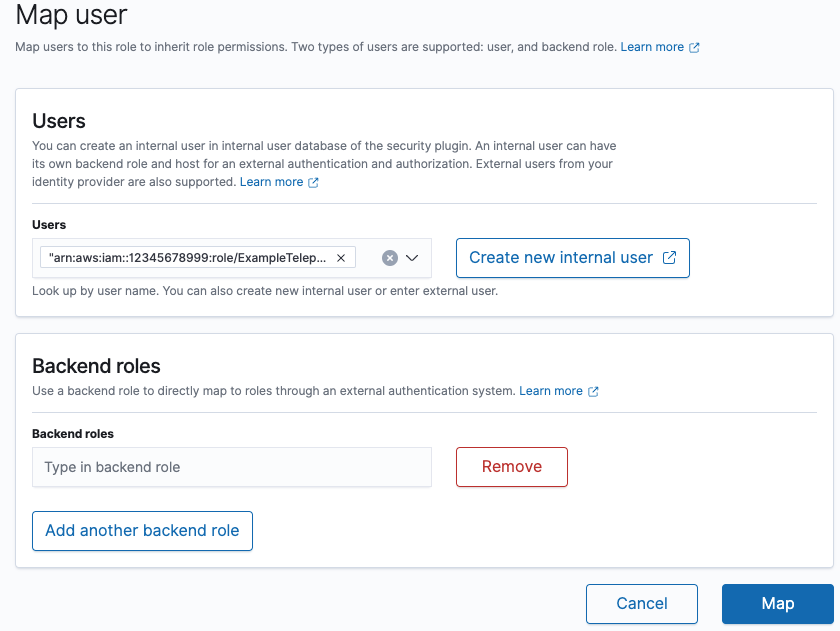
Finally, click the Map button to apply the settings.
Step 2/4. Configure the Teleport IAM role mapping
The next step is to give your Teleport users permissions to assume AWS IAM roles when accessing AWS resources through your Teleport cluster.
You can do this by creating a Teleport role with the db_users field
listing the IAM role ARN created in the previous step. Create a file called
aws-opensearch-access.yaml with the following content:
kind: role
version: v7
metadata:
  name: aws-opensearch-access
spec:
  allow:
    db_labels:
      'env': 'dev'
    db_users:
    - 'ExampleTeleportOpenSearchRole'
Create the new role:
tctl create -f aws-opensearch-access.yaml
Assign the aws-opensearch-access role to your Teleport user by running the appropriate
commands for your authentication provider:
-
Retrieve your local user's roles as a comma-separated list:
ROLES=$(tsh status -f json | jq -r '.active.roles | join(",")') -
Edit your local user to add the new role:
tctl users update $(tsh status -f json | jq -r '.active.username') \ --set-roles "${ROLES?},aws-opensearch-access" -
Sign out of the Teleport cluster and sign in again to assume the new role.
-
Retrieve your
githubauthentication connector:tctl get github/github --with-secrets > github.yamlNote that the
--with-secretsflag adds the value ofspec.signing_key_pair.private_keyto thegithub.yamlfile. Because this key contains a sensitive value, you should remove the github.yaml file immediately after updating the resource. -
Edit
github.yaml, addingaws-opensearch-accessto theteams_to_rolessection.The team you should map to this role depends on how you have designed your organization's role-based access controls (RBAC). However, the team must include your user account and should be the smallest team possible within your organization.
Here is an example:
teams_to_roles: - organization: octocats team: admins roles: - access + - aws-opensearch-access -
Apply your changes:
tctl create -f github.yaml -
Sign out of the Teleport cluster and sign in again to assume the new role.
-
Retrieve your
samlconfiguration resource:tctl get --with-secrets saml/mysaml > saml.yamlNote that the
--with-secretsflag adds the value ofspec.signing_key_pair.private_keyto thesaml.yamlfile. Because this key contains a sensitive value, you should remove the saml.yaml file immediately after updating the resource. -
Edit
saml.yaml, addingaws-opensearch-accessto theattributes_to_rolessection.The attribute you should map to this role depends on how you have designed your organization's role-based access controls (RBAC). However, the group must include your user account and should be the smallest group possible within your organization.
Here is an example:
attributes_to_roles: - name: "groups" value: "my-group" roles: - access + - aws-opensearch-access -
Apply your changes:
tctl create -f saml.yaml -
Sign out of the Teleport cluster and sign in again to assume the new role.
-
Retrieve your
oidcconfiguration resource:tctl get oidc/myoidc --with-secrets > oidc.yamlNote that the
--with-secretsflag adds the value ofspec.signing_key_pair.private_keyto theoidc.yamlfile. Because this key contains a sensitive value, you should remove the oidc.yaml file immediately after updating the resource. -
Edit
oidc.yaml, addingaws-opensearch-accessto theclaims_to_rolessection.The claim you should map to this role depends on how you have designed your organization's role-based access controls (RBAC). However, the group must include your user account and should be the smallest group possible within your organization.
Here is an example:
claims_to_roles: - name: "groups" value: "my-group" roles: - access + - aws-opensearch-access -
Apply your changes:
tctl create -f oidc.yaml -
Sign out of the Teleport cluster and sign in again to assume the new role.
Step 3/4. Install the Teleport Database Service
Create an EC2 instance to host the Teleport Database Service, and attach the
TeleportDatabaseService AWS IAM role to it. If you're hosting the service another
way, you must provide AWS credentials to the service - see AWS credentials
configuration
for more details.
For non-standard AWS regions such as AWS GovCloud (US) regions and AWS China
regions, please set the corresponding region in the AWS_REGION environment
variable or in the AWS credentials file so that the Database Service can use
the correct STS endpoint.
Generate a token
For users with a lot of infrastructure in AWS, or who might create or recreate many instances, consider alternative methods for joining new EC2 instances running Teleport:
The Database Service requires a valid join token to join your Teleport cluster.
Run the following tctl command and save the token output in /tmp/token
on the server that will run the Database Service:
tctl tokens add --type=db --format=textabcd123-insecure-do-not-use-this
Use the token provided by the output of this command in the next step.
Install and start Teleport
Install Teleport on your Linux server:
-
Assign edition to one of the following, depending on your Teleport edition:
Edition Value Teleport Enterprise Cloud cloudTeleport Enterprise (Self-Hosted) enterpriseTeleport Community Edition oss -
Get the version of Teleport to install. If you have automatic agent updates enabled in your cluster, query the latest Teleport version that is compatible with the updater:
TELEPORT_DOMAIN=example.teleport.comTELEPORT_VERSION="$(curl https://$TELEPORT_DOMAIN/v1/webapi/automaticupgrades/channel/default/version | sed 's/v//')"Otherwise, get the version of your Teleport cluster:
TELEPORT_DOMAIN=example.teleport.comTELEPORT_VERSION="$(curl https://$TELEPORT_DOMAIN/v1/webapi/ping | jq -r '.server_version')" -
Install Teleport on your Linux server:
curl https://goteleport.com/static/install.sh | bash -s ${TELEPORT_VERSION} editionThe installation script detects the package manager on your Linux server and uses it to install Teleport binaries. To customize your installation, learn about the Teleport package repositories in the installation guide.
On the host where you will run the Teleport Database Service, start Teleport with the appropriate configuration.
Note that a single Teleport process can run multiple different services, for
example multiple Database Service agents as well as the SSH Service or Application
Service. The step below will overwrite an existing configuration file, so if
you're running multiple services add --output=stdout to print the config in
your terminal, and manually adjust /etc/teleport.yaml.
Generate a configuration file at /etc/teleport.yaml for the Database Service.
Set the --proxy command-line option to the address for your Teleport cluster
and database parameters to your AWS environment.
sudo teleport db configure create \ -o file \ --token=/tmp/token \ --proxy=teleport.example.com:443 \ --name=example-opensearch \ --protocol=opensearch \ --uri=opensearch-uri:443 \ --aws-account-id=abcd1234-this-is-an-example \ --labels=env=dev
Configure the Teleport Database Service to start automatically when the host boots up by creating a systemd service for it. The instructions depend on how you installed the Teleport Database Service.
On the host where you will run the Teleport Database Service, enable and start Teleport:
sudo systemctl enable teleportsudo systemctl start teleport
On the host where you will run the Teleport Database Service, create a systemd service configuration for Teleport, enable the Teleport service, and start Teleport:
sudo teleport install systemd -o /etc/systemd/system/teleport.servicesudo systemctl enable teleportsudo systemctl start teleport
You can check the status of the Teleport Database Service with systemctl status teleport
and view its logs with journalctl -fu teleport.
Modify your Teleport Database Service static configuration file:
db_service:
  enabled: "yes"
  databases:
  - name: example-opensearch
    aws:
      account_id: "abcd1234-this-is-an-example"
    protocol: opensearch
    uri: opensearch-uri:443
    static_labels:
      env: dev
Restart the Teleport Database Service for the configuration file changes to take effect.
Create a dynamic database resource to dynamically register an AWS database in an external account and proxy connections to it.
kind: db
version: v3
metadata:
  name: "example-opensearch"
  description: "Example dynamic database resource"
  labels:
    env: "dev"
spec:
  protocol: "opensearch"
  uri: opensearch-uri:443
  aws:
    account_id: "abcd1234-this-is-an-example"
Save the configuration to a file like database.yaml and create it with tctl:
tctl create database.yaml
For more information about database registration using dynamic database resources, see: Dynamic Registration.
Step 4/4. Connect
Once the Database Service has started and joined the cluster, you can start accessing AWS OpenSearch API:
Create a proxy tunnel:
tsh proxy db --tunnel --port=8000 --db-user=ExampleTeleportOpenSearchRole example-opensearchStarted authenticated tunnel for the OpenSearch database "example-opensearch" in cluster "teleport.example.com" on 127.0.0.1:8000.
Use one of the following commands to connect to the database or to the address above using other database GUI/CLI clients:
  * start interactive session with opensearchsql:
  $ opensearchsql http://localhost:8000
  * run request with opensearch-cli:
  $ opensearch-cli --profile teleport --config /Users/alice/.tsh/teleport.example.dev/example-opensearch/opensearch-cli/8a5ce249.yml curl get --path /
  * run request with curl:
  $ curl http://localhost:8000/
You can now interact with AWS OpenSearch API via local tunnel created by the tsh proxy db command:
curl http://localhost:8000/movies/_search \   -H 'Content-Type: application/json'  \   -d '{ "query": { "match_all": {} } }'
{"took":170,"timed_out":false,"_shards":{"total":5,"successful":5,"skipped":0,"failed":0},"hits":{"total":{"value":1,"relation":"eq"},"max_score":1.0,"hits":[{"_index":"movies","_id":"1","_score":1.0,"_source":{"director": "Burton, Tim", "genre": ["Comedy","Sci-Fi"], "year": 1996, "actor": ["Jack Nicholson","Pierce Brosnan","Sarah Jessica Parker"], "title": "Mars Attacks!"}}]}}
Interactive session can be started using the tsh db connect command, which invokes the opensearchsql binary with interactive mode under the hood:
tsh db connect example-opensearch --db-user=ExampleTeleportOpenSearchRole____ _____ __
/ __ \____ ___ ____ / ___/___ ____ ___________/ /_
/ / / / __ \/ _ \/ __ \\__ \/ _ \/ __ `/ ___/ ___/ __ \
/ /_/ / /_/ / __/ / / /__/ / __/ /_/ / / / /__/ / / /
\____/ .___/\___/_/ /_/____/\___/\__,_/_/ \___/_/ /_/
/_/
Server: OpenSearch 2.5.0
CLI Version: 1.0.0
Endpoint: http://localhost:56766
Query Language: sql
opensearchsql> select * from movies;fetched rows / total rows = 1/1
+----------------+---------+---------------+--------+-------------+
| actor | genre | title | year | director |
|----------------+---------+---------------+--------+-------------|
| Jack Nicholson | Comedy | Mars Attacks! | 1996 | Burton, Tim |
+----------------+---------+---------------+--------+-------------+
opensearchsql>