
Teleport
Automatically Discover GCP Compute Instances
- Version 17.x
- Version 16.x
- Version 15.x
- Version 14.x
- Older Versions
The Teleport Discovery Service can connect to GCP and automatically discover and enroll GCP Compute Engine instances matching configured labels. It will then execute a script on these discovered instances that will install Teleport, start it and join the cluster.
Prerequisites
-
A running Teleport cluster version 16.1.0 or above. If you want to get started with Teleport, sign up for a free trial or set up a demo environment.
-
The
tctladmin tool andtshclient tool.Visit Installation for instructions on downloading
tctlandtsh.
- A GCP compute instance to run the Discovery Service on.
- GCP compute instances to join the Teleport cluster, running Ubuntu/Debian/RHEL if making use of the default Teleport install script. (For other Linux distributions, you can install Teleport manually.)
- To check that you can connect to your Teleport cluster, sign in with
tsh login, then verify that you can runtctlcommands using your current credentials.tctlis supported on macOS and Linux machines. For example:If you can connect to the cluster and run thetsh login --proxy=teleport.example.com --user=[email protected]tctl statusCluster teleport.example.com
Version 16.1.0
CA pin sha256:abdc1245efgh5678abdc1245efgh5678abdc1245efgh5678abdc1245efgh5678
tctl statuscommand, you can use your current credentials to run subsequenttctlcommands from your workstation. If you host your own Teleport cluster, you can also runtctlcommands on the computer that hosts the Teleport Auth Service for full permissions.
Step 1/6. Create a GCP invite token
When discovering GCP compute instances, Teleport makes use of GCP invite tokens for authenticating joining SSH Service instances.
Create a file called token.yaml:
# token.yaml
kind: token
version: v2
metadata:
  # the token name is not a secret because instances must prove that they are
  # running in your GCP project to use this token
  name: gcp-discovery-token
spec:
  # use the minimal set of roles required (e.g. Node, Proxy, App, Kube, DB, WindowsDesktop)
  roles: [Node]

  # set the join method allowed for this token
  join_method: gcp

  gcp:
    allow:
      # The GCP project ID(s) that VMs can join from.
      - project_ids: []
        # (Optional) The locations that VMs can join from. Note: both regions and
        # zones are accepted.
        locations: []
        # (Optional) The email addresses of service accounts that VMs can join
        # with.
        service_accounts: []
Add your instance's project ID(s) to the project_ids field.
Add the token to the Teleport cluster with:
tctl create -f token.yaml
Step 2/6. Configure IAM permissions for Teleport
Create a service account that will give Teleport IAM permissions needed to discover instances.
Go to IAM > Roles
in the GCP console and click + Create Role.
Pick a name for the role (e.g. teleport-discovery) and give it the following permissions:
compute.instances.getcompute.instances.getGuestAttributescompute.instances.listcompute.instances.setMetadataiam.serviceAccounts.actAsiam.serviceAccounts.getiam.serviceAccounts.list

Click Create.
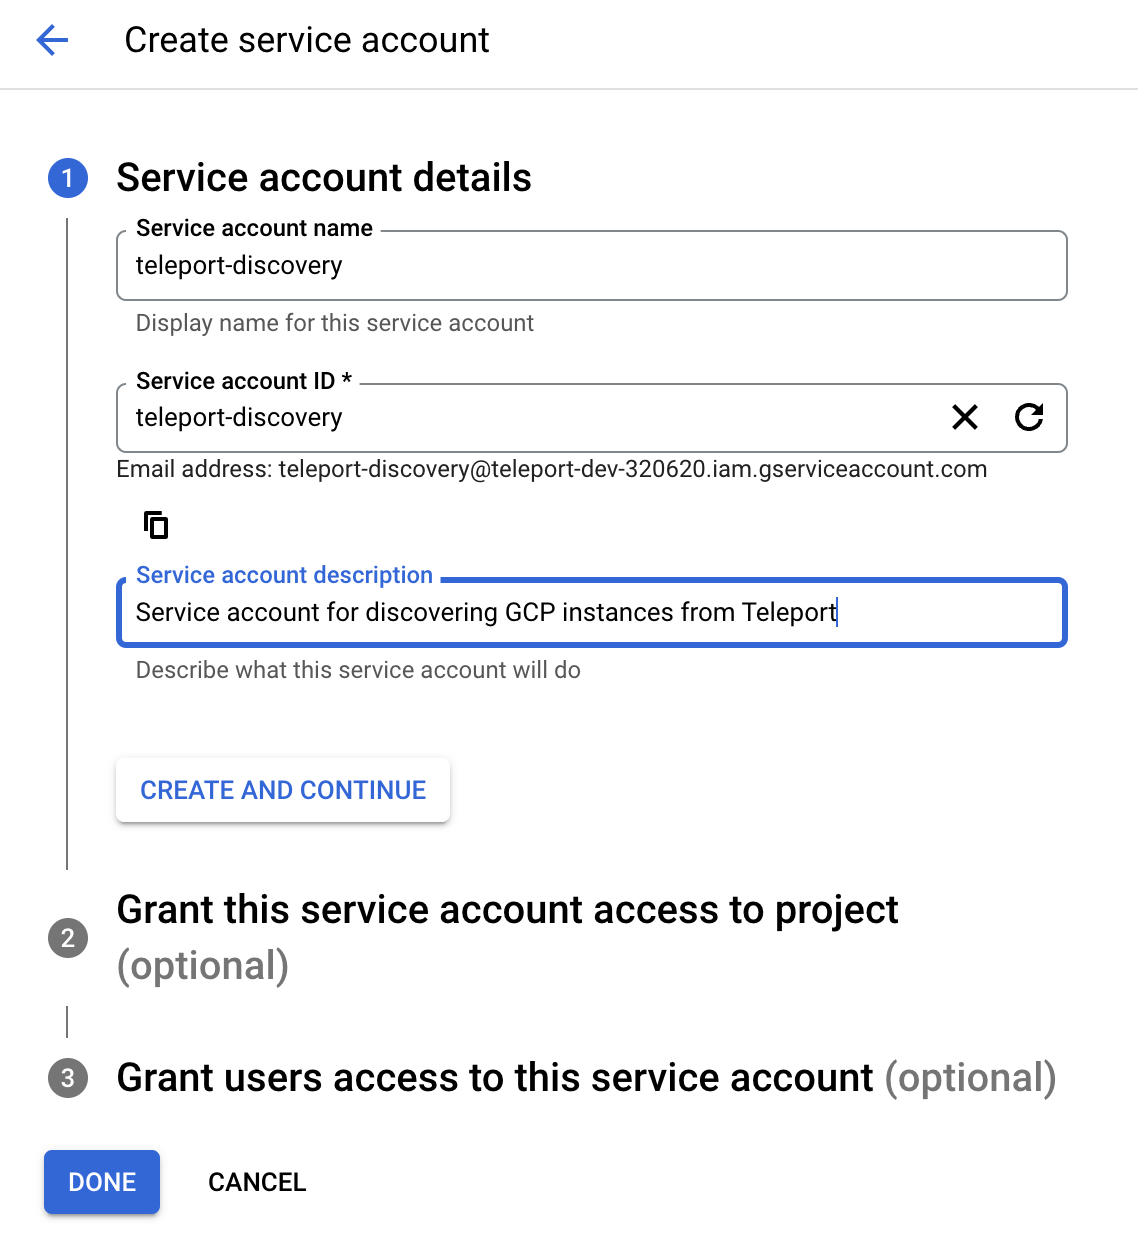
Go to IAM > Service accounts
and click + Create Service Account. Pick a name for the service account
(e.g. teleport-discovery) and copy its email address to your clipboard.
Click Create and Continue.
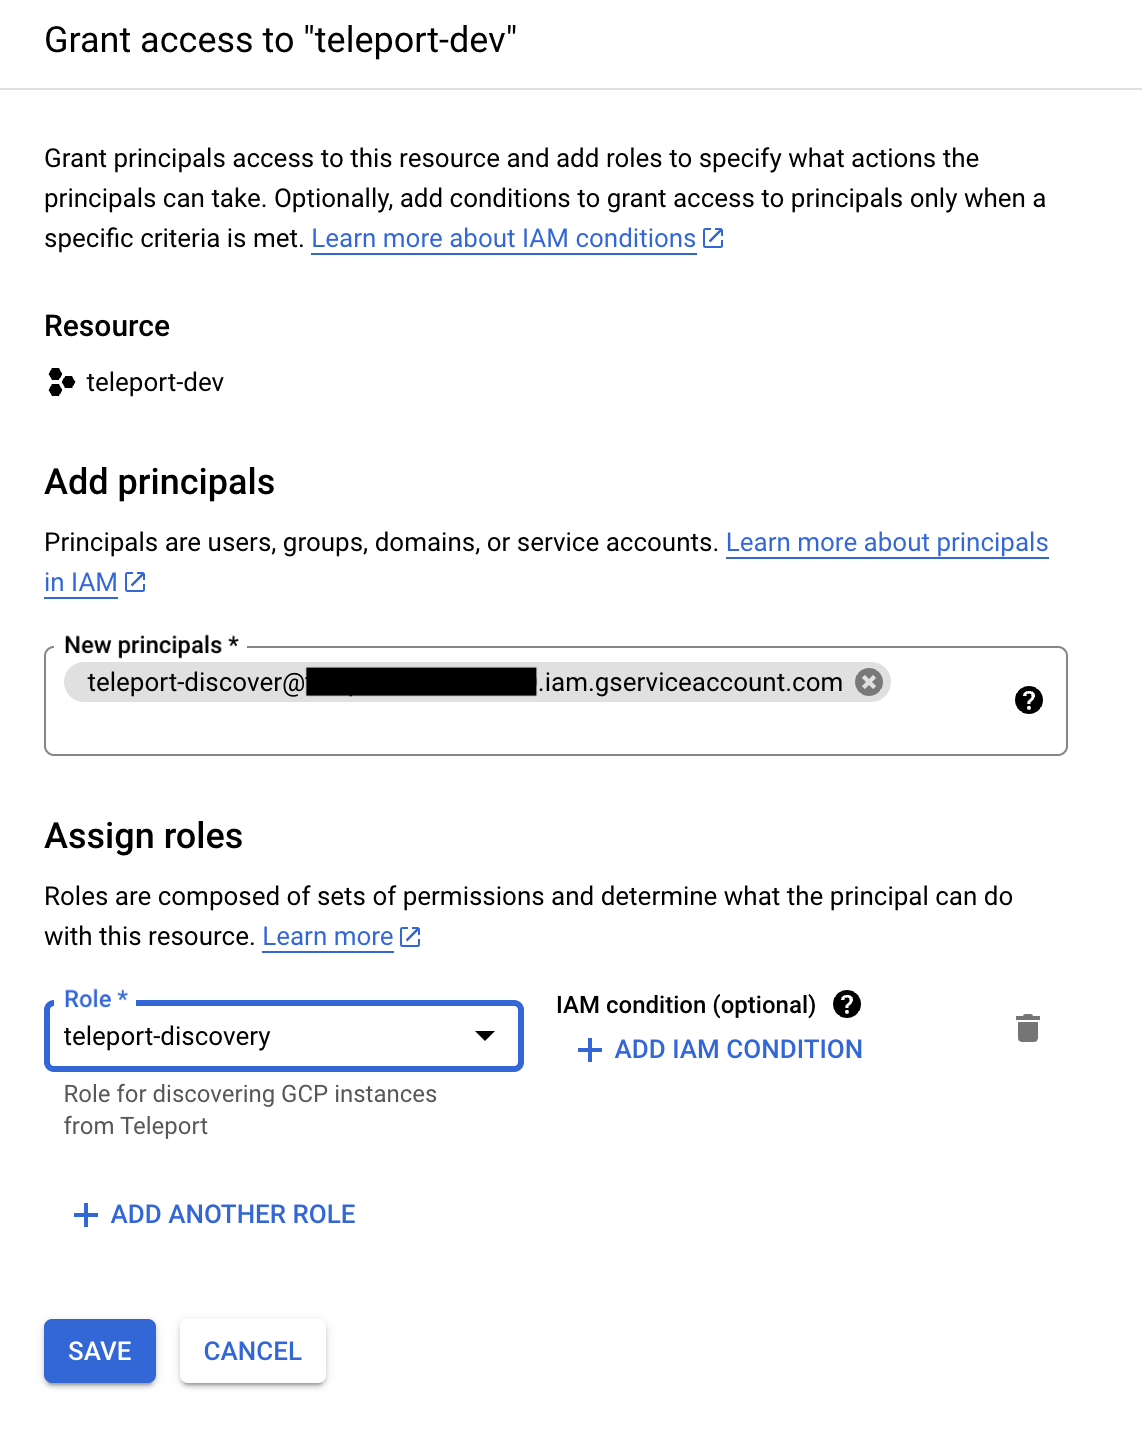
Go to IAM and click Grant Access. Paste the service account's email into the New principals field and select your custom role. Click Save.
Copy the following and paste it into a file called teleport-discovery-role.yaml:
# teleport-discovery-role.yaml
title: "teleport-discovery"
description: "A role to enable Teleport to discover GCP compute instances"
stage: "ALPHA"
includedPermissions:
- compute.instances.get
- compute.instances.getGuestAttributes
- compute.instances.list
- compute.instances.setMetadata
- iam.serviceAccounts.actAs
- iam.serviceAccounts.get
- iam.serviceAccounts.list
Then run the following command to create the role:
gcloud iam roles create teleport_discovery \--project=project_id \--file=teleport-discovery-role.yaml
Run the following command to create the service account:
gcloud iam service-accounts create teleport-discovery \--description="A service account to enable Teleport to discover GCP compute instances" \--display-name="teleport-discovery"
Run the following command to add the new role to the new service account:
gcloud projects add-iam-policy-binding project_id \--member="serviceAccount:teleport-discovery@project_id.iam.gserviceaccount.com" \--role="projects/project_id/roles/teleport_discovery"
Step 3/6. Configure instances to be discovered
Ensure that each instance to be discovered has a service account assigned to
it. No permissions are required on the service account. To check if an instance
has a service account, run the following command and confirm that there is
at least one entry under serviceAccounts:
gcloud compute instances describe --format="yaml(name,serviceAccounts)" instance_name
Enable guest attributes on instances
Guest attributes (a subset of custom metadata used for infrequently updated data)
must be enabled on instances to be discovered so Teleport can access their SSH
host keys. Enable guest attributes by setting enable-guest-attributes to
TRUE in the instance's metadata.
gcloud compute instances add-metadata instance_name \--metadata=enable-guest-attributes=True
If guest attributes are enabled during instance creation, the guest attributes will automatically be populated with the instance's host keys. If guest attributes were enabled after the instance was created, you can manually add the host keys to the guest attributes below:
Create a file named add-host-keys.sh and copy the following into it:
#!/usr/bin/env bash
for file in /etc/ssh/ssh_host_*_key.pub; do
  read -r KEY_TYPE KEY _ <"$file"
  curl -X PUT --data "$KEY" "http://metadata.google.internal/computeMetadata/v1/instance/guest-attributes/hostkeys/$KEY_TYPE" -H "Metadata-Flavor: Google"
done
Run the following command to add the host keys as part of a startup script:
gcloud compute instances add-metadata instance_name \--metadata-from-file=startup-script="add-host-keys.sh"
Run the following command to add the host keys over SSH:
gcloud compute ssh instance_name \--command='for file in /etc/ssh/ssh_host_*_key.pub; do KEY_TYPE=$(awk '\''{print $1}'\'' $file); KEY=$(awk '\''{print $2}'\'' $file); curl -X PUT --data "$KEY" "http://metadata.google.internal/computeMetadata/v1/instance/guest-attributes/hostkeys/$KEY_TYPE" -H "Metadata-Flavor: Google"; done'
Step 4/6. Install the Teleport Discovery Service
If you plan on running the Discovery Service on a host that is already running another Teleport service (Auth or Proxy, for example), you can skip this step.
Install Teleport on the virtual machine that will run the Discovery Service.
Install Teleport on your Linux server:
-
Assign edition to one of the following, depending on your Teleport edition:
Edition Value Teleport Enterprise Cloud cloudTeleport Enterprise (Self-Hosted) enterpriseTeleport Community Edition oss -
Get the version of Teleport to install. If you have automatic agent updates enabled in your cluster, query the latest Teleport version that is compatible with the updater:
TELEPORT_DOMAIN=example.teleport.comTELEPORT_VERSION="$(curl https://$TELEPORT_DOMAIN/v1/webapi/automaticupgrades/channel/default/version | sed 's/v//')"Otherwise, get the version of your Teleport cluster:
TELEPORT_DOMAIN=example.teleport.comTELEPORT_VERSION="$(curl https://$TELEPORT_DOMAIN/v1/webapi/ping | jq -r '.server_version')" -
Install Teleport on your Linux server:
curl https://goteleport.com/static/install.sh | bash -s ${TELEPORT_VERSION} editionThe installation script detects the package manager on your Linux server and uses it to install Teleport binaries. To customize your installation, learn about the Teleport package repositories in the installation guide.
Step 5/6. Configure Teleport to discover GCP compute instances
If you are running the Discovery Service on its own host, the service requires a valid invite token to connect to the cluster. Generate one by running the following command against your Teleport Auth Service:
tctl tokens add --type=discovery
Save the generated token in /tmp/token on the virtual machine that will run
the Discovery Service.
In order to enable GCP instance discovery the discovery_service.gcp section
of teleport.yaml must include at least one entry:
version: v3
teleport:
  join_params:
    token_name: "/tmp/token"
    method: token
  proxy_server: "teleport.example.com:443"
auth_service:
  enabled: off
proxy_service:
  enabled: off
ssh_service:
  enabled: off
discovery_service:
  enabled: "yes"
  gcp:
    - types: ["gce"]
      # The IDs of GCP projects that VMs can join from.
      project_ids: []
      # (Optional) The locations that VMs can join from. Note: both regions and
      # zones are accepted.
      locations: []
      # (Optional) The email addresses of service accounts that VMs can join
      # with.
      service_accounts: []
      # (Optional) Labels that joining VMs must have.
      labels:
        "env": "prod" # Match virtual machines where label:env=prod
      install:
        public_proxy_addr: "teleport.example.com:443"
- Edit the
teleport.auth_serverorteleport.proxy_serverkey to match your Auth Service or Proxy Service's domain name and port, respectively. - Adjust the keys under
discovery_service.gcpto match your GCP environment, specifically the projects, locations, service accounts, and tags you want to associate with the Discovery Service.
GCP credentials
The Teleport Discovery Service must have the credentials of the
teleport-discovery GCP service account we created above in order to be able
to log in.
The easiest way to ensure that is to run the Discovery Service on a GCP instance and assign the service account to that instance. Refer to Set Up Application Default Credentials for details on alternate methods.
Step 6/6. [Optional] Customize the default installer script
To customize an installer, your user must have a role that allows list, create, read and update verbs on the installer resource.
Create a file called installer-manager.yaml with the following content:
kind: role
version: v5
metadata:
  name: installer-manager
spec:
  allow:
    rules:
      - resources: [installer]
        verbs: [list, create, read, update]
Create the role:
tctl create -f installer-manager.yamlrole 'installer-manager' has been created
The preset editor role has the required permissions by default.
To customize the default installer script, execute the following command on your workstation:
tctl get installer/default-installer > teleport-default-installer.yaml
The resulting teleport-default-installer.yaml can be edited to
change what gets executed when enrolling discovered instances.
After making the desired changes to the default installer, the resource can be updated by executing:
tctl create -f teleport-default-installer.yaml
Multiple installer resources can exist and be specified in the
gcp.install.script_name section of a discovery_service.gcp list item in
teleport.yaml:
discovery_service:
  gcp:
    - types: ["gce"]
      tags:
       - "env": "prod"
      install: # optional section when default-installer is used.
        script_name: "default-installer"
    - types: ["gce"]
      tags:
       - "env": "devel"
      install:
        script_name: "devel-installer"
The installer resource has the following templating options:
{{ .MajorVersion }}: the major version of Teleport to use when installing from the repository.{{ .PublicProxyAddr }}: the public address of the Teleport Proxy Service to connect to.{{ .RepoChannel }}: Optional package repository (apt/yum) channel name. Has format<channel>/<version>e.g. stable/v16. See installation for more details.{{ .AutomaticUpgrades }}: indicates whether Automatic Updates are enabled or disabled. Its value is eithertrueorfalse. See Automatic Agent Updates for more information.{{ .TeleportPackage }}: the Teleport package to use. Its value is eitherteleport-entorteleportdepending on whether the cluster is enterprise or not.
These can be used as follows:
kind: installer
metadata:
  name: default-installer
spec:
  script: |
    echo {{ .PublicProxyAddr }}
    echo Teleport-{{ .MajorVersion }}
    echo Repository Channel: {{ .RepoChannel }}
version: v1
Which, when retrieved for installation, will evaluate to a script with the following contents:
echo teleport.example.com
echo Teleport-16.1.0
echo Repository Channel: stable/v16.1.0
The default installer will take the following actions:
- Add an official Teleport repository to supported Linux distributions.
- Install Teleport via
aptoryum. - Generate the Teleport config file and write it to
/etc/teleport.yaml. - Enable and start the Teleport service.
Next steps
- Read Joining Services via GCP for more information on GCP tokens.
- Full documentation on GCP discovery configuration can be found through the config file reference documentation.
- The complete default installer can be found with the Teleport source .