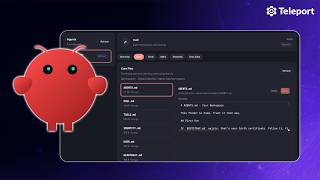
Access OpenClaw using the Teleport Application Service
OpenClaw is a personal AI assistant that you can deploy on your own hardware or cloud servers.
This guide shows you how to protect access to your OpenClaw Control UI using Teleport.
How it works
OpenClaw exposes a local web interface on port 18789 for communication with the agent. By default, this interface is bound to localhost. Exposing it publicly without proper security controls creates significant risk.
Teleport can secure this setup by acting as a secure gateway. It provides:
- Zero-trust web access: Access the web interface through a secure Teleport proxy without exposing public ports.
- Secure SSH: Manage the underlying server using Teleport’s identity-based SSH access.
- Origin validation: OpenClaw can be configured to only accept requests from your trusted Teleport domain.
Prerequisites
-
A running Teleport cluster. If you want to get started with Teleport, sign up for a free trial or set up a demo environment.
-
The
tctlandtshclients.Installing
tctlandtshclients-
Determine the version of your Teleport cluster. The
tctlandtshclients must be at most one major version behind your Teleport cluster version. Send a GET request to the Proxy Service at/v1/webapi/findand use a JSON query tool to obtain your cluster version. Replace teleport.example.com:443 with the web address of your Teleport Proxy Service:TELEPORT_DOMAIN=teleport.example.com:443TELEPORT_VERSION="$(curl -s https://$TELEPORT_DOMAIN/v1/webapi/find | jq -r '.server_version')" -
Follow the instructions for your platform to install
tctlandtshclients:- Mac
- Windows - Powershell
- Linux
Download the signed macOS .pkg installer for Teleport, which includes the
tctlandtshclients:curl -O https://cdn.teleport.dev/teleport-${TELEPORT_VERSION?}.pkgIn Finder double-click the
pkgfile to begin installation.dangerUsing Homebrew to install Teleport is not supported. The Teleport package in Homebrew is not maintained by Teleport and we can't guarantee its reliability or security.
curl.exe -O https://cdn.teleport.dev/teleport-v${TELEPORT_VERSION?}-windows-amd64-bin.zipUnzip the archive and move the `tctl` and `tsh` clients to your %PATH%
NOTE: Do not place the `tctl` and `tsh` clients in the System32 directory, as this can cause issues when using WinSCP.
Use %SystemRoot% (C:\Windows) or %USERPROFILE% (C:\Users\<username>) instead.
All of the Teleport binaries in Linux installations include the
tctlandtshclients. For more options (including RPM/DEB packages and downloads for i386/ARM/ARM64) see our installation page.curl -O https://cdn.teleport.dev/teleport-v${TELEPORT_VERSION?}-linux-amd64-bin.tar.gztar -xzf teleport-v${TELEPORT_VERSION?}-linux-amd64-bin.tar.gzcd teleportsudo ./installTeleport binaries have been copied to /usr/local/bin
-
- A server to host OpenClaw (e.g., AWS EC2, Raspberry Pi, or mini PC).
- An AI model provider account for the agent's backend.
Step 1/4. Set up the OpenClaw server
While you can host OpenClaw on local hardware like a Raspberry Pi or Mac mini, this guide uses an AWS EC2 instance as an example.
- Log into the AWS Console and launch a new Ubuntu instance.
- Choose an instance type (e.g.,
t3.smallfor a balance of performance and free-tier). - Ensure your Security Group allows SSH access so you can perform the initial installation.
Step 2/4. Install and configure OpenClaw
Once your server is running, connect via SSH to install the agent.
-
Run the official OpenClaw one-liner installation script:
curl -fsSL https://openclaw.ai/install.sh | bash -
Follow the interactive prompts to accept the security warnings, select your preferred AI model, and authenticate. Skip channel and skill setup if you only need the web interface.
-
After installation, you may need to refresh your shell to use the
openclawCLI command:source ~/.bashrc # or ~/.zshrc
Step 3/4. Enroll the server and application with Teleport
-
Generate a new join token that allows both the Node and App roles.
From a machine with
tctlaccess to your Teleport cluster (see Prerequisites), run:tctl tokens add --type=node,app --ttl=30m --format=textNote the output. You will use this token in the
teleport configurecommand below to validate that your server and application requesting to join the Teleport cluster are legitimate. -
On your OpenClaw server, install the Teleport Agent using the cluster install script:
curl "https://example.teleport.sh:443/scripts/install.sh" | sudo bash -
Generate a Teleport configuration that enables both the SSH Service and the Application Service:
sudo teleport configure \ --proxy="example.teleport.sh:443" \ --token="token generated above" \ --roles=node,app \ --app-name=openclaw \ --app-uri=http://127.0.0.1:18789 \ --output=file -
Finally, enable and start the Teleport Agent:
sudo systemctl enable teleportsudo systemctl start teleportYou should now see the OpenClaw server and application enrolled in your Teleport UI.

Step 4/4. Pair OpenClaw with Teleport
OpenClaw requires that any devices accessing it, outside of localhost, be explicitly paired. Pairing is OpenClaw's owner approval step that dictates which devices are allowed to join the gateway network.
Configure allowed origins
Edit ~/.openclaw/openclaw.json and add your Teleport URL to the allowedOrigins section. Replace your-teleport-proxy.com with your Teleport proxy address:
"gateway": {
  ...
  "controlUi": {
    "allowedOrigins": ["https://openclaw.your-teleport-proxy.com"]
  }
  ...
}
After adding the allowed origin, restart OpenClaw and try accessing the app through Teleport. You will see an error: "unauthorized: gateway token missing."
Complete the pairing process
-
Retrieve your gateway token from
~/.openclaw/openclaw.jsonundergateway.auth.token.tipIf your token is stored in plain text, consider moving it to an
.envfile and referencing it with the${OPENCLAW_GATEWAY_TOKEN}variable in your config file. In addition, be sure to rotate this periodically. -
Open the OpenClaw app from your Teleport Web UI and append the token to the URL:
https://openclaw.your-teleport-proxy.com?token=<your-gateway-token>This initiates a pairing request.
-
On your OpenClaw server, retrieve your pairing request ID:
openclaw devices list -
Approve the device using the request ID request-id:
openclaw devices approve request-id -
Restart the OpenClaw gateway:
openclaw gateway restart
You can now securely access your AI agent through the Teleport-protected URL from anywhere.

Once Teleport is confirmed working, you can further harden your server by removing standard SSH access from your AWS security group. Teleport will still be able to provide secure access to the machine.
Further reading
- Learn about the Teleport Agentic Identity Framework.