AWS Console and CLI Access with Roles Anywhere
Teleport integrates with AWS IAM Roles Anywhere to provide AWS Console and CLI access. This allows you to take advantage of Teleport role-based access controls, just-in-time Access Requests and other Teleport Zero Trust Access and Identity Governance capabilities to manage access to your AWS infrastructure.
If you're already using AWS IAM Roles Anywhere and looking to protect access to your AWS environment with Teleport, while ensuring full compatibility with all AWS API based tooling (such as CLI tools or terraform), this guide provides a recommended way for you to do that. If you're looking to provide AWS CLI access to your users with audit capture by going through Teleport proxy, or Roles Anywhere are not adopted at your organization, take a look at the guide for agent-based AWS access instead.
This guide will explain how to:
- Configure AWS Console and CLI access with Teleport using Roles Anywhere
- Access the AWS Management Console
- Access the AWS Command Line Interface (CLI)
- Access applications using AWS SDKs
How it works
Teleport uses AWS IAM Roles Anywhere to issue temporary credentials for assuming target IAM roles.
Access is managed through Teleport's RBAC policies, ensuring credentials are only generated for authorized users and roles. No additional service is required, as it runs in the control plane (Proxy Service and Auth Service).
For web console access, you can navigate to the resources page in Teleport Web UI and click on the AWS Application which is named after the Roles Anywhere profile.
For CLI and SDK based access, you must use tsh to obtain AWS credentials.
Prerequisites
-
A running Teleport cluster. If you want to get started with Teleport, sign up for a free trial or set up a demo environment.
-
The
tctlandtshclients.Installing
tctlandtshclients-
Determine the version of your Teleport cluster. The
tctlandtshclients must be at most one major version behind your Teleport cluster version. Send a GET request to the Proxy Service at/v1/webapi/findand use a JSON query tool to obtain your cluster version. Replace teleport.example.com:443 with the web address of your Teleport Proxy Service:TELEPORT_DOMAIN=teleport.example.com:443TELEPORT_VERSION="$(curl -s https://$TELEPORT_DOMAIN/v1/webapi/find | jq -r '.server_version')" -
Follow the instructions for your platform to install
tctlandtshclients:- Mac
- Windows - Powershell
- Linux
Download the signed macOS .pkg installer for Teleport, which includes the
tctlandtshclients:curl -O https://cdn.teleport.dev/teleport-${TELEPORT_VERSION?}.pkgIn Finder double-click the
pkgfile to begin installation.dangerUsing Homebrew to install Teleport is not supported. The Teleport package in Homebrew is not maintained by Teleport and we can't guarantee its reliability or security.
curl.exe -O https://cdn.teleport.dev/teleport-v${TELEPORT_VERSION?}-windows-amd64-bin.zipUnzip the archive and move the `tctl` and `tsh` clients to your %PATH%
NOTE: Do not place the `tctl` and `tsh` clients in the System32 directory, as this can cause issues when using WinSCP.
Use %SystemRoot% (C:\Windows) or %USERPROFILE% (C:\Users\<username>) instead.
All of the Teleport binaries in Linux installations include the
tctlandtshclients. For more options (including RPM/DEB packages and downloads for i386/ARM/ARM64) see our installation page.curl -O https://cdn.teleport.dev/teleport-v${TELEPORT_VERSION?}-linux-amd64-bin.tar.gztar -xzf teleport-v${TELEPORT_VERSION?}-linux-amd64-bin.tar.gzcd teleportsudo ./installTeleport binaries have been copied to /usr/local/bin
-
- To check that you can connect to your Teleport cluster, sign in with
tsh login, then verify that you can runtctlcommands using your current credentials. For example, run the following command, assigning teleport.example.com to the domain name of the Teleport Proxy Service in your cluster and [email protected] to your Teleport username:If you can connect to the cluster and run thetsh login --proxy=teleport.example.com --user=[email protected]tctl statusCluster teleport.example.com
Version 19.0.0-dev
CA pin sha256:abdc1245efgh5678abdc1245efgh5678abdc1245efgh5678abdc1245efgh5678
tctl statuscommand, you can use your current credentials to run subsequenttctlcommands from your workstation. If you host your own Teleport cluster, you can also runtctlcommands on the computer that hosts the Teleport Auth Service for full permissions. - Permissions in AWS to:
- create IAM Roles Anywhere trust anchor
- create IAM Roles Anywhere profiles
- create IAM roles
awscommand line interface (CLI) tool in PATH. Read the AWS documentation to install or update the latest version of the AWS CLI.
Step 1/4. Configure AWS IAM Roles Anywhere integration
In this section, you will configure AWS IAM resources to allow Teleport to issue AWS credentials.
Navigate to the Teleport Web UI, click on Enroll New Resource in the Resources listing page, and follow the guide after clicking on AWS CLI/Console Access tile.
Manually configure the integration
You will create the following resources in AWS:
| Name | Resource | Function |
|---|---|---|
TeleportRolesAnywhereIntegrationCA | IAM Roles Anywhere trust anchor | Allow access from Teleport into AWS. |
TeleportRolesAnywhereProfileSync | IAM role | Allows Teleport to iterate over AWS Roles Anywhere profiles and import them as resources. |
TeleportRolesAnywhereProfileSync | IAM Roles Anywhere profile | Allows access to TeleportRolesAnywhereProfileSync IAM role. |
Create an IAM Roles Anywhere Trust Anchor
First, you will create an IAM Roles Anywhere Trust Anchor which trusts the Teleport's AWS Roles Anywhere CA.
- Obtain the Teleport certificate:
tctl auth export --type awsra-----BEGIN CERTIFICATE-----MIIDqjCCApKgAwIBAgIQMIK8/WiQ/rUOrjlmB0IHVTANBgkqhkiG9w0BAQsFADBv...-----END CERTIFICATE-----
- Navigate to Create a trust anchor page.
Name the trust anchor
TeleportRolesAnywhereIntegrationCAand add the Teleport'sawsraCA certificate you obtained in the previous step as an External certificate bundle. - Copy the Trust Anchor ARN Trust Anchor ARN
Set up Profile Sync
Next, you will create the required AWS resources to enable the profile sync.
- Navigate to Create Role and create a new IAM role called
TeleportRolesAnywhereProfileSync. Trust policy must include the Roles Anywhere service principal:
{
    "Version": "2012-10-17",
    "Statement": [
        {
            "Effect": "Allow",
            "Principal": {
                "Service": "rolesanywhere.amazonaws.com"
            },
            "Action": [
                "sts:AssumeRole",
                "sts:SetSourceIdentity",
                "sts:TagSession"
            ]
        }
    ]
}
- Copy the IAM role ARN Role ARN
- Navigate to the TeleportRolesAnywhereProfileSync Role and create a new inline policy:
{
    "Version": "2012-10-17",
    "Statement": [
        {
            "Sid": "RolesAnywhereProfileSync",
            "Effect": "Allow",
            "Action": [
                "rolesanywhere:ListProfiles",
                "rolesanywhere:ListTagsForResource",
                "rolesanywhere:ImportCrl",
                "iam:GetRole"
            ],
            "Resource": [
                "*"
            ]
        }
    ]
}
- Now, navigate to the Create a Profile page and name it
TeleportRolesAnywhereProfileSync. Add the role created in the last step (TeleportRolesAnywhereProfileSync) and create the Profile. - Copy the Profile ARN Profile ARN
Create a Teleport AWS IAM Roles Anywhere integration
Now that the required AWS resources are created, you can create a Teleport AWS IAM Roles Anywhere integration.
- Write the following contents to a file called
roles-anywhere-integration.yaml:
kind: integration
sub_kind: aws-ra
version: v1
metadata:
  name: Integration Name
spec:
  aws_ra:
    trust_anchor_arn: Trust Anchor ARN
    profile_sync_config:
      enabled: true
      profile_arn: Profile ARN
      role_arn: Role ARN
- Create the integration with the following command:
tctl create -f roles-anywhere-integration.yaml
Teleport will now start syncing AWS IAM Roles Anywhere profiles as AWS applications, every 5 minutes.
Step 2/4. Create an AWS IAM Roles Anywhere profile and assign IAM roles
Now, you will create an example profile and role so that you can test the integration.
If you are already leveraging AWS IAM Roles Anywhere profiles, you can skip this step.
- Navigate to Create role and create a new IAM role called
ExampleReadOnlyAccess. Trust policy must include the Roles Anywhere service principal:
{
    "Version": "2012-10-17",
    "Statement": [
        {
            "Effect": "Allow",
            "Principal": {
                "Service": "rolesanywhere.amazonaws.com"
            },
            "Action": [
                "sts:AssumeRole",
                "sts:SetSourceIdentity",
                "sts:TagSession"
            ]
        }
    ]
}
Add the AWS-managed ReadOnlyAccess policy to the role.
Copy the role ARN Read Only Role ARN.
- Now, navigate to Create a Profile page and name it
ExampleReadOnlyAccess. Add the role created in the last step (ExampleReadOnlyAccess) and create the Profile.
Copy the Profile ARN Read Only Profile ARN.
Step 3/4. Set up access
Now you need to grant your users access to the imported AWS profiles/roles.
You will create a Teleport role which will grant access to the ExampleReadOnlyAccess Profile and associated IAM role.
- Web UI
- Via tctl
Open your Teleport cluster Web UI, select the "Zero Trust Access" and then "Roles".
Click the "Create New Role" button, set the role name to aws-ro-access.
Next, add an Application Access entry, in the Resources section, with the following:
- Labels:
teleport.dev/aws-roles-anywhere-profile-arn': 'Read Only Profile ARN' - AWS Role ARNs: Read Only Role ARN
Proceed to the next steps and create the role.
- Create a file named
example-read-only-access-role.yamlwith the following contents:
kind: role
version: v8
metadata:
  name: aws-ro-access
spec:
  allow:
    app_labels:
      'teleport.dev/aws-roles-anywhere-profile-arn': 'Read Only Profile ARN'
    aws_role_arns:
    - Read Only Role ARN
- Create the role with the following command:
tctl create -f example-read-only-access-role.yaml
Assign the Role to the users you want to allow access. You can also assign it to an Access List or use it in conjunction with Access Requests.
Step 4/4. Access AWS resources
Now that you have configured the Integration and set up the Role, users can access AWS resources through Teleport.
Access AWS Management Console
-
Visit the home page of the Teleport Web UI and click Resources. If the Integration found any profiles as expected, the Web UI will display the name of the Profile. If you don't see any profiles, see the Troubleshooting section.
-
Click the Launch button for the AWS Console application, then click on the role you would like to assume when signing in to the AWS Console:
-
You will get redirected to the AWS Management Console, signed in with the selected role. You should see your Teleport user name as a federated login assigned to
ExampleReadOnlyRolein the top-right corner of the AWS Console: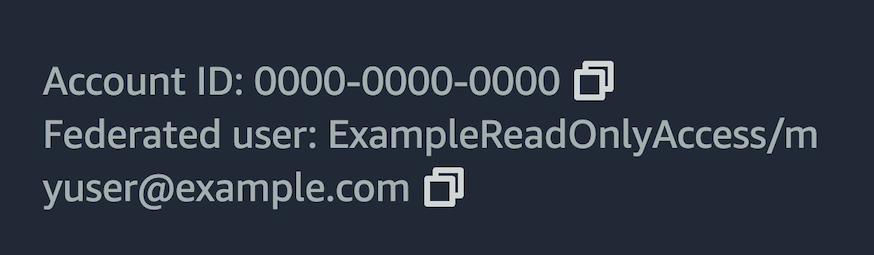
Access AWS using AWS CLI or other AWS SDK based tools
Obtain the credentials
On your desktop, log into the AWS App Profile that was synced:
tsh apps login --aws-role arn:aws:iam::278576220453:role/ExampleReadOnlyAccess example-read-only-accessLogged into AWS app "example-read-only-access".
Your IAM role:    arn:aws:iam::123456789012:role/ExampleReadOnlyAccess
Example AWS CLI commands:    aws --profile example-read-only-access s3 ls    AWS_PROFILE=example-read-only-access aws s3 ls
Access AWS using AWS CLI
You can now access all your AWS resources from the command line using the aws command line tool.
You need to pass the --profile flag or export the AWS_PROFILE environment variable with the name of the profile you created earlier.
aws --profile example-read-only-access s3 ls...
Access AWS from Terraform
Using Terraform requires you to set the profile in the provider.
provider "aws" {
  profile = "example-read-only-access"
  // ...
}
Setting the AWS_PROFILE environment variable is also an option.
Troubleshooting
Read this section if you run into issues while following this guide.
Missing Profiles in Resources page
If you don't see the expected AWS profiles in the Teleport Web UI, check the following:
-
Ensure the profile sync configuration is enabled and the
profile_name_filtersare set accordingly (set it to*if you want to import all the profiles):tctl get integration/Integration Name...spec: aws_ra: profile_sync_config: enabled: true profile_arn: arn:aws:rolesanywhere:eu-west-2:123456789012:profile/5c659b8f-7ca3-48ef-a1aa-14c9c93506ee profile_name_filters: - MarcoRA-* role_arn: arn:aws:iam::123456789012:role/TeleportRolesAnywhereProfileSync trust_anchor_arn: arn:aws:rolesanywhere:eu-west-2:123456789012:trust-anchor/69a0c3f8-3157-49b2-85dd-75bdef828a68 -
You can get the integration status summary by running the following command:
tctl get integration/Integration Name...status: aws_ra: last_profile_sync: end_time: "2025-07-23T15:46:27.475629Z" error_message: "" start_time: "2025-07-23T15:46:26.334536Z" status: SUCCESS synced_profiles: 4Look for any error message you might have.
-
Ensure that your Teleport role allows you access to all the expected profiles. AWS app resources have a specific label which you can use to control access:
teleport.dev/aws-roles-anywhere-profile-arn. Set it to*to allow access to all profiles, like so:kind: role spec: allow: app_labels: 'teleport.dev/aws-roles-anywhere-profile-arn': '*'
Next steps
Now that you know how to set up Teleport to protect access to the AWS Management Console and APIs, you can tailor your setup to the needs of your organization.
Refine your AWS IAM role mapping
The aws_role_arns field supports template variables so they can be populated dynamically when a user authenticates to Teleport.
For example, you can configure your identity provider to define a SAML attribute or OIDC claim called aws_role_arns, then use this field to list each user's permitted AWS role ARNs on your IdP.
If you define a Teleport role to mention the {{external.aws_role_arns}} variable, the Auth Service will fill in the user's permitted ARNs based on data from the IdP:
    aws_role_arns:
    - {{external.aws_role_arns}}
See the Access Controls Reference for all of the variables and functions you can use in the aws_role_arns field.
Create Roles to grant access to a specific profile and IAM roles
You can create multiple Teleport roles to grant access to the profiles and IAM roles for each Profile.
See Role Access Requests to learn more about creating Roles and how to access them using Access Requests.