
Teleport
Run Teleport Policy's Access Graph feature on Self-Hosted Clusters with Helm
- Version 17.x
- Version 16.x
- Version 15.x
- Version 14.x
- Older Versions
Using Teleport Policy's Access Graph with a self-hosted Teleport cluster requires setting up the Access Graph, a dedicated service which uses PostgreSQL as its backing storage and communicates with Auth Service and Proxy Service to collect information about resources and access.
This guide will help you set up the Access Graph service in a Kubernetes cluster using a Helm Chart, and enable the Access Graph feature in your Teleport cluster.
The full listing of supported parameters can be found in the Helm chart reference.
Access Graph is a feature of the Teleport Policy product that is only available to Teleport Enterprise customers.
Prerequisites
- Kubernetes >= v1.21
- Helm >= 3.4.2
- A running Teleport Enterprise cluster v14.3.6 or later.
- For the purposes of this guide, we assume that the Teleport cluster is set up
using the
teleport-clusterHelm chart in the same Kubernetes cluster that will be used to deploy Access Graph.
- For the purposes of this guide, we assume that the Teleport cluster is set up
using the
- An updated
license.pemwith Teleport Policy enabled. - A PostgreSQL database server v14 or later.
- Access Graph needs a dedicated database to store its data.
The user that Teleport connects to the database with needs to be the owner of this database, or have similar broad permissions:
at least the
CREATE TABLEprivilege on thepublicschema, and theCREATE SCHEMAprivilege. - Amazon RDS for PostgreSQL is supported.
- Access Graph needs a dedicated database to store its data.
The user that Teleport connects to the database with needs to be the owner of this database, or have similar broad permissions:
at least the
- A TLS certificate for the Access Graph service
- The TLS certificate must be issued for "server authentication" key usage,
and must contain an X.509 v3
subjectAltNameextension with the Kubernetes service name for Access Graph (teleport-access-graph.teleport-access-graph.svc.cluster.localby default).
- The TLS certificate must be issued for "server authentication" key usage,
and must contain an X.509 v3
Step 1/4. Add the Teleport Helm chart repository
Set up the Teleport Helm repository.
Allow Helm to install charts that are hosted in the Teleport Helm repository:
helm repo add teleport https://charts.releases.teleport.dev
Update the cache of charts from the remote repository so you can upgrade to all available releases:
helm repo update
Step 2/4. Set up Access Graph
You will need a copy of your Teleport cluster's host certificate authority (CA). Access Graph requires incoming connections to be authenticated via host certificates that the host CA issues to the Auth Service and Proxy Service.
The host CA can be retrieved in one of the following ways:
curl 'https://teleport.example.com/webapi/auth/export?type=tls-host'-----BEGIN CERTIFICATE-----MIIDqjCCApKgAwIBAgIQMIK8/WiQ/rUOrjlmB0IHVTANBgkqhkiG9w0BAQsFADBv<...>-----END CERTIFICATE-----
tsh login --proxy=teleport.example.comtctl get cert_authorities --format=json \ | jq -r '.[] | select(.spec.type == "host") | .spec.active_keys.tls[].cert' \ | base64 -d-----BEGIN CERTIFICATE-----MIIDqjCCApKgAwIBAgIQMIK8/WiQ/rUOrjlmB0IHVTANBgkqhkiG9w0BAQsFADBv<...>-----END CERTIFICATE-----
Then, create the namespace and required secrets for the Access Graph deployment. You can skip the final command if you are instead using cert-manager to issue the certificate, or otherwise have already provisioned the TLS certificate for Access Graph in your Kubernetes cluster.
kubectl create namespace teleport-access-graphkubectl -n teleport-access-graph create secret generic teleport-access-graph-postgres \ --from-literal uri="postgres://access_graph_user:[email protected]:5432/access_graph_db?sslmode=require"kubectl -n teleport-access-graph create secret tls teleport-access-graph-tls --cert=./certs/cert.crt --key=./certs/cert.key
The above commands assume that you have the TLS certificate and private key for the Access Graph server stored under the ./certs directory.
The following script can be used to quickly generate a certificate authority and server TLS certificate for deploying Access Graph.
#!/usr/bin/env bash

set -e

mkdir -p ./certs
cd ./certs

openssl genrsa -aes256 -out ca.key 4096
openssl req -x509 -new -key ca.key -sha256 -days 3652 -out ca.crt -subj '/CN=root'
openssl req -new -out cert.csr -newkey rsa:4096 -nodes -keyout cert.key -subj '/CN=Access Graph'
openssl x509 -req -in cert.csr -CA ca.crt -CAkey ca.key -CAcreateserial -out cert.crt -days 3652 -sha256 \
  -extfile <(printf 'extendedKeyUsage = serverAuth, clientAuth\nsubjectAltName = DNS:teleport-access-graph.teleport-access-graph.svc.cluster.local')

echo "Certificates issued successfully"
The script will ask to input the same password 4 times: twice to create and confirm the password to encrypt the CA private key material with, then once to use the private key to self-sign the CA certificate, and finally once to use for signing the Access Graph server certificate.
Please note that this script is only provided for proof-of-concept deployments, and may not follow the best security practices.
After provisioning the secrets, create the following file named tag-values.yaml file for the Access Graph deployment,
replacing the value under the clusterHostCAs key with the Teleport Host CA certificate retrieved previously.
postgres:
  secretName: "teleport-access-graph-postgres"

tls:
  # You may need to change this value if using cert-manager or other means
  # to provision TLS certificates for your Kubernetes workloads.
  existingSecretName: "teleport-access-graph-tls"

clusterHostCAs:
  # Replace this with the certificate retrieved in Step 1.
  # `clusterHostCAs` is an array of multiline YAML strings, `- |` must not be removed, and the indentation must be kept.
  - |
    -----BEGIN CERTIFICATE-----
    MIIDqjCCApKgAwIBAgIQMIK8/WiQ/rUOrjlmB0IHVTANBgkqhkiG9w0BAQsFADBv
    <...>
    -----END CERTIFICATE-----
Finally, deploy the Access Graph service using Helm:
helm install -n teleport-access-graph -f tag-values.yaml --version 1.20.4 teleport-access-graph teleport/teleport-access-graphkubectl -n teleport-access-graph rollout status deployment/teleport-access-graph # Wait for the deployment to succeed
Step 3/4. Update the Teleport Auth Service configuration
To enable connectivity between the Teleport Auth Service and the Access Graph Service, the Auth Service configuration needs to be updated with:
- The Access Graph service address
- The path to the CA which issued the Access Graph service TLS certificate.
- This path must refer to a volume containing the CA, mounted on the Teleport pods.
- Specifying the CA certificate file can be skipped if you are using a CA that is already trusted by the Teleport cluster
(e.g. via the
tls.existingCASecretNameoption), or if the certificate was issued by a CA included in the Mozilla CA Certificate List.
Create a ConfigMap containing the CA certificate as follows:
kubectl -n teleport-cluster-namespace create configmap teleport-access-graph-ca \ --from-file=ca.pem=./certs/ca.crt
Then, update the values for the deployment of the teleport-cluster Helm chart as follows:
auth:
  teleportConfig:
    # <...>

    # Add a section for configuring the Access Graph connection.
    access_graph:
      enabled: true
      endpoint: teleport-access-graph.teleport-access-graph.svc.cluster.local:443
      # Omit the `ca` key if your Teleport cluster already trusts the issuing CA.
      ca: /var/run/access-graph/ca.pem

# Provide the Access Graph CA to the Teleport Auth Service as a volume.
# Omit all of the below if your Teleport cluster already trusts the issuing CA.
extraVolumes:
  - name: tag-ca
    configMap:
      name: teleport-access-graph-ca

extraVolumeMounts:
  - name: tag-ca
    mountPath: /var/run/access-graph
If not using the teleport-cluster Helm chart, you will need to do the equivalent changes to your Teleport cluster deployment:
- Add the
access_graph:section at the top-level of the YAML config file for the Teleport Auth Service. - Mount the created ConfigMap as a volume so that the Auth Service can read the CA certificate.
Finally, redeploy the Helm chart (assuming the values are stored in values-teleport.yaml).
Once the Auth Service changes succeed, restart the Proxy Service.
helm upgrade -n teleport-cluster-namespace -f values-teleport.yaml \ --version <version> teleport-cluster-deployment-name teleport/teleport-clusterkubectl -n teleport-cluster-namespace rollout status deployment/teleport-auth # Wait for the deployment to succeedkubectl -n teleport-cluster-namespace rollout restart deployment/teleport-proxykubectl -n teleport-cluster-namespace rollout status deployment/teleport-proxy # Wait for the deployment to succeed
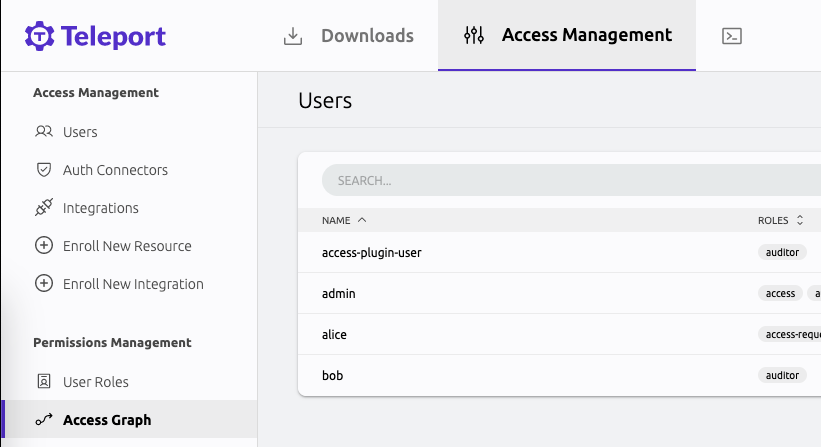
Step 4/4. View the Access Graph in the Web UI
You can find the Access Graph in the "Access Management" tab in the Web UI.
To access the interface, your user must have a role that allows list and read verbs on the access_graph resource, e.g.:
kind: role
version: v7
metadata:
  name: my-role
spec:
  allow:
    rules:
    - resources:
      - access_graph
      verbs:
      - list
      - read
The preset editor role has the required permissions by default.