
Teleport
Set up Single Sign-On with GitHub
- Version 17.x
- Version 16.x
- Version 15.x
- Version 14.x
- Older Versions
How To Use Teleport: Using GitHub for Single Sign On (SSO)
Length: 09:52
This guide explains how to set up GitHub Single Sign On (SSO) so you can automatically map teams in your GitHub organization to users and roles in Teleport.
Prerequisites
-
A GitHub organization with at least one team.
In Teleport Community Edition, this organization must not have external SSO set up, or Teleport will refuse to create the GitHub authentication connector.
In Teleport Enterprise and Enterprise Cloud, organization can be hosted from either GitHub Cloud or GitHub Enterprise Server.
-
Teleport role with access to maintaining
githubresources for usingtctlfrom the Desktop. This is available in the defaulteditorrole.
-
A running Teleport cluster version 16.1.0 or above. If you want to get started with Teleport, sign up for a free trial or set up a demo environment.
-
The
tctladmin tool andtshclient tool.Visit Installation for instructions on downloading
tctlandtsh.
- To check that you can connect to your Teleport cluster, sign in with
tsh login, then verify that you can runtctlcommands using your current credentials.tctlis supported on macOS and Linux machines. For example:If you can connect to the cluster and run thetsh login --proxy=teleport.example.com --user=[email protected]tctl statusCluster teleport.example.com
Version 16.1.0
CA pin sha256:abdc1245efgh5678abdc1245efgh5678abdc1245efgh5678abdc1245efgh5678
tctl statuscommand, you can use your current credentials to run subsequenttctlcommands from your workstation. If you host your own Teleport cluster, you can also runtctlcommands on the computer that hosts the Teleport Auth Service for full permissions.
Step 1/4. Create a GitHub OAuth app
Create and register a GitHub OAuth App. When you do so, ensure that your OAuth App's "Authentication callback URL" is the following:
https://PROXY_ADDRESS/v1/webapi/github/
Replace PROXY_ADDRESS with be the public address of the Teleport Proxy Service
or your Teleport Cloud workspace URL (e.g., example.teleport.sh).
The app must have the read:org scope in order to be able to read org and team
membership details.
Instructions for creating a GitHub OAuth app are available in GitHub's documentation
Create a client secret to use along with the client ID in the next step:
Step 2/4. Create a GitHub authentication connector
In this section, you will define a GitHub authentication connector using tctl.
On your workstation, create a file called client-secret.txt consisting only of
your client secret.
Update this example command with:
- Your OAuth app's client ID and client secret created during the previous step.
- The roles you want to map from your GitHub organization to Teleport roles. Roles are defined in the Repository roles section of your organization's settings.
See tctl sso configure github for a full reference of flags for this command:
tctl sso configure github \--id=GITHUB-CLIENT-ID \--secret=$(cat client-secret.txt) \--teams-to-roles=ORG-NAME,github-team,access,editor \> github.yaml
GitHub organizations and teams should be referred to by their slug, not display name.
To create the team slug, GitHub replaces special characters in the name string, changes all words to lowercase,
and replaces spaces with a - separator. For example, My TEam Näme would become my-team-name.
The organization slug is treated the same except the organization is not changed to lowercase.
You can confirm the slug in GitHub Web application URLs or via the GitHub API.
Example: navigate to the team My Team in the GitHub web application.
The URL https://github.com/orgs/org-name/teams/my-team
shows the slug is my-team.
The contents of github.yaml should resemble the following:
kind: github
metadata:
  name: github
spec:
  api_endpoint_url: ""
  client_id: <client-id>
  client_secret: <client-secret>
  display: GitHub
  endpoint_url: ""
  redirect_url: https://<proxy-address>/v1/webapi/github/callback
  teams_to_logins: null
  teams_to_roles:
    - organization: ORG-NAME
      roles:
        - access
        - editor
      team: github-team
version: v3
kind: github
metadata:
  name: github
spec:
  api_endpoint_url: https://api.github.com
  client_id: <client-id>
  client_secret: <client-secret>
  display: GitHub
  endpoint_url: https://github.com
  redirect_url: https://<proxy-address>/v1/webapi/github/callback
  teams_to_logins: null
  teams_to_roles:
    - organization: org-name
      roles:
        - access
        - editor
        - reviewer
      team: github-team
version: v3
You can add multiple instances of the --teams-to-roles flag or edit the connector
file to define multiple mappings. For example:
tctl sso configure github \--id=GITHUB-CLIENT-ID \--secret=$(cat client-secret.txt) \--teams-to-roles=ORG-NAME,github-team,access,editor \--teams-to-roles="org-name,administrators,admins \--teams-to-roles="different-org,developers,dev \> github.yaml
spec.
  teams_to_roles:
    - organization: org-name
      roles:
        - access
        - editor
      team: github-team
    - organization: org-name
      roles:
        - admins
      team: administrators
    - organization: different-org
      roles:
        - devs
      team: developers
For self-hosted GitHub Enterprise servers, you can specify the server
instance endpoints with the --endpoint-url, --api-endpoint-url parameters:
tctl sso configure github \--id=GITHUB-CLIENT-ID \--secret=$(cat client-secret.txt) \--teams-to-roles=ORG-NAME,github-team,access,editor \--endpoint-url=https://github-enterprise-server-address--api-endpoint-url=https://api-github-enterprise-server-address> github.yaml
...
spec:
  ...
  api_endpoint_url: https://<api-github-enterprise-server-address>
  endpoint_url: https://<github-enterprise-server-address>
  ...
You can test the connector configuration before applying it to your cluster. This is strongly encouraged to avoid interruption to active clusters:
cat github.yaml | tctl sso testIf browser window does not open automatically, open it by clicking on the link: http://127.0.0.1:52690/35714f6b-...Success! Logged in as: alice--------------------------------------------------------------------------------Authentication details:   roles:   - access   - editor   traits:     github_teams:     - admins     kubernetes_groups: null     kubernetes_users: null     logins:     - alice   username: alice--------------------------------------------------------------------------------[GitHub] Received claims:organization_to_teams:  Octocats:  - adminsteams:- adminsusername: alice
--------------------------------------------------------------------------------[GitHub] Connector team to roles mapping:- organization: Octocats  roles:  - access  - editor  team: admins
--------------------------------------------------------------------------------For more details repeat the command with --debug flag.
Finally, create the connector using tctl:
tctl create -f github.yamlauthentication connector "github" has been created
When going through the GitHub authentication flow for the first time, the application must be granted access to all organizations that are present in the "teams to logins" mapping, otherwise Teleport will not be able to determine team memberships for these organizations.
After a user authenticates, Teleport will add the user's GitHub username to their
internal.logins trait for their Teleport session. The preset access role has this
trait variable configured to include the GitHub user as an authorized SSH login.
Here is an example role configuration snippet using the trait variable:
  allow:
    # List of allowed SSH logins
    logins: ['{{internal.logins}}', ubuntu, debian]

    # List of node labels that users can SSH into
    node_labels:
      '*': '*'
Step 3/4. Log in to Teleport using GitHub
You can now log in with Teleport using GitHub SSO. Run the following to log out of Teleport and log in again using GitHub SSO.
tsh logoutLogged out all users from all proxies.
tsh login --proxy=tele.example.com --auth=githubIf browser window does not open automatically, open it by clicking on the link: http://127.0.0.1:56334/6bf976e6-a4be-4898-94eb-8a7b01af2158
tsh logoutLogged out all users from all proxies.
tsh login --proxy=mytenant.teleport.sh --auth=githubIf browser window does not open automatically, open it by clicking on the link: http://127.0.0.1:56334/6bf976e6-a4be-4898-94eb-8a7b01af2158
You can also log to the web UI using GitHub by clicking Other sign-in options at the login screen.
When you sign in for the first time, you will see a prompt to authorize your GitHub OAuth app:
Teleport will request only the read:org OAuth scope. Read more about OAuth scopes in GitHub's documentation:
GitHub OAuth scopes
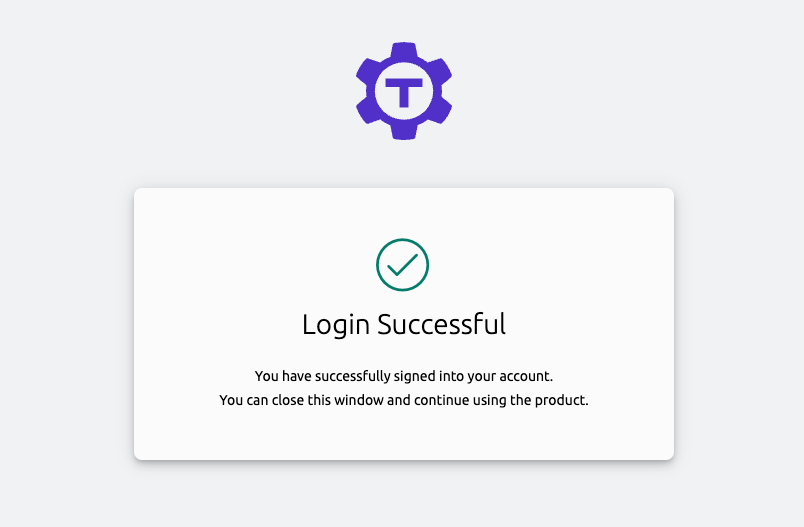
After logging in successfully, you will see the following:
You will receive the details of your user session within the CLI:
> Profile URL: https://tele.example.com:443 Logged in as: jeff Cluster: tele.example.com Roles: access Logins: jeff, ubuntu, debian Kubernetes: enabled Kubernetes users: dev Kubernetes groups: developer Valid until: 2023-03-08 17:13:50 -0600 CST [valid for 7h51m0s] Extensions: permit-port-forwarding, permit-pty, private-key-policy
> Profile URL: https://tele.example.com:443 Logged in as: jeff Cluster: tele.example.com Roles: access, requester Logins: jeff, ubuntu, debian Kubernetes: enabled Kubernetes users: dev Kubernetes groups: developer Valid until: 2023-03-08 17:13:50 -0600 CST [valid for 7h51m0s] Extensions: permit-port-forwarding, permit-pty, private-key-policy
> Profile URL: https://mytenant.teleport.sh:443 Logged in as: jeff Cluster: mytenant.teleport.sh Roles: access, requester Logins: jeff, ubuntu, debian Kubernetes: enabled Kubernetes users: dev Kubernetes groups: developer Valid until: 2023-03-08 17:13:50 -0600 CST [valid for 7h51m0s] Extensions: permit-port-forwarding, permit-pty, private-key-policy
Step 4/4. Configure authentication preference
In the previous step we signed in to Teleport using GitHub credentials by
specifying GitHub as our auth type. By editing the cluster_auth_preference
resource we can make it the default auth type.
Edit the existing cluster_auth_preference resource using tctl:
tctl edit cap
A temporary file will open in your default editor with your cluster_auth_preference definition.
Ensure that cap.yaml includes the following content:
kind: cluster_auth_preference
metadata:
  name: cluster-auth-preference
spec:
  type: github
  webauthn:
    rp_id: 'example.teleport.sh'
version: v2
For rp_id, use the public address of your Teleport Proxy Service or Teleport
Cloud workspace.
When you save and close the temporary file, tctl will update the resource:
cluster auth preference has been updated
You can also edit your Teleport configuration file to include the following:
# Snippet from /etc/teleport.yaml
auth_service:
  authentication:
    type: github
After logging out of tsh, you can log back in without specifying
--auth=github. You will automatically be redirected to the GitHub auth flow.
Troubleshooting
Troubleshooting SSO configuration can be challenging. Usually a Teleport administrator must be able to:
- Be able to see what SAML/OIDC claims and values are getting exported and passed by the SSO provider to Teleport.
- Be able to see how Teleport maps the received claims to role mappings as defined in the connector.
- For self-hosted Teleport Enterprise clusters, ensure that HTTP/TLS certificates are configured properly for both the Teleport Proxy Service and the SSO provider.
If something is not working, we recommend to:
- Double-check the host names, tokens and TCP ports in a connector definition.
Using the Web UI
If you get "access denied" or other login errors, the number one place to check is the Audit Log. Under the Management area you can access it within the Activity tab in the Teleport Web UI.
Example of a user being denied because the role clusteradmin wasn't set up:
{
  "code": "T1001W",
  "error": "role clusteradmin is not found",
  "event": "user.login",
  "method": "oidc",
  "success": false,
  "time": "2019-06-15T19:38:07Z",
  "uid": "cd9e45d0-b68c-43c3-87cf-73c4e0ec37e9"
}
Teleport does not show the expected Nodes
When Teleport's Auth Service receives a request to list Teleport Nodes (e.g., to
display Nodes in the Web UI or via tsh ls), it only returns the Nodes that the
current user is authorized to view.
For each Node in the user's Teleport cluster, the Auth Service applies the following checks in order and, if one check fails, hides the Node from the user:
- None of the user's roles contain a
denyrule that matches the Node's labels. - At least one of the user's roles contains an
allowrule that matches the Node's labels.
If you are not seeing Nodes when expected, make sure that your user's roles
include the appropriate allow and deny rules as documented in the
Teleport Access Controls Reference.
When configuring SSO, ensure that the identity provider is populating each user's
traits correctly. For a user to see a Node in Teleport, the result of populating a
template variable in a role's allow.logins must match at least one of a user's
traits.logins.
In this example a user will have usernames ubuntu, debian and usernames from the SSO trait logins for Nodes that have a env: dev label. If the SSO trait username is bob then the usernames would include ubuntu, debian, and bob.
kind: role
metadata:
  name: example-role
spec:
  allow:
    logins: ['{{external.logins}}', ubuntu, debian]
    node_labels:
      'env': 'dev'
version: v5
Single sign-on fails with OIDC
When encountering the error message "Failed to verify JWT: oidc: unable to verify JWT signature: no matching keys", it typically indicates a discrepancy between the algorithm used to sign the JWT token and the algorithm(s) supported by the JSON Web Key Set (JWKS). Specifically, the token might be signed with one algorithm, e.g., HS256, while the JWKS only lists keys for a different algorithm. e.g., RS256. This issue predominantly arises when using identity providers that offer extremely low-level functionality.
Here are some things to check:
- Verify the JWT header specifies the correct signing algorithm. This should match one of the algorithms listed in the keys section of the JWKS endpoint response.
- Ensure the JWKS endpoint is returning all relevant public keys. Sometimes key rotation can cause valid keys to be omitted.
To resolve the issue, align the JWT algorithm header with a supported algorithm in the JWKS. Rotate keys if necessary. Verify the JWKS only publishes the active public keys. With proper configuration, the signature should validate successfully.
Teams Not Mapping to Roles
If you are not seeing teams mapping to roles as expected confirm you
are using the slug of the organizations and teams in the connector.
To create the slug, GitHub replaces special characters in the name string,
changes all words to lowercase, and replaces spaces with a - separator.
For example, "My TEam Näme" would become my-team-name.
The GitHub Web application URLs and GitHub API can provide the slug.
Example: navigate to the team My Team in the GitHub web application.
The URL https://github.com/orgs/org-name/teams/my-team
shows the slug is my-team. Update the teams to roles mapping.
  teams_to_roles:
    - organization: my-org
      roles:
        - access
        - editor
        - reviewer
      team: my-team
Next steps
The role we illustrated in this guide uses the internal.logins trait,
which Teleport replaces with values from the Teleport local user
database. For full details on how traits work in Teleport roles,
see the Teleport Access Controls
Reference.