CockroachDB Security Hardening
Databases are a critical component of an organization’s infrastructure and a primary target for hackers and cybercriminals. This makes it essential that you have standard practices to secure your database. This article discusses the steps and procedures of securing CockroachDB, a renowned SQL-based and distributed database.
CockroachLabs offers both hosted CockroachDB-as-a-Service offering and an enterprise self-hosted version. This post will mostly cover CockroachDB Core, the always-free, open source version of CockroachDB.
Securing CockroachDB
You’re going to learn how to secure CockroachDB on three levels: network, transport and database:
- Network-level security makes your database accessible only by trusted nodes, securing it from the rest of the network.
- Transport-level security deals with network traffic encryption for the secure transportation of data.
- Database-level security defines the user’s privileges towards the data in the database.
Having the database secured on these levels ensures the security of data in the deployment environment, during transportation, and in the database, by the mechanisms of firewalls, encryption and authentication, respectively.
Install CockroachDB
When installing or upgrading CockroachDB, you’ll need to install the latest version of CockroachDB. You can download the latest version of CockroachDB from CockroachDB’s Releases Page.
Network-level security for CockroachDB
This section covers the details of securing your CockroachDB on a network level. You’ll be looking into the procedures for ensuring that your database can be accessed only by the required nodes. For this purpose, we’ll look into the methods of iptables, --listen-addr, --advertise-addr, and network authorization.
iptables firewall for CockroachDB
iptables is a command-line firewall utility that uses policy chains to allow or block traffic.
You can utilize iptables when deploying your CockroachDB on Linux to limit which ports are open to TCP port 26257.
# Make sure not to drop established connections.
iptables -A INPUT -m state --state ESTABLISHED,RELATED -j ACCEPT

# Allow SSH.
iptables -A INPUT -p tcp -m state --state NEW --dport 22 -j ACCEPT
# For allowing it to listen to the specified port
iptables -A INPUT -p tcp -m state --state NEW -m tcp --dport 26257 -j ACCEPT
iptables -A INPUT -j REJECT --reject-with icmp-host-prohibited
# Allow all outbound, drop everything else inbound.
iptables -A OUTPUT -j ACCEPT
iptables -A INPUT -j DROP
iptables -A FORWARD -j DROP
# Make the rule persistent
sudo /usr/libexec/iptables/iptables.init save
Note: When updating the iptables rules, it is a good idea to use the iptables-apply tool which automatically rolls back the changes in case you lock yourself out.
The CockroachDB rule above will allow anyone to connect to port 26257. You could make it more strict by only accepting connections from certain IP addresses or subnets:
# Only allow access to CockroachDB port from the local subnet.
iptables -A INPUT -p tcp -m state --state NEW --dport 26257 -s 192.168.1.0/24 -j ACCEPT
--listen-addr
By default, CockroachDB can listen to all IP addresses on port 26257. However, if you want to specify the IP address on which the port shall listen, --listen-addr is the key.
As an example, following command with --listen-addr will configure CockroachDB to only listen on the localhost interface:
# For listening to port 26257 for traffic and 8080 for requests from admin UI
cockroach start --certs-dir=certs --store=node1 --listen-addr=localhost:26257 --http-addr=localhost:8080 --join=localhost:26257,localhost:26258,localhost:26259
--advertise-addr
--advertise-addr specifies the address you would want to tell the nodes. If the --listen-addr is specified and the --advertise-addr isn’t, the former one is displayed to the nodes. But, with the specified --advertise-addr, the selected address is displayed.
The procedure is as follows:
# Set up the --advertise-addr
cockroach start --certs-dir=certs --advertise-addr=localhost:26257 --join=localhost:26257,localhost:26258,localhost:26258 --cache=.25 --max-sql-memory=.25
You can set up --advertise-addr along with the flag of --locality that specifies the node's location. Combining --locality with --advertise-addr allows the nodes to prefer connecting to a local address, which improves performance.
Learn more about networking flags.
# Set up --advertise-addr with locality
cockroach start --certs-dir=certs --locality=cloud=gce --locality-advertise-addr=cloud=gce@<private_address_of_node> --advertise-addr=<public_address_of_node> --join=<public_address_of_node1>,<public_address_of_node2>,<public_address_of_node3> --cache=.25 --max-sql-memory=.25
Network authorization
You can also set up authorization for your network based on the network type. You can utilize IP allowlisting, VPC peering and AWS PrivateLink:
- IP allowlisting: The process of allowing the connection to specific IP addresses by adding them to the allowlist of the CockroachDB Dedicated Cluster.
- VPC peering: This comes in handy if you’re utilizing the Google Cloud Provider as it allows the CockroachDB cluster to only connect to internal addresses, keeping it safe from the public network.
- AWS PrivateLink: This can be utilized if you’re using AWS as your cloud provider. It allows the secure connection between the AWS application and the CockroachDB cluster with the utilization of a private AWS endpoint. AWS endpoint is a URL that serves as an entry point for the web service.
Follow the steps below to create an AWS endpoint:
# Step 1: Setting up AWS Endpoint
aws ec2 create-vpc-endpoint --region <region_name> --vpc-id <vpc_id> --subnet-ids <Subnet1_ID> <Subnet2_ID> --vpc-endpoint-type Interface --security-group-ids <SecurityGroup1_ID> <SecurityGroup2_ID> --service-name <Service_Name_Provided_By _Cockroach>
# Step 2: Copy the Endpoint ID generated as output and verify it by pasting it into VPC Endpoint Field in Amazon VPC Console
# Step 3: Enable the DNS
aws ec2 modify-vpc-endpoint --region <Region_name> --private-dns-enabled --vpc-endpoint-id <VPC_endpoint_ID>
# Step 4: After some delay, the status will be active, allowing you to connect
See further details about IP allowlisting and VPC peering.
Transport-level security for CockroachDB
This section discusses the details of hardening CockroachDB on the transport level to protect it against security breaches. We’ll be covering the details of cryptographic protocols—SSL/TLS and Client Certificate Authentication — for the secure and encrypted transportation of your data.
SSL/TLS
These cryptographic protocols ensure the secure transportation of data during communication over a network. CockroachDB utilizes TLS1.3 and TLS1.2 or 1.3 for inter-node and client-node communication, respectively. Lean more about Encryption for CockroachDB
verify-full is the default SSL mode to verify the nodes. It encrypts the data in transport and verifies the node identity as well. The flag of verify-full comes along with the connection string. This protects against both eavesdropping and MITM attacks.
This is what it looks like on a test CockroachDB Cloud database:
cockroach sql --url "postgresql:# p_1809:_RqtsBh1U4bBoL5BrlS4hg@free-tier8.aws-ap-southeast-1.cockroachlabs.cloud:26257/defaultdb?sslmode=verify-full&sslrootcert=certs/root.crt&options=--cluster%3Dtest-cluster-1594"
You can take the following actions to retrieve the connection string of a Cockroach Cloud database: Log in to your account > Overview > Connect > Connection string.
Client certificate authentication
CockroachDB utilizes a certificate (Cockroach cert) for the identity verification of your client, making sure that it's a trusted resource. You can create the cert by using cockroach cert, the security certificate and place it in the certs directory using the following command:
# Create the CA certificate and key:
cockroach cert create-ca \
 --certs-dir=[path-to-certs-directory] \
 --ca-key=[path-to-ca-key]
# Connecting with the Client Authentication Certificate (Client Certificate and Key Authentication)
cockroach sql --certs-dir=certs --user=<username>
Database-level security for CockroachDB
This section covers the details of hardening your CockroachDB on the database level. It defines the set of privileges and actions for the user so that only the trusted users can access and alter the data. We’ll be covering the details of user authentication, user authorization, audit logs, and encryption.
User authentication
Authentication is the process of ensuring that only trusted users are able to access the database. You can take the following steps to set up user authentication for CockroachDB:
# Step 1: Connect to DB using the connection string and hostname using these cockroach commands
cockroach sql --url "postgresql:# p_1809:_RqtsBh1U4bBoL5BrlS4hg@free-tier8.aws-ap-southeast-1.cockroachlabs.cloud:26257/defaultdb?sslmode=verify-full&options=--cluster%3Dtest-cluster-1594&sslrootcert=certs/root.crt"
# Step 2: Get the details of current configuration
show cluster setting server.host_based_authentication.configuration;
# Step 3: Set the required settings
SET CLUSTER SETTING server.host_based_authentication.configuration TO
# TYPE    DATABASE  	USER 	ADDRESS           	METHOD
#  host	       	all   	         	all  	<specific IP address>  password
#  host           	all   	         	all                	all               	accept
# Step 4: Try re-connecting with unauthorized user for verification
User authorization
Authorization is the process of defining a user’s privileges along with the set of actions they can perform. By default, the user holds all privileges. Permission can be altered using these steps:
- Check for the current users of your database under SQL Users.
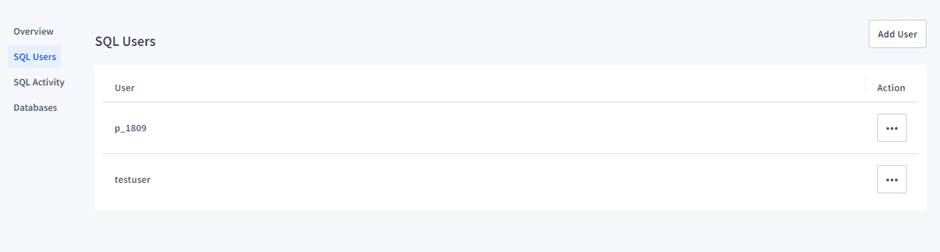
or using SQL
SHOW USERS;
- Look for their permissions under the Grants tab in Databases. By default, they’ll have all permissions.
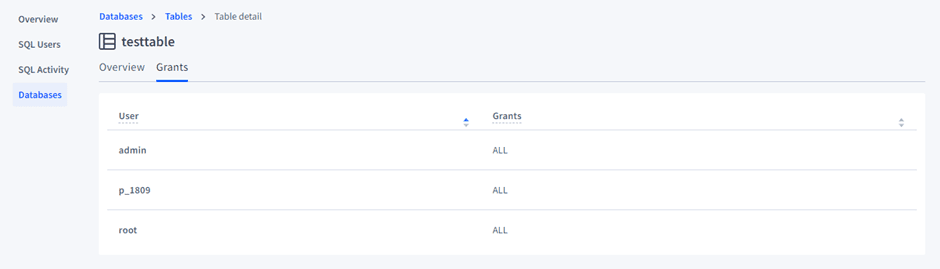
or using SQL
SHOW GRANTS [ON [DATABASE | SCHEMA | TABLE | TYPE] <targets...>] [FOR <users...>]
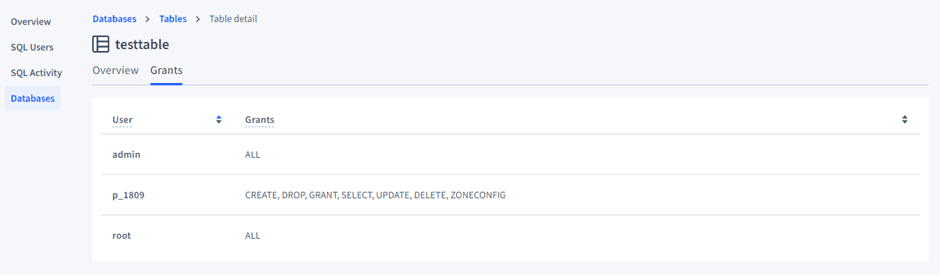
- Alter the permissions by revoking the conditions:
# Revoking privileges from the user
REVOKE INSERT ON TABLE <database>.<table> FROM <user>;
- Check the permissions after revoking to see if they’ve been updated.
- If you want to grant permissions to the user, the command is as follows:
# Grant ALL permissions to the user on the table using db console.
GRANT ALL ON TABLE <db_name>.<table_name> TO <username>;
Similarly, you can create user roles and assign them privileges using the following steps:
# Step 1: Create a user role
CREATE ROLE <name_of_role>;
# Step 2: Grant the privileges to the user
GRANT <privilege> ON DATABASE <name_of_database> TO <name_of_role>;
Audit logs
Audit logs allow you to gain detailed information about the processes. This makes it easier to analyze the user’s actions and acquire real-time alerts.
Audit logs can be set up in CockroachDB using the following steps:
# Step 1: Enable auditing for the table
ALTER TABLE <Table Name> EXPERIMENTAL_AUDIT SET READ WRITE;
By default, events in the SENSITIVE_ACCESS channel are output to a log file that is prefixed cockroach-sql-audit and stored in the same directory, cockroach-data/logs as the other logs generated by CockroachDB.
Encryption
Encrypting your data helps keep it safe from security breaches. CockroachDB offers a range of encryption options. It supports the AES-128, AES-192, and AES-256 encryption algorithms. While encryption provides security it'll result in higher CPU utilization of between 5-10% increase, with AES-256 providing a longer key length will result in greater CPU usage.
Learn more about supported algorithms and keyfiles. CockroachDB Cloud let's customer bring their own Customer-Managed Encryption Keys (CMEK) and will also take care of encrypting backups.
To set up Cockroach Labs' proprietary storage-level encryption-at-rest service (Enterprise Only), follow the steps outlined below:
# Step 1: Generate the key file
cockroach gen encryption-key -s 192 <path_to_aes-192.key>
# Step 2: Starting node with the enterprise encryption
cockroach start --store=cockroach-data --enterprise-encryption=path=cockroach-data,key=< path_to_aes-192.key >,old-key=plain
Warning: Backups taken with the BACKUP statement are not encrypted even if Encryption at Rest is enabled. Encryption at Rest only applies to the CockroachDB node's data on the local disk. Backups should be encrypted separately using your preferred encryption method.
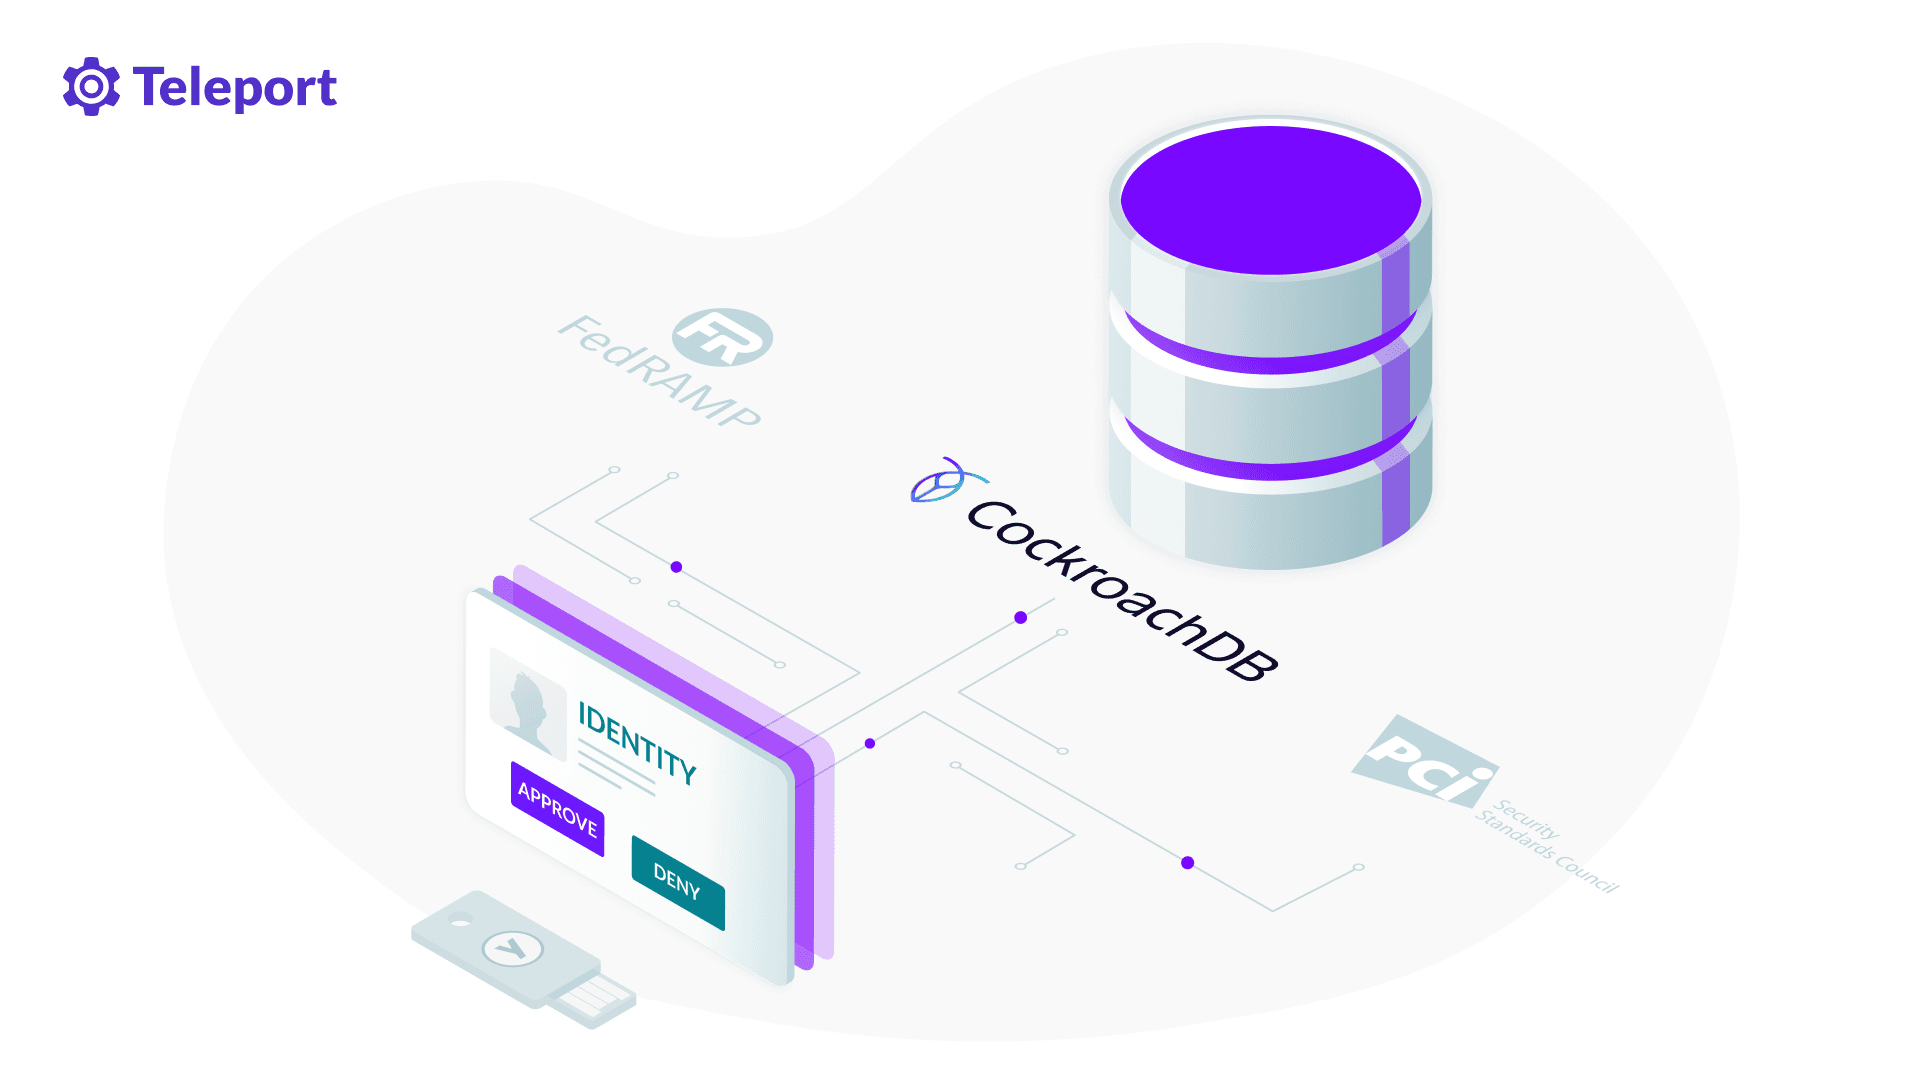
Secure access to Self-Hosted CockroachDB using Teleport Database Access
One of the most effective ways to harden your database is to adopt a tool specifically made to ensure secure access. For example, Teleport is an open source project with an identity-aware and multiple protocol access proxy. Teleport Database Access provides some impressive features for the security of your CockroachDB and supports various other popular databases like MongoDB, PostgreSQL, MariaDB and MySQL. Teleport improves security by using a central certificate authority (CA) instead of passwords.
When using Teleport, you can use the following steps to set up secure access to your CockroachDB Self-Hosted using Teleports Certificate Authority. Below are a few sample commands to set up Teleport, but for an in-depth explanation, please refer to the Teleport documentation.
# Step 1: Create export CockroachDB ca certificate, ca-key and client.root
tctl auth sign \
    --format=cockroachdb \
    --host=roach.example.com \
    --out=/path/to/cockroach/certs/dir/ \
    --ttl=2190h
# The command will produce 3 files: ca.crt with Teleport's certificate
# authority  and node.crt / node.key with the node's certificate and
# key. Do not rename them as this is # how CockroachDB expects them
# to be named.
# Step 2: Start CockroachDB with Teleport Cert
cockroach start \
    --certs-dir=/path/to/cockroachdb/certs/dir/ \
# other flags...
# Step 3: Connect to CockroachDB using Teleport
# https://goteleport.com/docs/enroll-resources/database-access/enroll-self-hosted-databases/cockroachdb-self-hosted
Learn more about setting up Teleport on your self-hosted CockroachDB. You can also watch the Introducing Teleport Database Access and explore Teleport code on GitHub.
Conclusion
It’s almost impossible to attain a strong organizational architecture without securing your databases. Databases are critical components as they hold all the essential data, which is the driving force of any organization.
This article covered the methods and standards of hardening CockroachDB on three distinctive levels of security: network, transport, and database. You can implement secure access to your databases with a few steps by utilizing an identity-aware and multiple protocol access proxy, such as Teleport. If using CockroachDB in Kubernetes, you can use the Teleport Agent Helm Chart to set up secure access to your CockroachDB.
Table Of Contents
Teleport Newsletter
Stay up-to-date with the newest Teleport releases by subscribing to our monthly updates.
Tags
Tags
Teleport Newsletter
Stay up-to-date with the newest Teleport releases by subscribing to our monthly updates.