Securing Microsoft SQL Server
Microsoft SQL Server is a popular relational database management system created and maintained by Microsoft. It’s effective in numerous use cases: storage and retrieval of data as part of a DBMS, transaction processing and analytics applications.
However, there are some essential measures you must take to protect your database from cybercriminals and security breaches, as the default security settings are relatively insufficient to keep your database safe.
This article guides you through the process and steps of using standard practices to secure your Microsoft SQL Server on the network, transport and database levels.
Why do I need to secure my Microsoft SQL Server?
The primary function of Microsoft SQL Server, like any other database management system, is storing and retrieving data, and it’s essential that you have proper security measures in place to keep that data protected.
The following are just some of the reasons why securing your Microsoft SQL Server is important:
- Low security defaults: The default security of Microsoft SQL Server is not enough to keep your data and processes protected. Certain additional layers of security are required to make it secure.
- SQL injection: SQL injection is one of the most common data vulnerabilities when it comes to databases. The hackers inject commands via the input fields of your web application that your database can mistakenly execute, leaving your data exposed.
- Denial of service attack: In this type of attack, hackers bombard the SQL server with fake and malicious queries, making it unable to respond to the queries of customers. It can also lead to downtime.
- Verbose error: This is a vulnerability where your SQL Server returns error messages containing personal and sensitive information. The hackers can access this information and trace back to the gap in your code’s security, which can then be exploited to steal your data.
- Compliance: Compliance refers to adhering to widely accepted standards and policies, and the default level of protection may not sufficiently cover this. The process of securing your database will ensure that you adhere to the security standards that customers expect.
As you can see from these examples, and further reinforced by various other potential SQL server security threats, having proper security standards for your database is critical. With that in mind, the rest of this article focuses on practical ways you can secure your SQL Server on three levels: network, transport, and database.
Network-level security
Network security ensures that only trusted nodes can access the database by restricting any access from unauthorized users. This section will show you some methods to set up network security for your SQL Server.
Network security can be improved through the use of firewalls that control and monitor network traffic. The following sections explain how you can set up the Windows Firewall—using netsh, PowerShell, and the Microsoft Management Console (MMC) — along with the Azure Service Firewall and the Azure Database Firewall.
Configuring Windows Firewall
For restricted access to the SQL Server, you need to enable the firewall on the device the server is running on. However, note that this can only be set up for SQL Server Database Engine and not the Azure SQL database.
You can set up a firewall on Windows using netsh, PowerShell, and MMC.
netsh
netsh is an administrator tool capable of controlling and monitoring devices running on Windows using a command prompt. To set up a firewall using netsh, follow the steps below:
# Configuring the windows firewall to allow SQL server access using netsh
# Notice that the default port for Microsoft SQL is 1433 and the following command allows the database to be accessed on the specified port on the network
netsh firewall set portopening protocol = TCP port = <port_number> name = SQLPort mode = ENABLE scope = SUBNET profile = CURRENT
# Command to see to which ports the active TCP connections exist
netstat -n -a
PowerShell
You can also enable the Windows Firewall using PowerShell. The steps are as follows:
# Configuring the windows firewall to allow SQL server access using PowerShell on Port 1433 only
New-NetFirewallRule -DisplayName "SQLServer default instance" -Direction Inbound -LocalPort 1433 -Protocol TCP -Action Allow
New-NetFirewallRule -DisplayName "SQLServer Browser service" -Direction Inbound -LocalPort 1433 -Protocol UDP -Action Allow
Microsoft Management Console
Lastly, the Windows Firewall can be set up using the Microsoft Management Console (MMC). The steps are as follows:
- Open Run from Start.
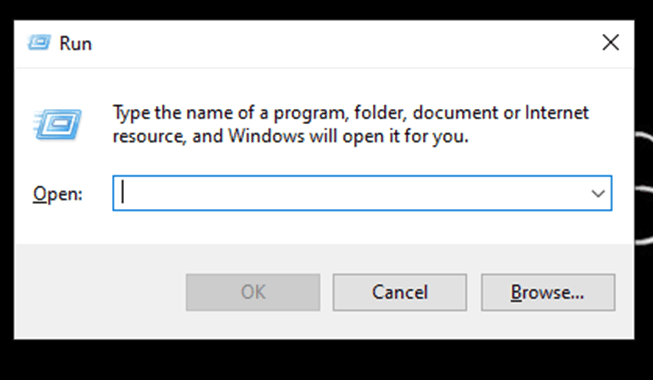
- Type “”WF.msc” and click OK.
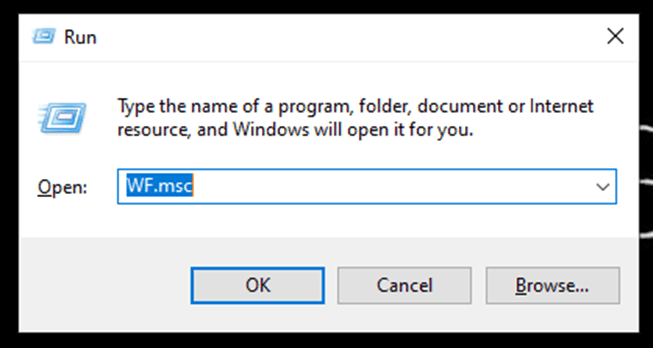
- The Windows Defender Firewall with Advanced Security will open.
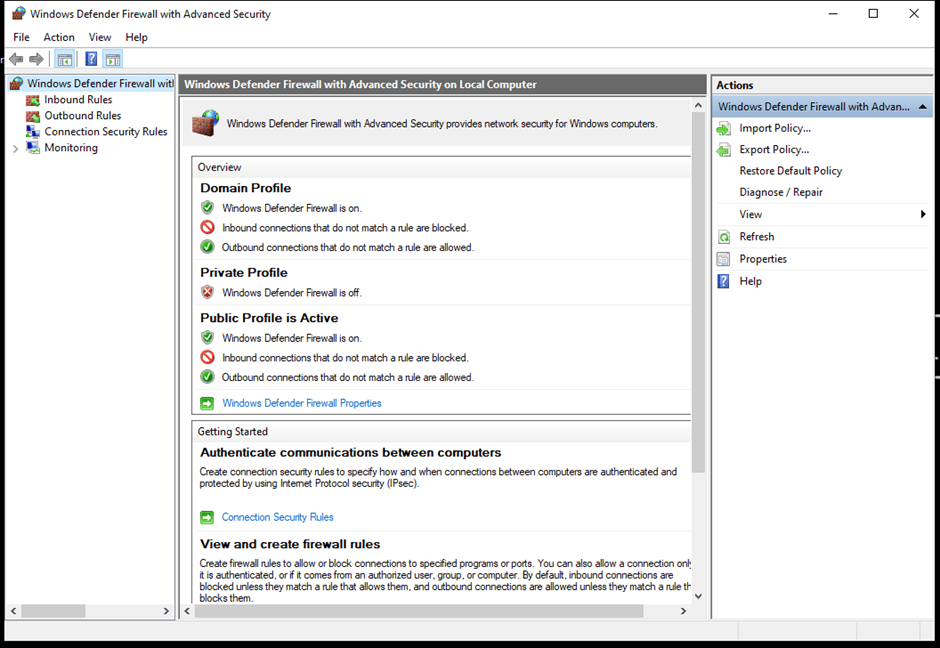
- Add new rules by clicking on New Rule under Inbound Rules.
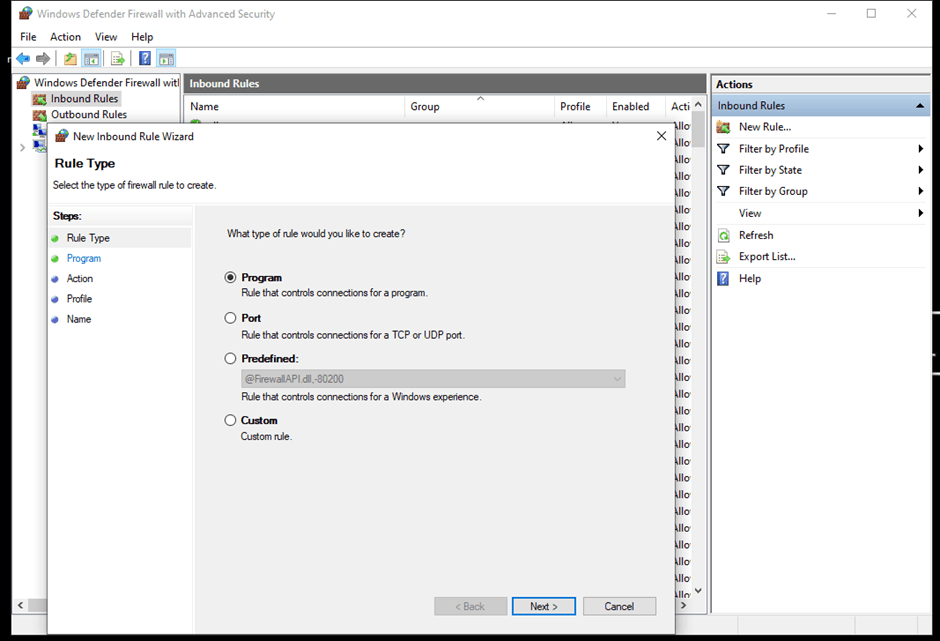
- Follow the remaining prompts, and this will complete the setup of the Windows Firewall.
You can find more details about configuring the Windows Firewall.
Configuring the Azure Database Firewall
You can configure the Azure Database Firewall for Azure SQL using sp_set_database_firewall_rule. It allows only the IP addresses within the specified range to be able to connect to the database.
This procedure doesn’t work for SQL Server Database Engine. However, the steps for setting it up for Azure SQL Database are as follows:
# Syntax of sp_set_database_firewall_rule
# The name of the firewall is of datatype nvarchar(128)
# The starting IP address is the lowest IP address in range
sp_set_database_firewall_rule [@name = ] [N] <name_of_firewall_for_distinguishing>
, [@start_ip_address =] <starting_ip_address>
, [@end_ip_address =] <ending_ip_address>
[ ; ]
You can find more details about the Azure Database Firewall in the official documentation.
Configuring the Azure Service Firewall
Configuring the Azure Service Firewall enables server-level firewall settings for the Azure SQL database using the sp_set_firewall_rule. The steps are as follows:
# Syntax of sp_set_firewall_rule
sp_set_firewall_rule [@name =] <name_of_firewall_for_distinguishing>,
	[@start_ip_address =] <starting_ip_address>,
	[@end_ip_address =] <ending_ip_address>
[ ; ]
Again, if you would like more information about this rule, the official documentation on the Azure SQL Database is a good source.
Transport-level security
Transport security ensures the secure and protected transfer of data from one node to the other. This section will show you some standard practices for ensuring appropriate transport security for your SQL Server.
You can use TLS/SSL cryptographic protocols for transport security in your SQL Server. The instructions below demonstrate how to set up encrypted connections to the Database Engine. Note that the forced SSL connections can be used in both the SQL Server and Azure SQL, whereas the optional SSL connections can only be used in the SQL Server Database Engine.
An instance of the Server Database Engine and SQL Server Configuration Manager is used to set up the specification of the cryptographic protocol certificate. After downloading the certificate from a trusted Certificate Authority, follow the steps below for its installation (note that these steps are for the installation on a single server):
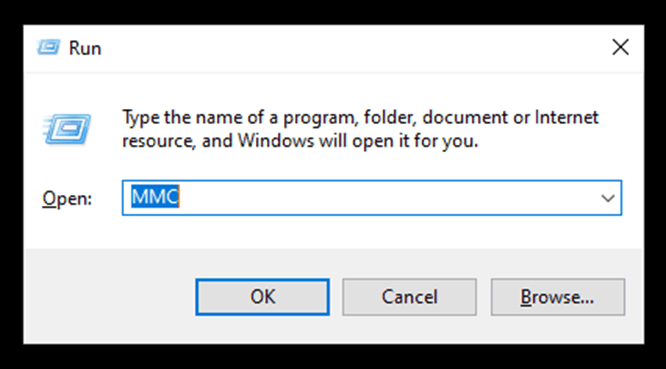
- Open Run from Start. Write “MMC” in the dialogue box and click OK.
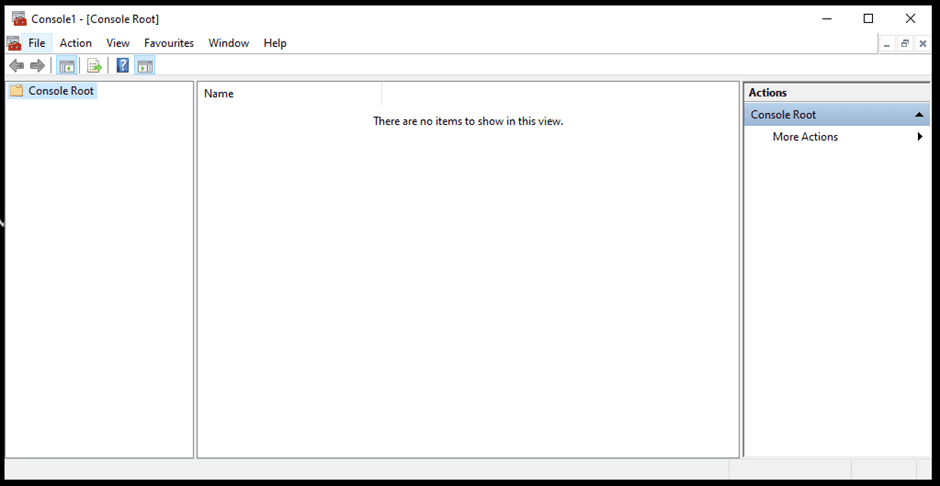
- It will open a Console Root window. Go to Files and click Add or Remove Snap-ins.
- Select Certificates from the Available snap-ins and click Add.
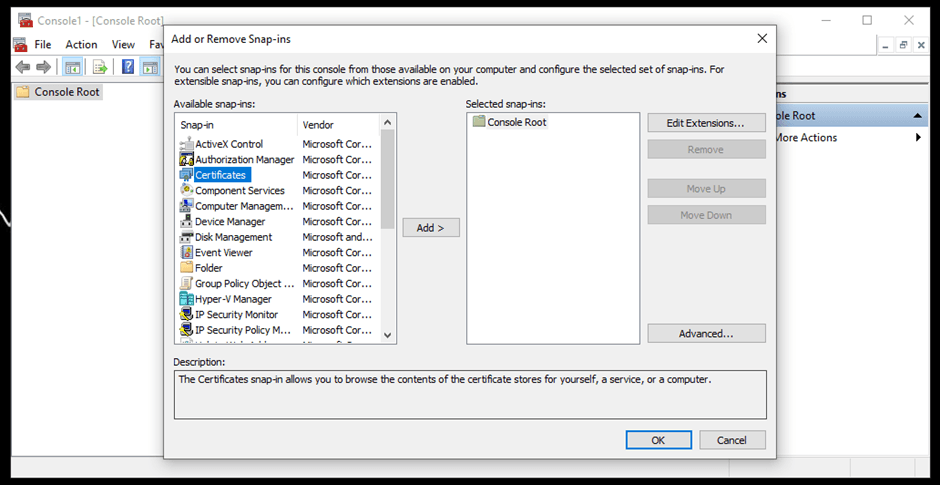
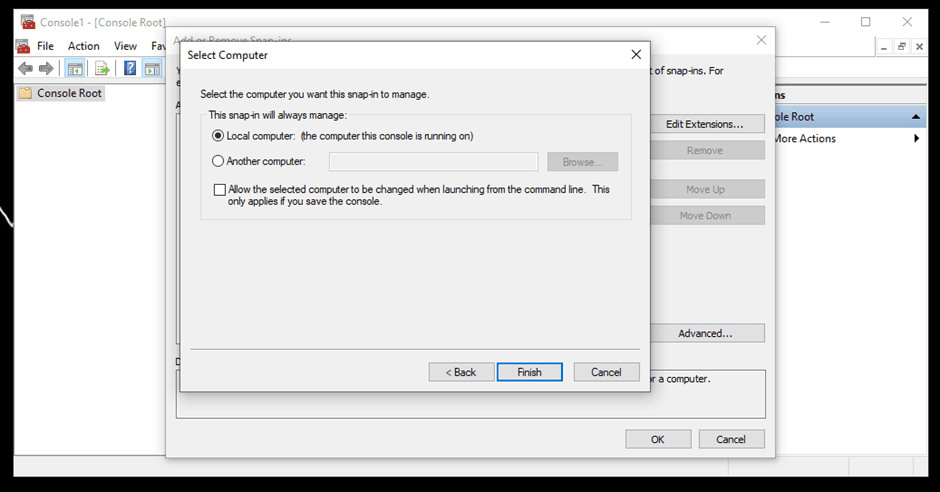
- Choose a Computer account from the options.
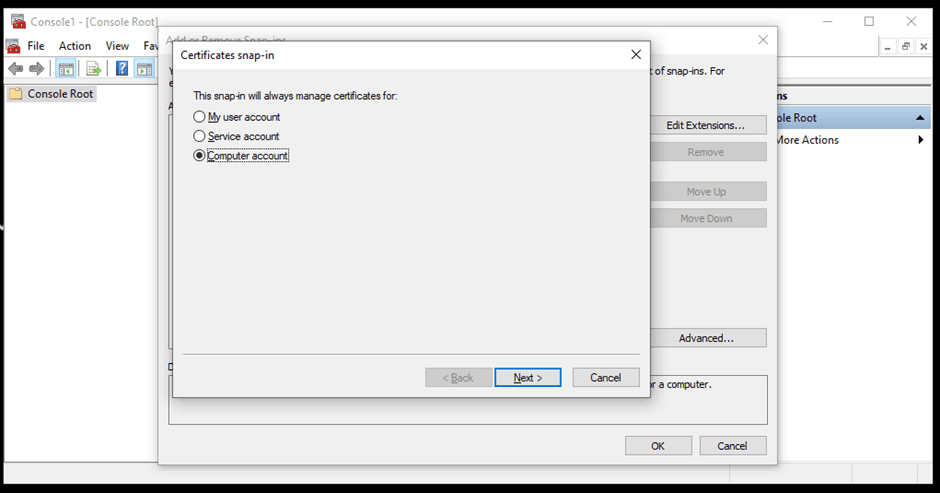
- Select Local computer if the console is running on the same device you want to set up the certificate on.
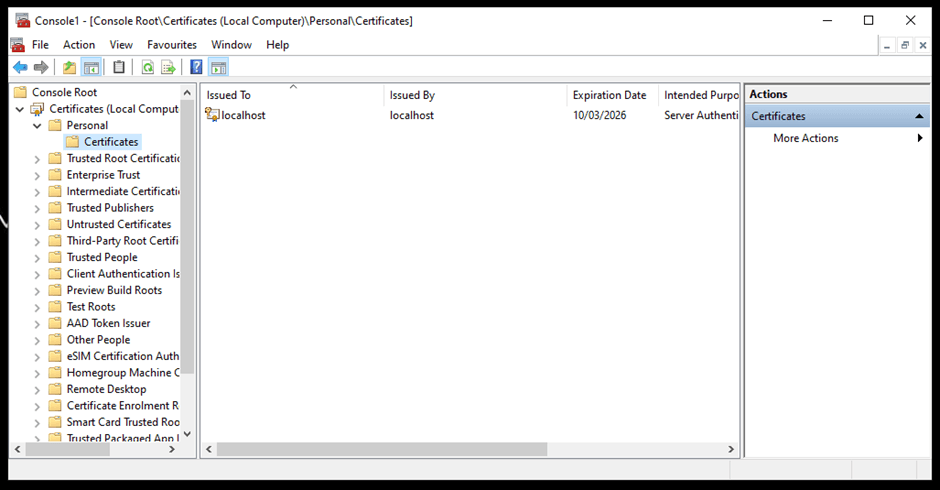
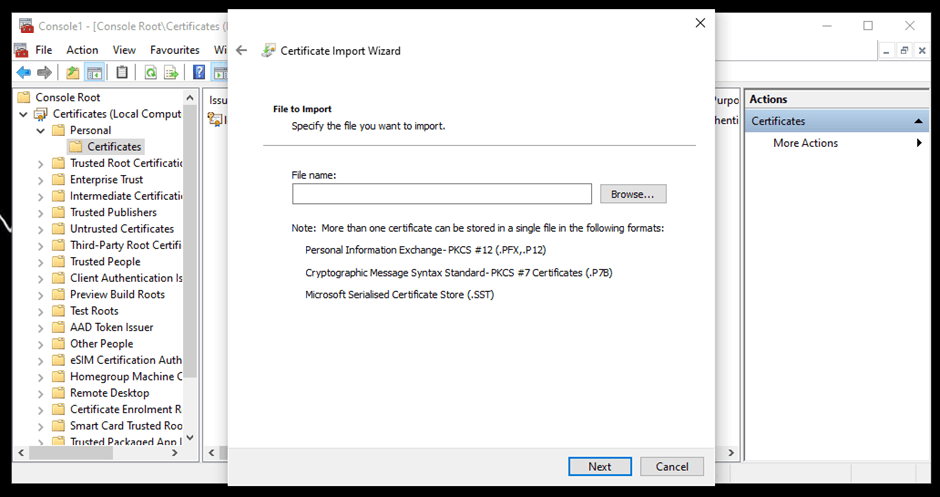
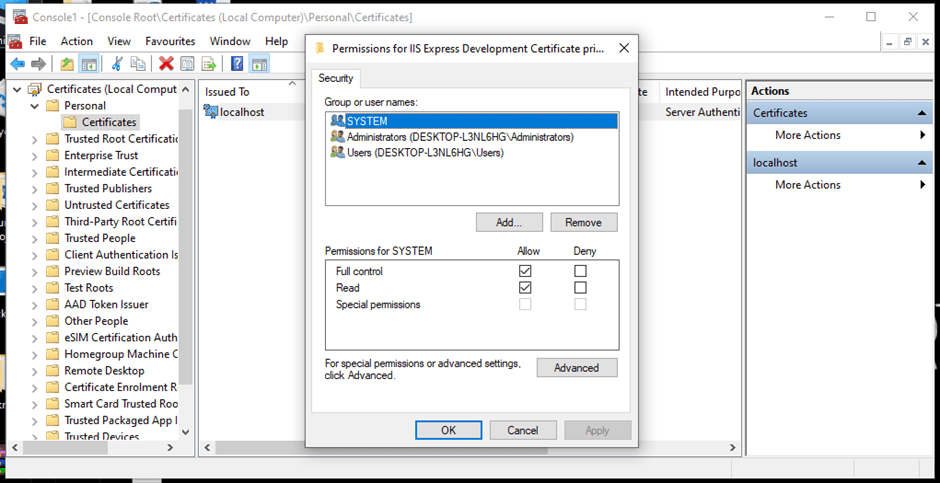
- After adding the certificate, expand Certificates, and then Personal. Right-click Certificates and select Import.
- Choose the certificate from the storage.
- Right-click the added certificate. Click All Tasks and then Manage Private Keys. Here, you can set up the permissions you want to allot.
- Here are the steps to configure the client for the particular certificate.
You can learn more about installing a certificate across multiple servers.
Database-level security
Database security ensures that the right users can access the database with the correct credentials and perform authorized tasks. In this section, you’ll learn how to achieve an appropriate level of database security through authentication, authorization, EXECUTE AS statements, auditing and encryption.
Authentication
Authentication is the process of checking who the user is and if they have the right credentials and permissions to access the database.
There are two authentication methods you can choose from: Windows Authentication or Mixed Mode Authentication (combining SQL Server Authentication and Windows Authentication). These should be chosen at the time of setup.
Windows Authentication is applicable only for the Windows database engine, whereas the SQL Authentication (as used with Windows Authentication in Mixed Mode Authentication) is applicable for Windows Database Engine and the Azure SQL.
Follow the steps below to determine the current password policy setup on the device and to enable authentication methods:
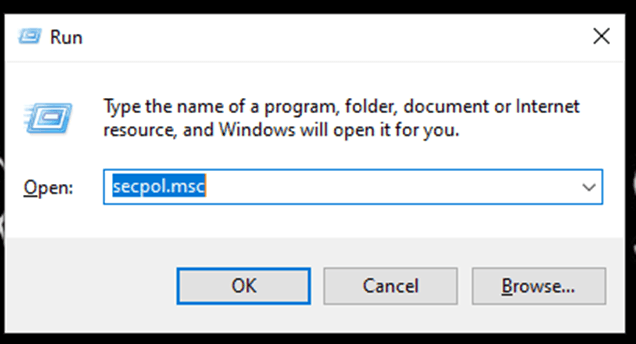
- Write “Run” in the Start search bar. Enter “secpol.msc” in the dialogue box and click OK.
- Navigate to Password Policy by expanding the Security Settings and Account Policies.
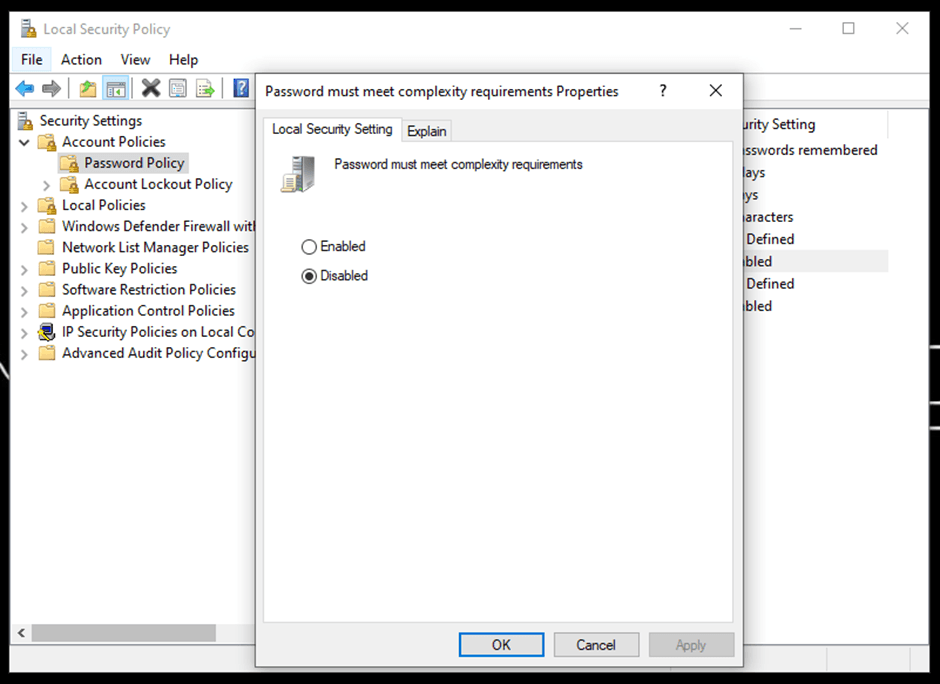
- Here, you can see all the password policies that can be altered as needed. For instance, you can change the maximum password age for which it's remembered.
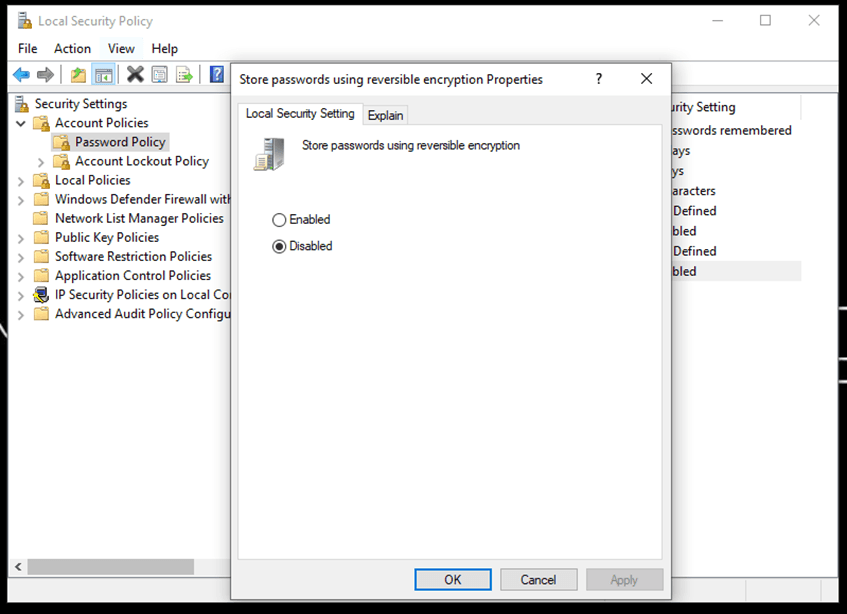
- You can also enable the reverse encryption properties. However, this is not recommended generally as it's similar to storing passwords as plain text.
- You should always enable password complexity characteristics, as it ensures the passwords are up to the security standards of complexity.
Similarly, you can change the remaining policies. Learn more about Authentication Mode.
You can also look into the setting up Azure Active Directory for Authentication purposes.
EXECUTE AS Statement
You can utilize the EXECUTE AS statement to enable the permissions of a specified user, instead of the one calling the statement. It limits the permissions of the user for that specific session.
For example, if you have admin privileges but are calling this command for a test account, then the context will be switched to the permissions of that test account for the particular session instead of the admin privileges.
The following is the command for it:
# Syntax of EXECUTE AS statement
{ EXEC | EXECUTE } AS <context_specification>
[;]
<context_specification>::=
{ LOGIN | USER } = 'name'
	[ WITH { NO REVERT | COOKIE INTO @varbinary_variable } ]
| CALLER
You can find more in-depth information on the EXECUTE AS statement.
Authorization
You can authorize distinct permissions to the user based on requirements, which decide what a user can do with the data:
# General syntax of authorization statement
AUTHORIZATION  PERMISSION  ON  SECURABLE::NAME  TO  PRINCIPAL;
# An example of authorization statement to grant update permissions on the TestTable to the role of DBUser
GRANT UPDATE ON OBJECT::Test.TestTable TO DBUser;
You can find more information about authorization.
Auditing
Auditing defines the process of recording the access and action details of the user. You can set up server- and database- level audits. To implement a server audit using Transact-SQL, follow the steps below:
- Connect to the database engine and click New Query.
- Add the following query in the dialogue box and click Execute:
# Creates a server audit called "HIPAA_Audit" with the target of binary file
CREATE SERVER AUDIT HIPAA_Audit
	TO FILE ( FILEPATH ='E:\SQLAudit\' );
There are also other methods of auditing that you can try, including creating a server audit using SQL Server Management Studio.
Encryption
It’s always a best practice to keep the data encrypted to protect it from potential security risks. The data can be encrypted at the drive, folder, and file level.
Encryption at Rest
This is also known as transparent data encryption (TDE), which is the process of real-time encryption of sensitive data using an encryption key:
# Step 01: Create a master key
USE master;
CREATE MASTER KEY ENCRYPTION BY PASSWORD = '<your_password>';
# Step 02: Create a certificate or obtain one, if already exists
CREATE CERTIFICATE <certificate_name> WITH SUBJECT = 'My DEK Certificate';
USE <database_name>;
# Step 03: Create the encryption key and protect it using a certificate
CREATE DATABASE ENCRYPTION KEY
WITH ALGORITHM = AES_256
ENCRYPTION BY SERVER CERTIFICATE <certificate_name>;
# Step 04: Set the database to encryption
ALTER DATABASE <database_name>
SET ENCRYPTION ON;
You can utilize the commands and functions of encryption at rest as per your requirements.
Backup Encryption
You can also set up a backup encryption using PowerShell:
# Command to setup backup encryption
$encryptionOption = New-SqlBackupEncryptionOption -Algorithm Aes256 -EncryptorType ServerCertificate -EncryptorName "BackupCert"
Backup-SqlDatabase -ServerInstance . -Database "<database_name>" -BackupFile "<database_name>.bak" -CompressionOption On -EncryptionOption $encryptionOption
If using this method, there are some recommended practices associated with backup encryption that you should also familiarize yourself with.
Additional practices for securing Your Microsoft SQL Server
There are numerous practices that we covered in the article for the security of your Microsoft SQL server. In addition to Firewall, TLS/SSL, authentication, authorization, auditing, and encryption, you can setup row-level security and temporal tables for enhanced security.
A better way to secure your Microsoft SQL Server
You have seen several methods and standards of securing your Microsoft SQL Server that can be very effective. However, implementing these methods and keeping them up to date requires a significant amount of effort and attention. This process can be greatly simplified and smoothened through the use of security software that takes care of these issues for you.
For example, Teleport is a platform that brings together numerous security standards including connectivity, authentication, authorization and auditing in one place.
Teleport supports multiple databases, including MySQL, PostgreSQL, MongoDB, Redis, CockroachDB, MariaDB and Microsoft SQL. You can visit the Teleport GitHub repository and Teleport Documentation to gain more information about the tool.
Conclusion
Microsoft SQL Server is a popular database with several use cases. However, the default security of the database can leave your data vulnerable. This is why you should incorporate some standard security practices in your database.
This article discussed how you can secure your Microsoft SQL Server on three levels: network, transport and database. Respectively, properly implemented and configured firewalls provide network security; incorporating cryptographic SSL/TLS ensures the best transport security; finally, the appropriate use of authentication, authorization, auditing and encryption support strong database security.
Though all these methods are effective, implementing and monitoring them all manually can be challenging. An open-source multi-protocol access platform like Teleport simplifies the process of securing your database by providing a single platform that handles it all for you.
Table Of Contents
Teleport Newsletter
Stay up-to-date with the newest Teleport releases by subscribing to our monthly updates.
Tags
Tags
Teleport Newsletter
Stay up-to-date with the newest Teleport releases by subscribing to our monthly updates.