Securing Your Snowflake Database with Teleport Database Access
The problem with shared Snowflake credentials
Picture this: unfortunately you had to let one of your engineers go. No matter how many times you tried to tell them, after countless interventions and meetings with the engineering lead, they simply wouldn’t stop using tabs instead of spaces. An absolutely unforgivable offense. A few weeks later, suddenly your production Snowflake database is wiped out. You log on to assess the damages and you check the SNOWFLAKE.ACCOUNT_USAGE.QUERY_HISTORY for every user in the system. Finally you find it: dozens of DROP DATABASE commands. The user that executed the command? SHARED_DEV_ADMIN, an account with credentials shared by every developer at the company… credentials that you forgot to rotate when the disgruntled, tab-obsessed engineer left the team.
While this is a worst-case scenario, without proper audit logging, RBAC role configuration, and networking rules, this is all too realistic.
Configuring a Snowflake database to be secure can be extremely difficult, especially when the company is growing, developers are constantly being on-boarded and off-boarded, and your data collection becomes larger and more diverse. There are plenty of best practices to follow when configuring a Snowflake database. However, enforcing these practices without impacting developer productivity and making them swim through a sea of “security-policy” red-tape, while still being auditable and compliant, can feel overwhelming. This is why we’re very excited to introduce Snowflake Database access support in Teleport 10. Now you can easily manage your Snowflake database without having to juggle long-lived credentials, or even firewalls, all while allowing users to maintain their organization-wide identity. Let’s take a look.
The environment:
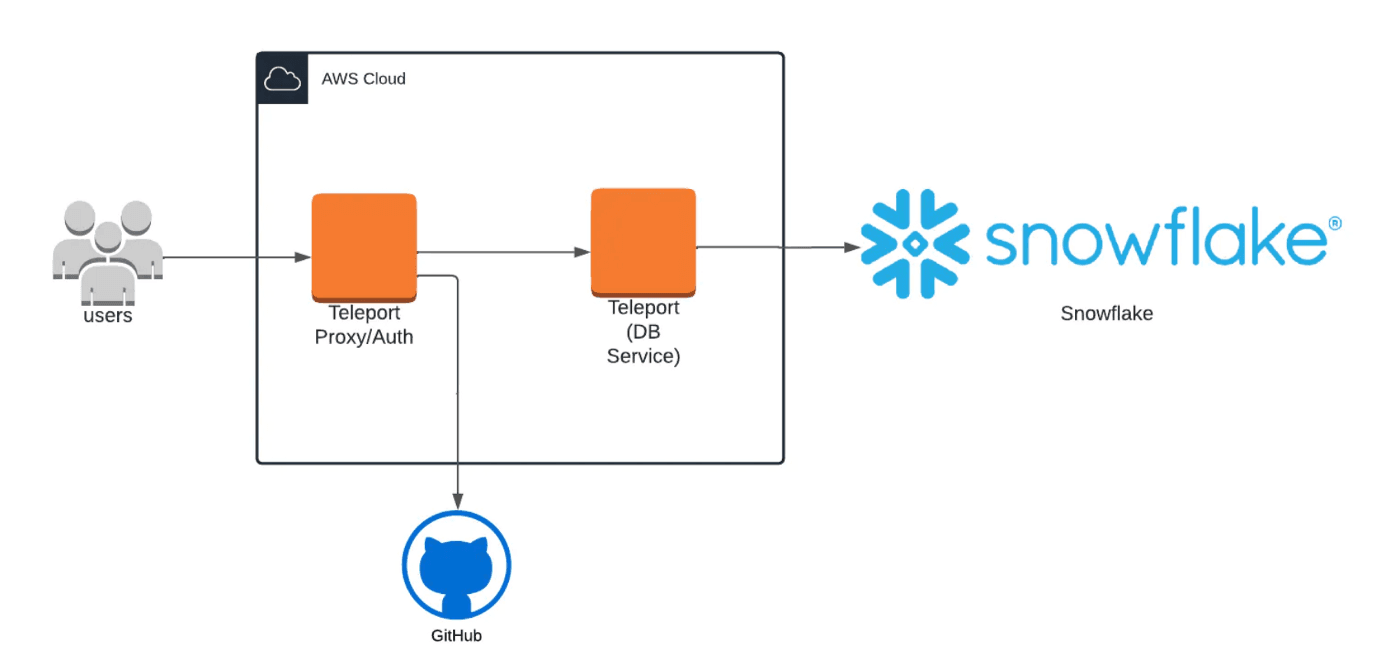
The environment we’ll be using for this demonstration consists of 3 separate entities:
- The Snowflake database
- A Teleport cluster
- A local Teleport client (tsh)
For a detailed guide on how to initially configure your Teleport cluster to connect to your Snowflake database, please follow the guide here.
Demonstration:
In this demonstration, you’ll see how you can use Teleport to securely access your Snowflake database from your local machine using the SnowSQL CLI client. Once Teleport is configured with your Snowflake database, accessing your data is as simple as logging in through Teleport, connecting to the database and then running your queries.
First we’ll login to our Teleport user using the command:
tsh login --proxy=teleport.example.com:443 --user=dumez-k --auth=github
The proxy is the public address of my Teleport cluster, the user is my Teleport user, and the auth flag dictates how we will authenticate. Teleport 10 has also introduced Passwordless Access, for passwordless and usernameless authentication for Teleport.
Once I am authenticated, the Teleport cluster will issue a short-lived client-certificate that I can then use to run additional commands.
Let’s see what databases I have access to by running:
tsh db ls

As we can see, I have access to the snowflake database host.
Let’s login to the database by running:
tsh db login --db-user=alice snowflake
The --db-user flag specifies what user on the database we want to connect to.
Now that we’re logged in, let’s finally connect to our database by running this command:
tsh db connect --db-user=alice --db-name=SNOWFLAKE_SAMPLE_DATA snowflake

In this example, --db-name is the name of the actual database. “snowflake” is the Teleport database host alias.
We now have a SnowSQL shell into the database, logged in as the user “Alice” with all of our traffic passing through the reverse proxy tunnel we opened when logging into the Teleport cluster.
Let’s run some queries:
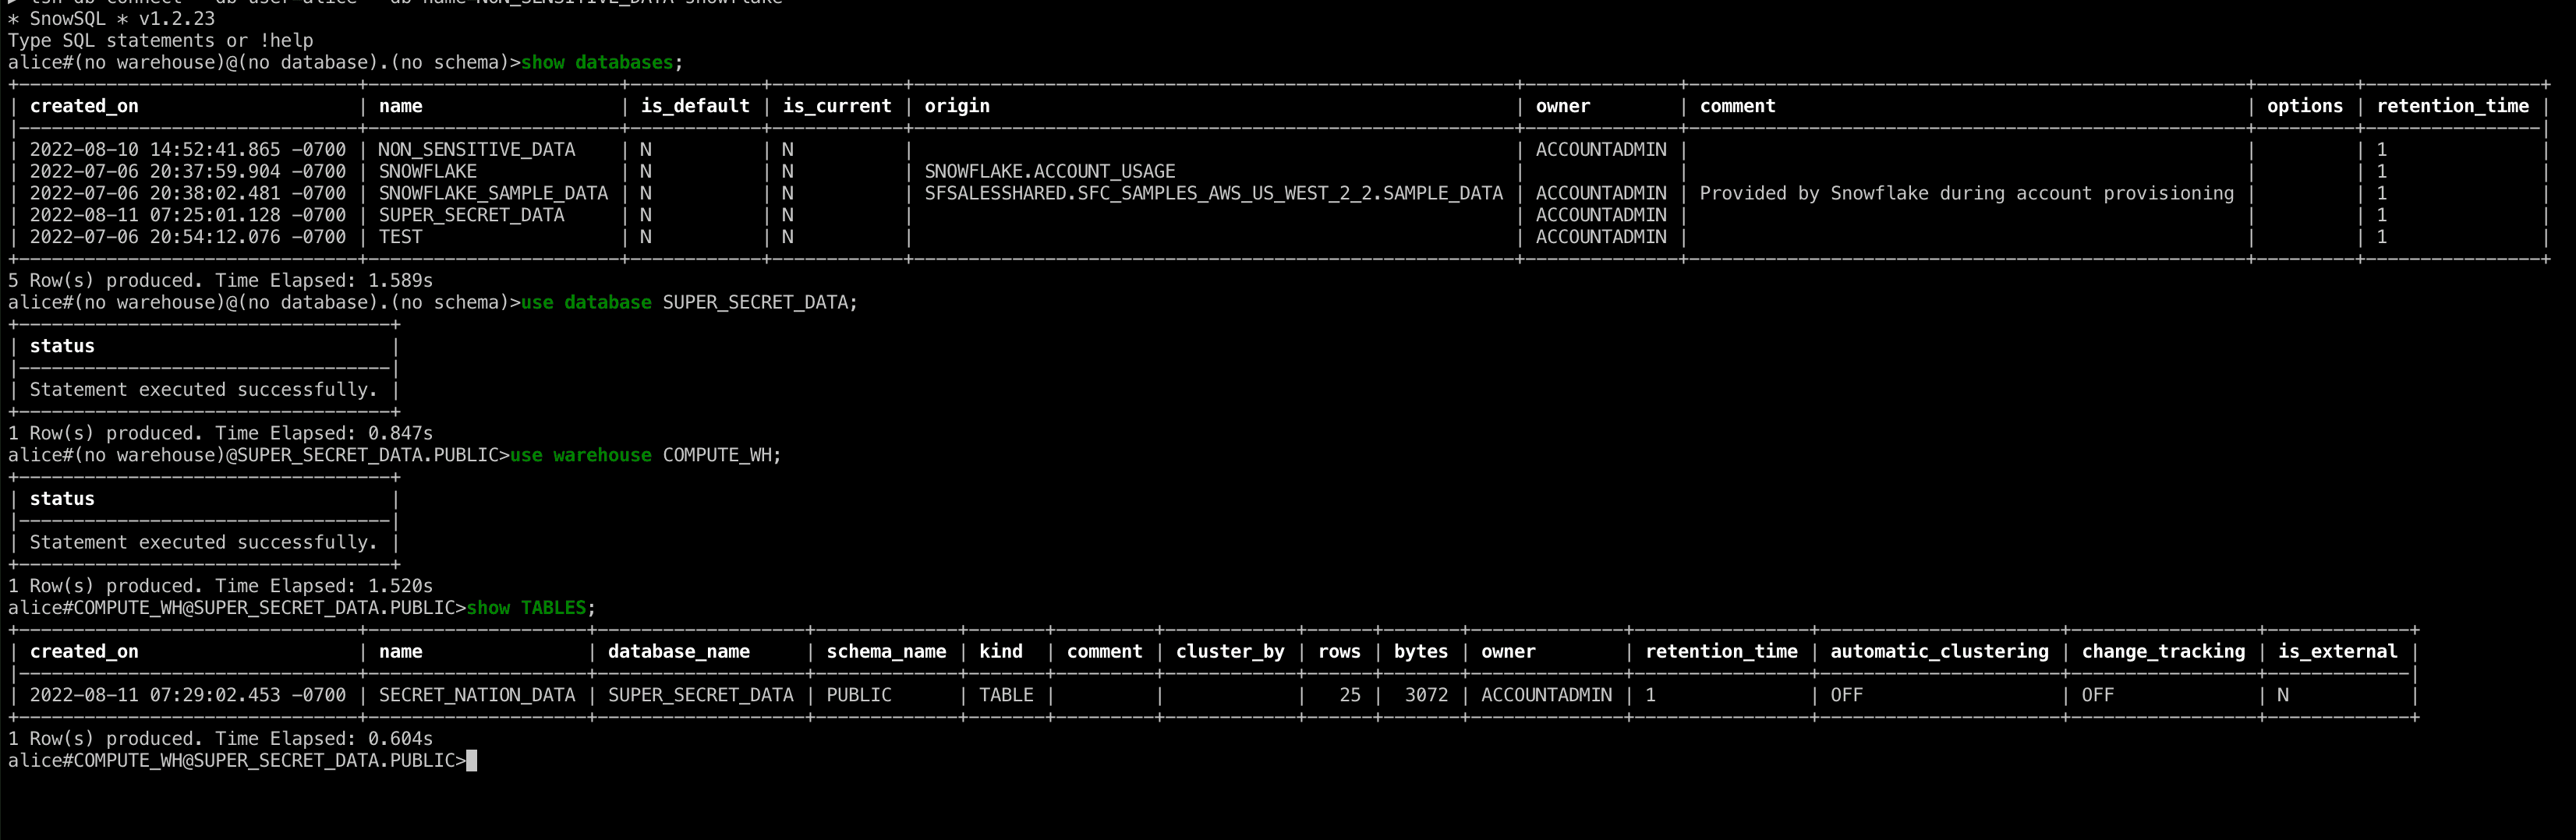
First let’s select one of the databases we have access to now that we’re inside of Snowflake, select a compute warehouse and then take a look at the database’s tables. As we're the admin user, we have access to the SUPER_SECRET_DATA database. Let's check it out!
Finally let’s view the super-secret classified data in our table.
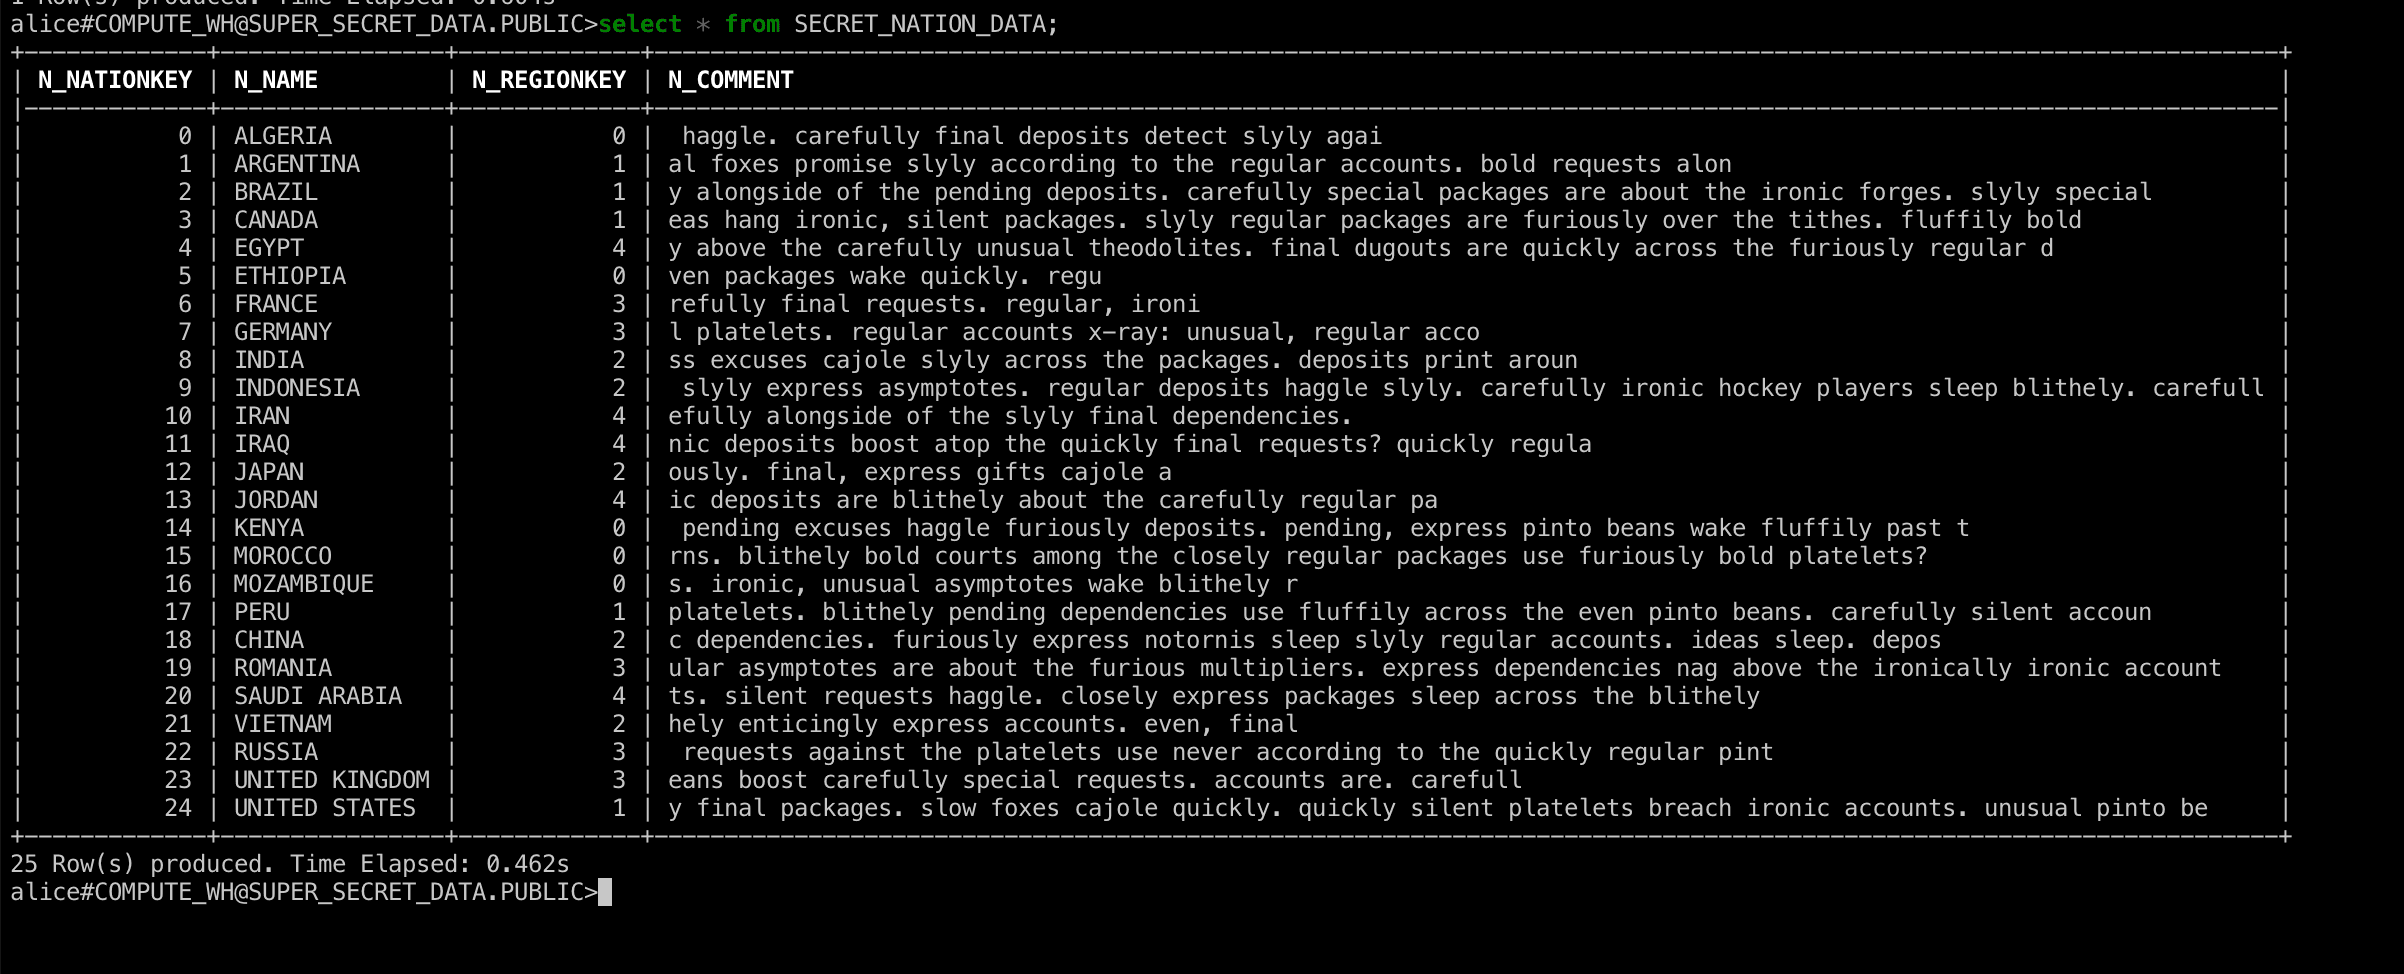
Wow, no wonder that data is so secure. If this information got public I can't even imagine the damage! Then once we’re done, we can exit the session.
Once we’ve finished with our session, we can then go into the Teleport browser UI and look at the audit log.
We can access this log by going to the address of our Teleport Web UI.
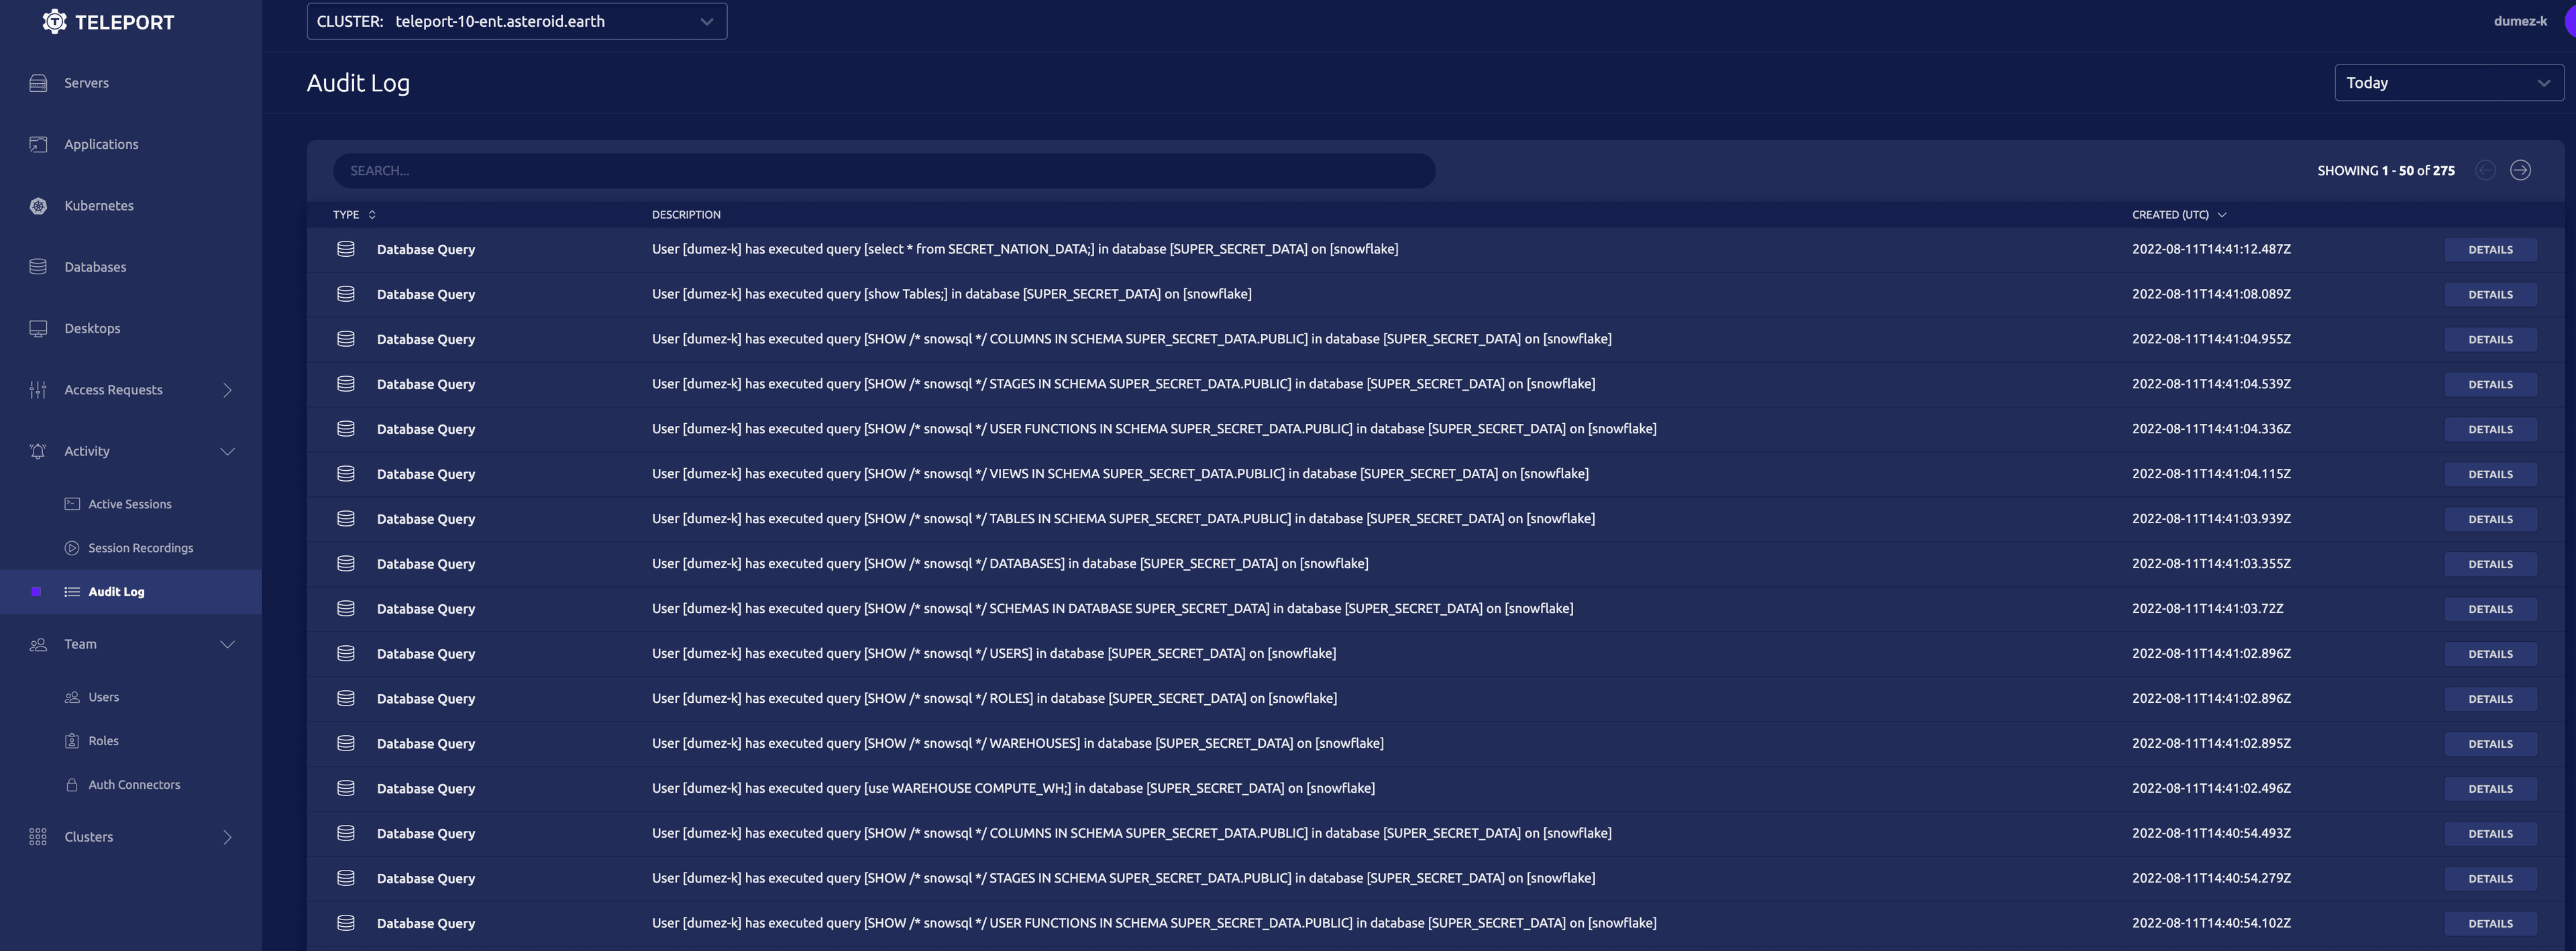
From here we can see all of our queries that we executed, and information about the start and end of our session. All of these events are tied to both the database user and the Teleport user linked to your SSO, making auditing and accountability a breeze.
Creating Snowflake role
While it's great that we can access all of our data from the admin user, say we wanted to create a user with more limited permissions. We can also do this right from our Teleport Snowflake session.
Let's start by creating a new role. We'll call this role "junior_dev". This role will be able to access only our NON_SENSITIVE_DATA database, without having access to our SUPER_SECRET_DATA database.
First run the command:
CREATE ROLE junior_dev;
Now that we have our role, let's grant it some privileges. Snowflake requires you to grant explicit permissions on every database, schema and table. Even if a user has permissions to a schema, they won't be able to see the tables in that schema unless they are specifically granted permission to it.
We can grant our role these privileges by running these commands:
grant usage
  on warehouse COMPUTE_WH
  to role junior_dev;

grant usage
  on database NON_SENSITIVE_DATA
  to role junior_dev;

grant usage
  on schema NON_SENSITIVE_DATA.TPCH_SF10
  to role junior_dev;

grant select
  on table STORE_LOCATIONS;
  to role junior_dev;
This will grant our role permissions to run SELECT queries on the STORE_LOCATIONS table in the TPCH_SF1 schema in the NON_SENSITIVE database, using the warehouse COMPUTE_WH. Perfect!
Creating Snowflake user
Now that we have our role, let's create our user and then assign it our new role.
CREATE USER intern;

GRANT ROLE junior_dev to user intern;
Finally we have to add the Teleport public key to our new user. To do this, first export the public key on your Teleport cluster host by running
tctl auth sign --format=snowflake --out=server
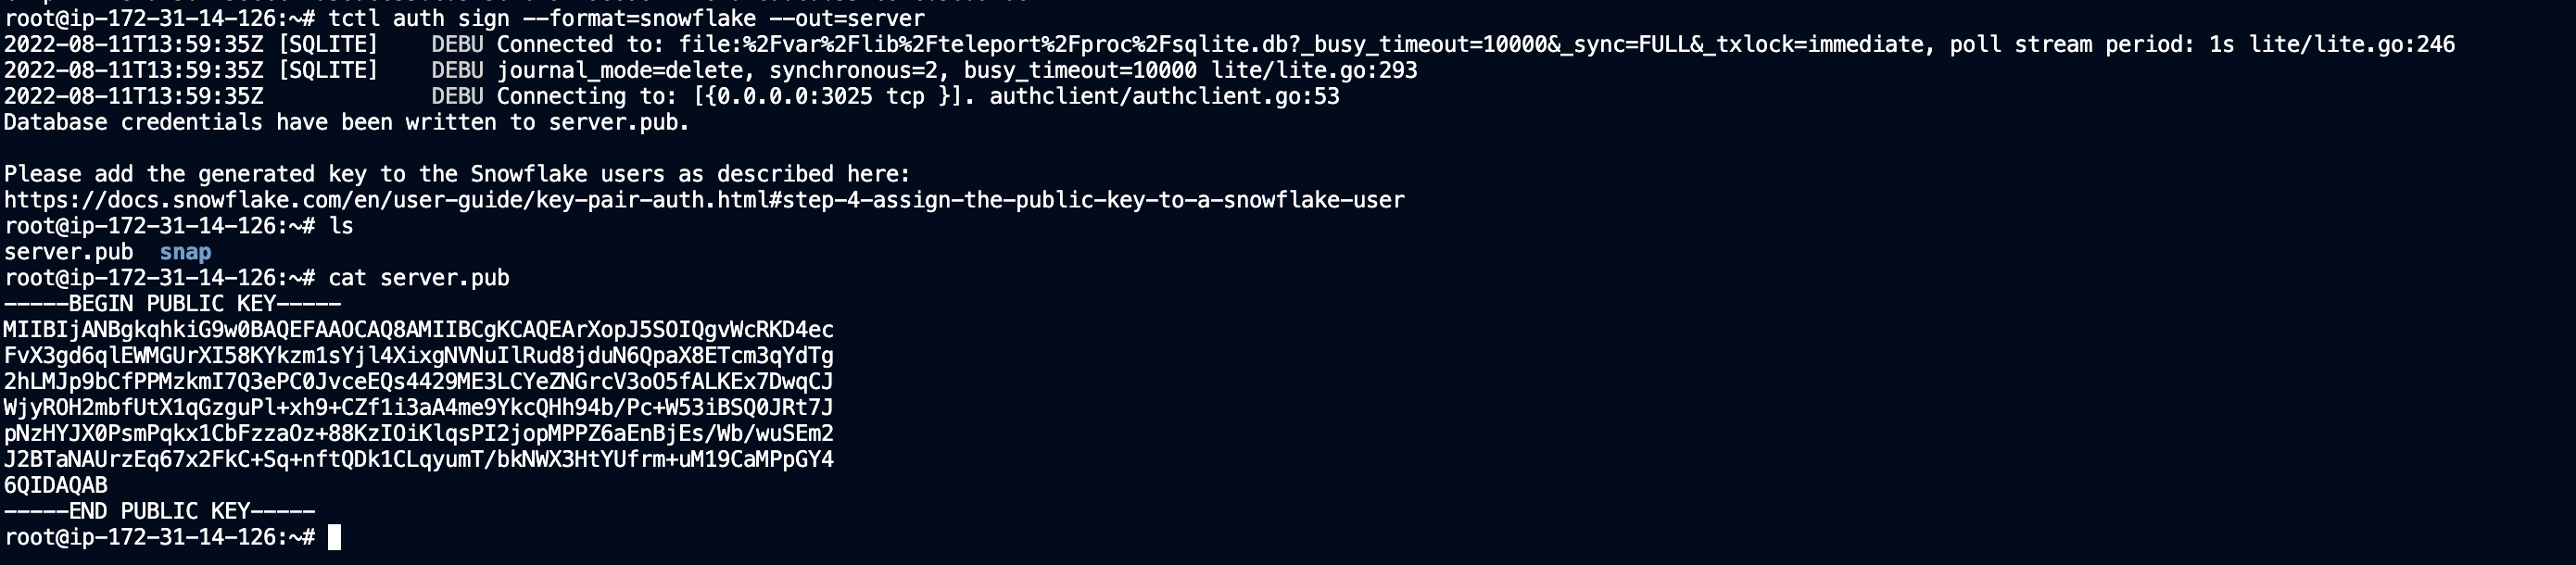
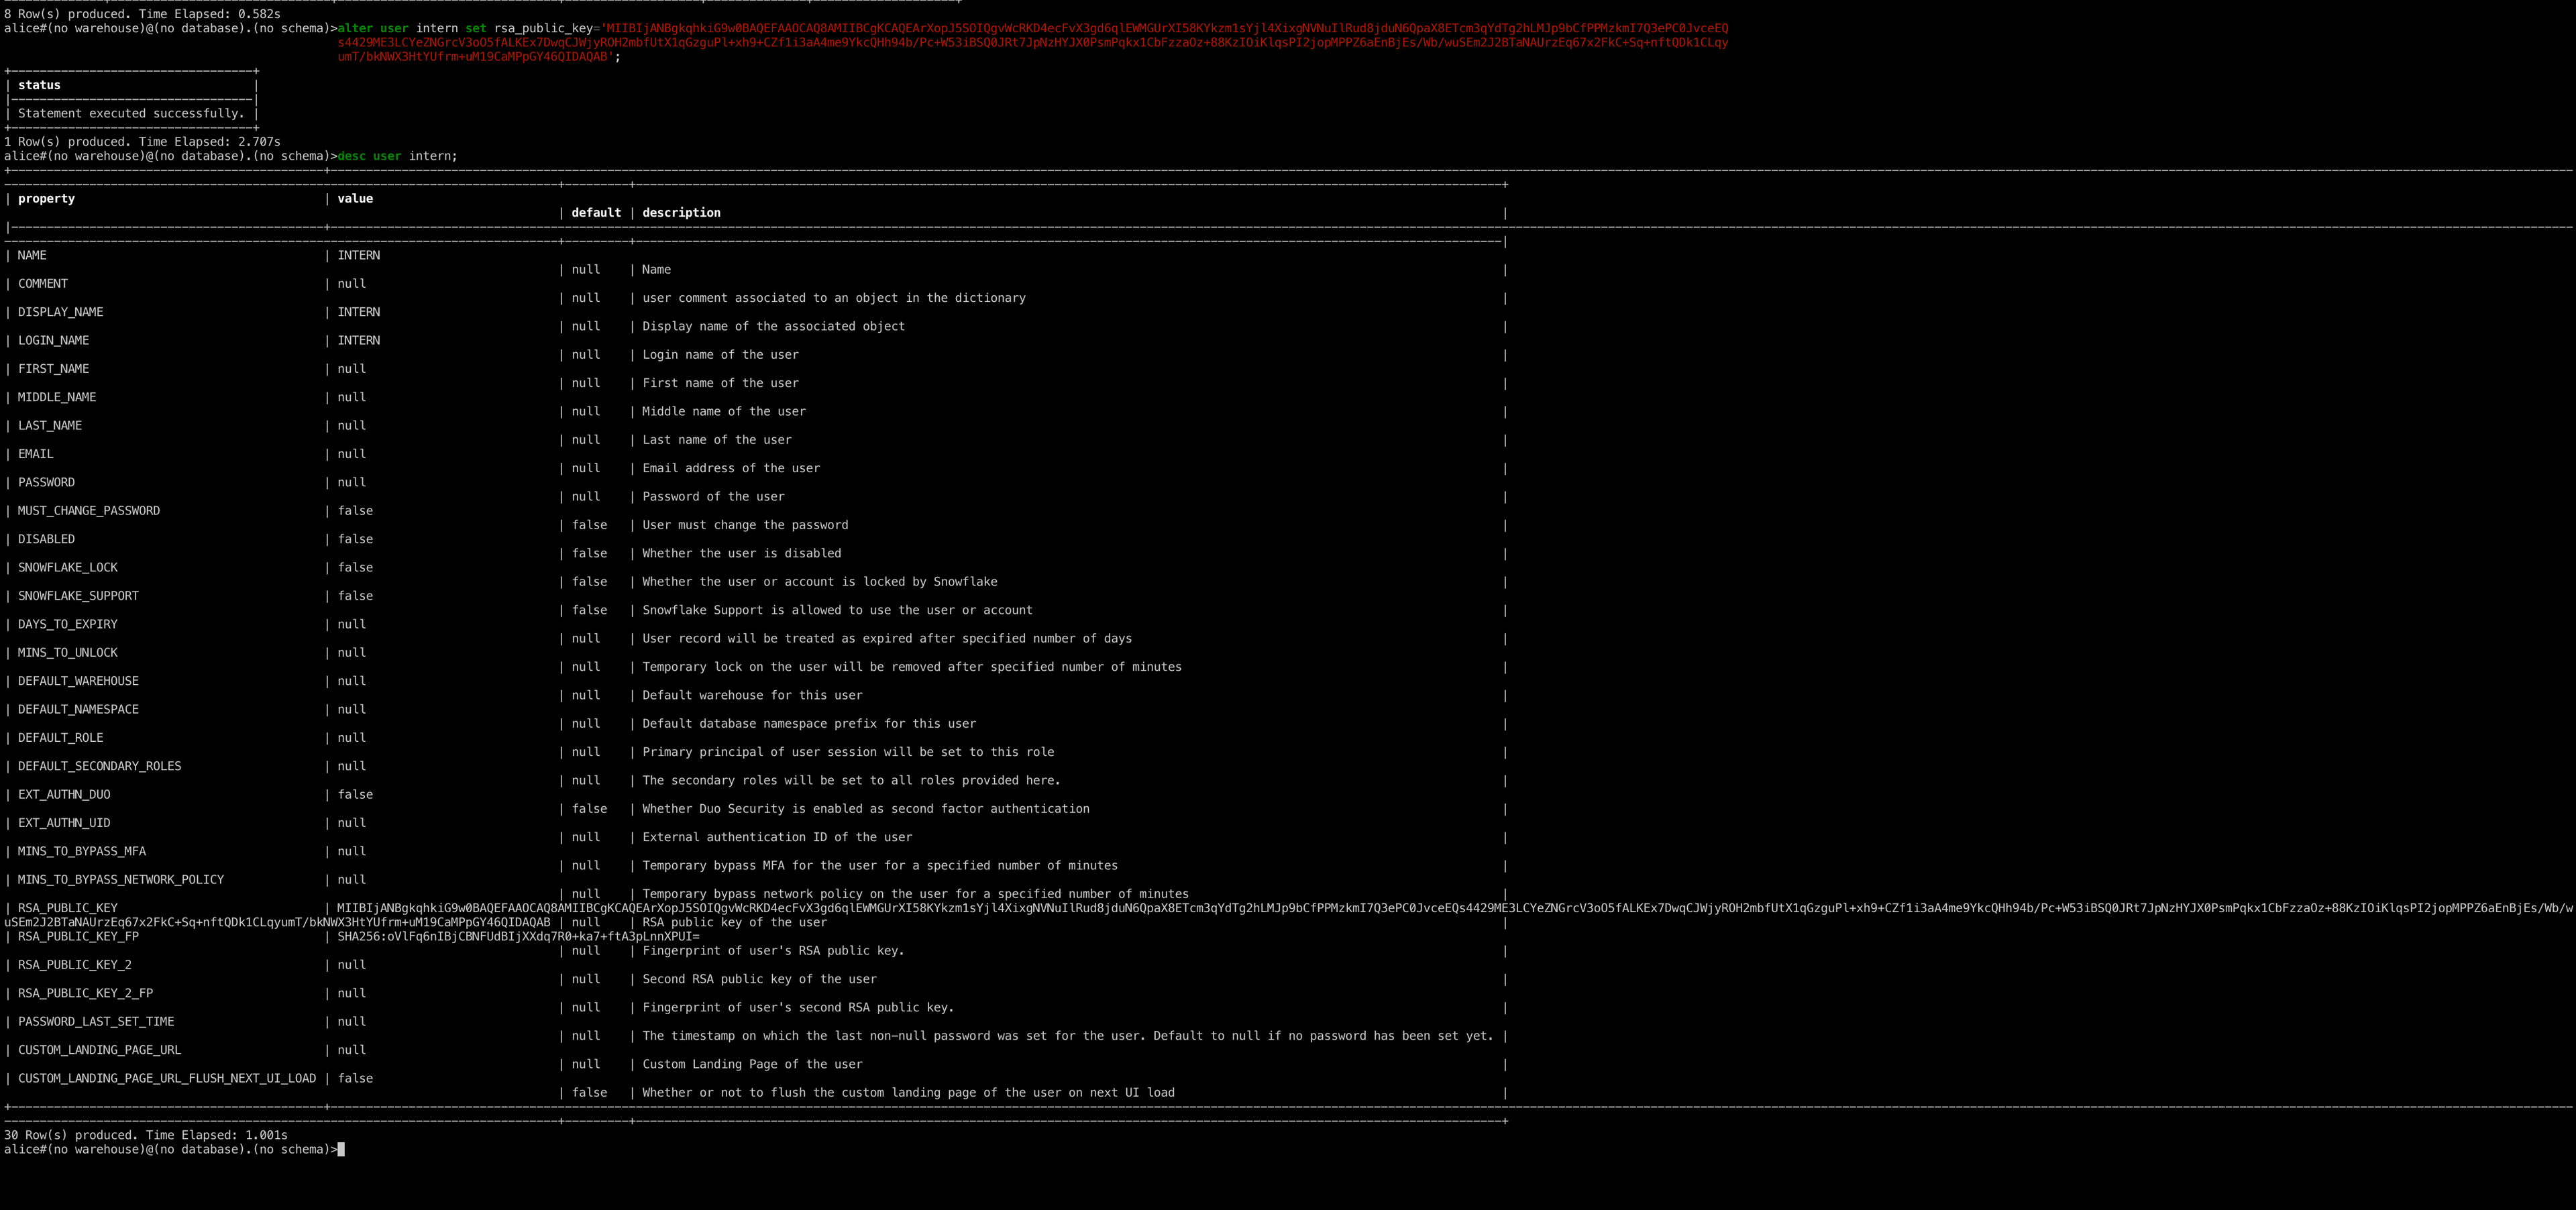
This will create a server.pub file with Teleport's public key. Copy the contents of the key without the header/footer. Then in our Snowflake session we'll run the command:
alter user intern set rsa_public_key=`<YOUR_PUBLIC_KEY>`
We can then run desc user intern to verify that the user's public key is correct. Now that we have the public key, we should be able to connect to the account directly given that our Teleport user has the correct permissions to use the account!
Mapping Snowflake user to Teleport role
Next, let's assign our new user to our Teleport role, so that we can login and test it out.
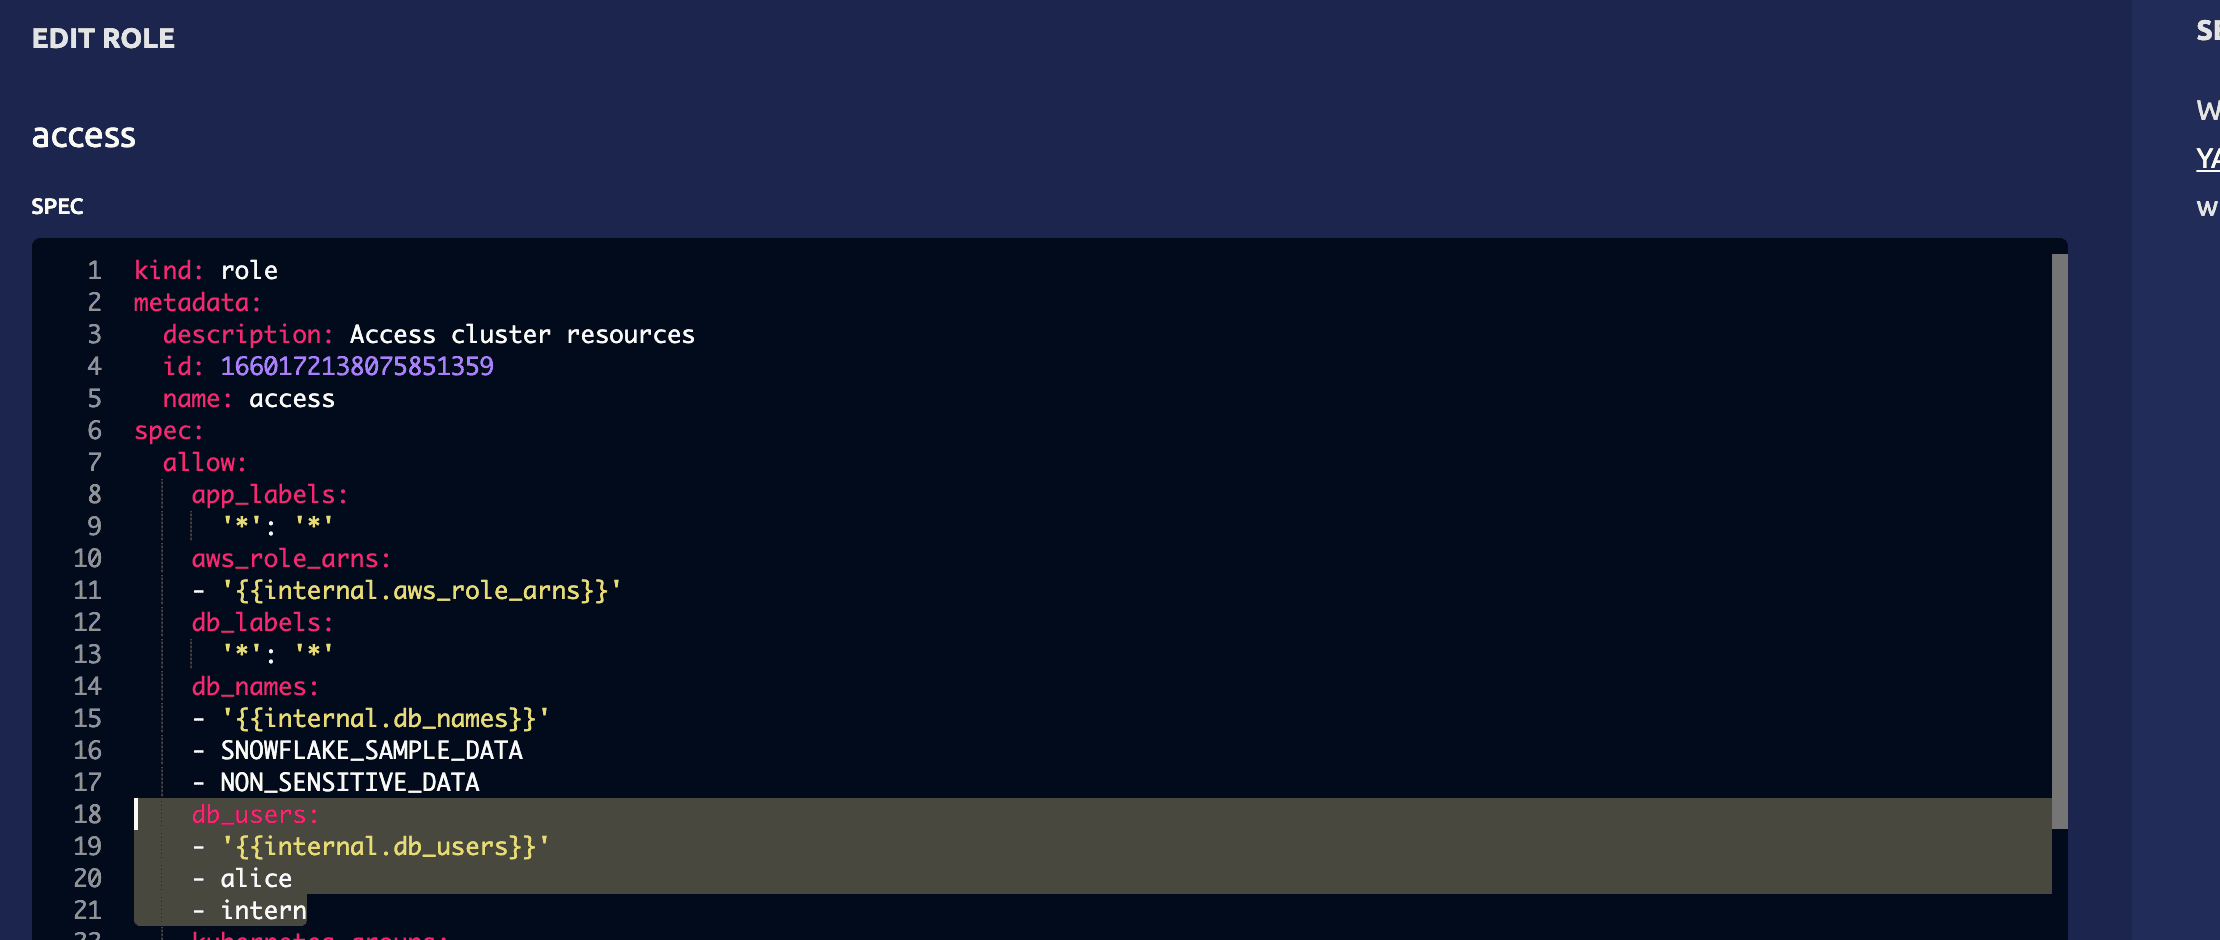
An easy way to do this is edit the role right in the Teleport web UI. Open your Teleport cluster's web UI and navigate to the Roles section under the Team heading.
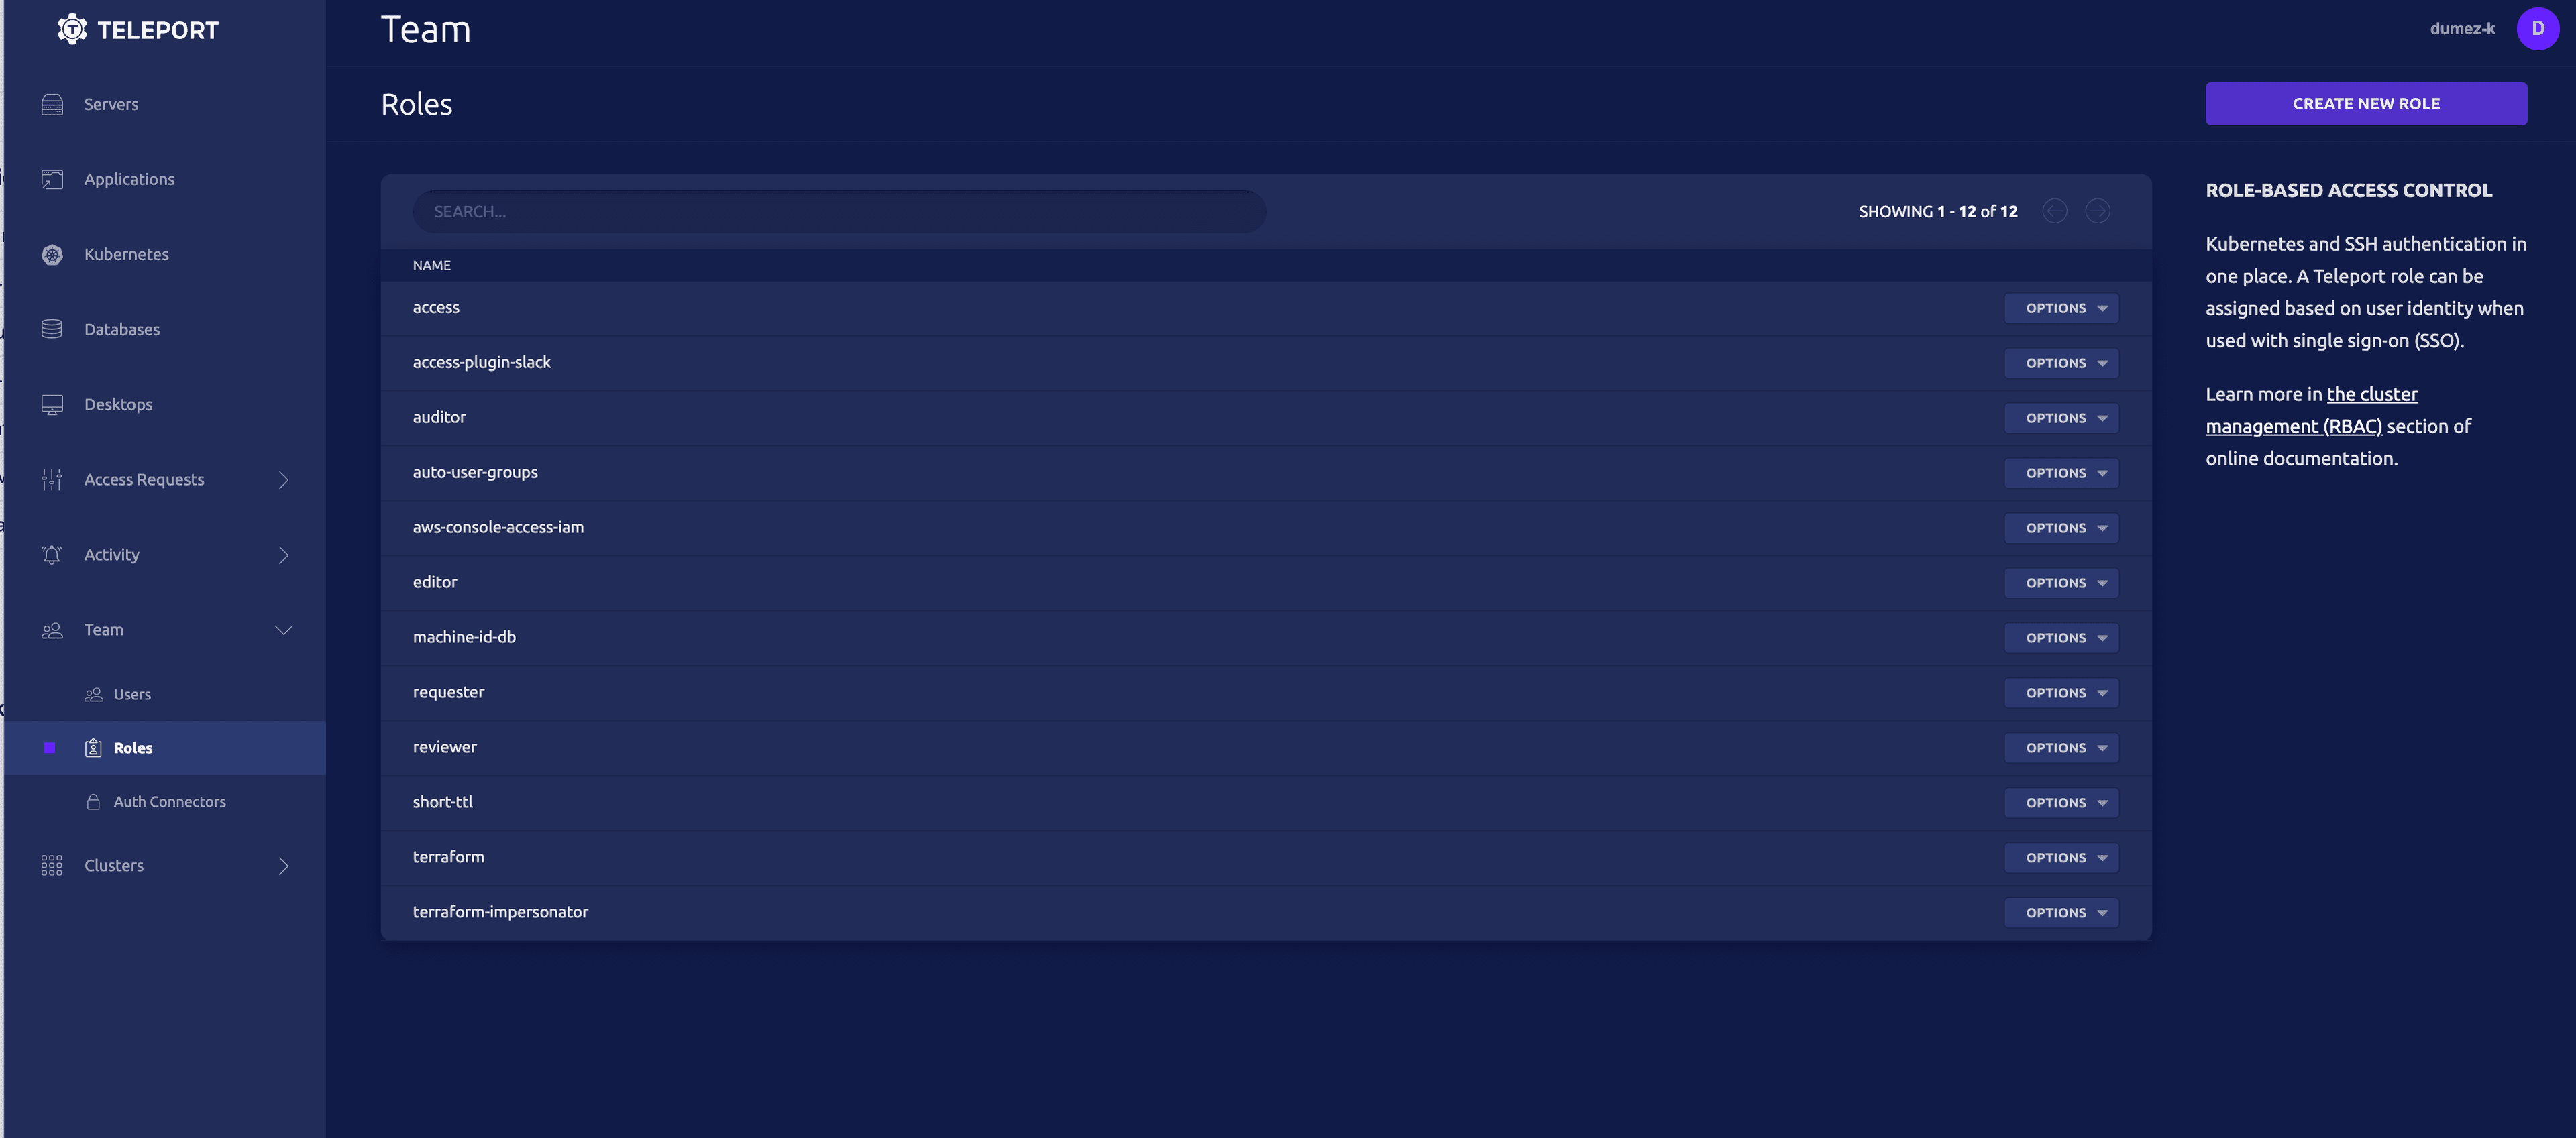
Then navigate to the role you want to grant access to. In this case, we'll use the access role. From here add the user to the db_users field.
Now let's try to access our database as our intern user.
Run the commands:
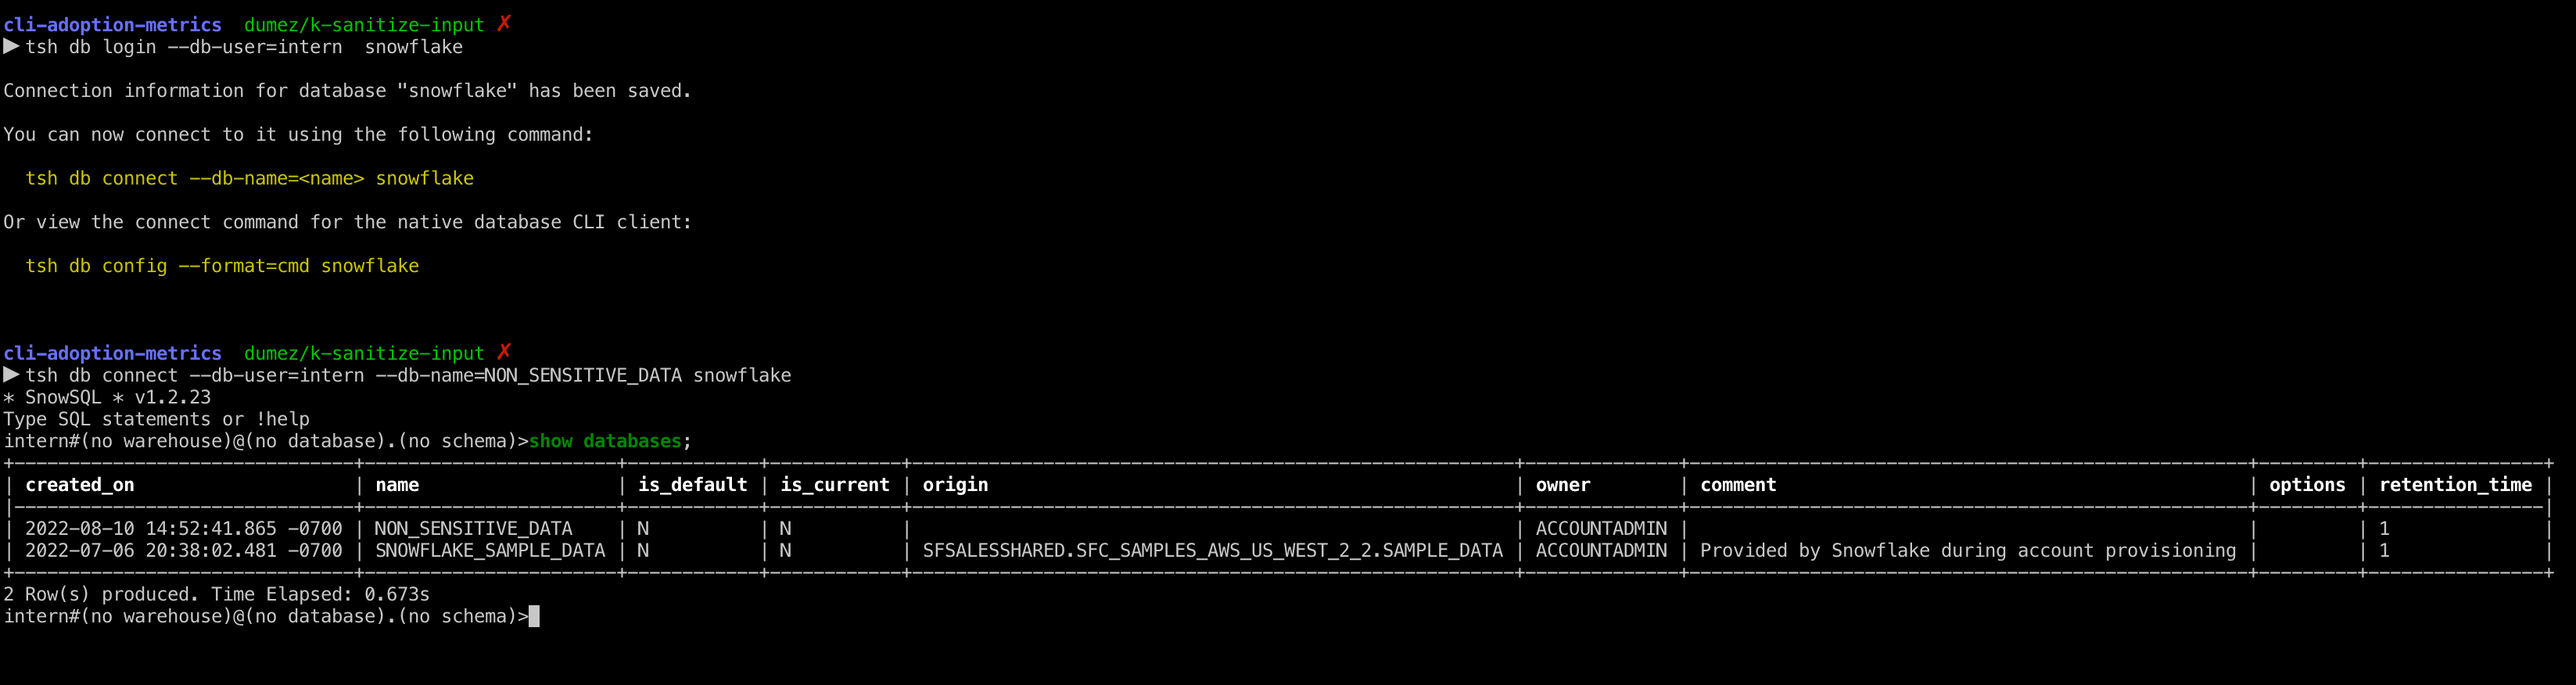
tsh db login --db-user=intern snowflake
tsh db connect --db-user=intern --db-name=NON_SENSITIVE_DATA snowflake
Now when we do our show databases command we'll only see the SNOWFLAKE_SAMPLE_DATA and the `NON_SENSITIVE_DATA databases, with all of our other resources hidden.
Configuring RBAC is a critical step in securing your database.
With Teleport, it’s easy to secure your Snowflake database, enforcing best security practices and compliance, all without slowing down development.
For more information, follow our documentation for Database Access with Snowflake.
New to Teleport? Try out our interactive learning labs!
Table Of Contents
Teleport Newsletter
Stay up-to-date with the newest Teleport releases by subscribing to our monthly updates.
Teleport Newsletter
Stay up-to-date with the newest Teleport releases by subscribing to our monthly updates.