How to Secure Amazon RDS Access With an Identity-Aware Access Proxy
Databases are sensitive resources that need an additional layer of protection and security. Though database servers have built-in authentication and authorization mechanisms, they are not designed for cloud-based, multi-tenant access mechanisms. Managed databases such as Amazon RDS are accessed and administered by different personas with varying levels of access permissions. Enterprises need a robust, fine-grained role-based access control to manage cloud-based DB as a Service (DBaaS) offerings such as Amazon Relational Database Services (Amazon RDS).
By using an identity-aware access proxy such as Teleport, enterprises can apply industry best practices for database access with identity-based SSO, short-lived certificates for users or service accounts, multi-factor authentication, RBAC, and audit for all databases across all environments.
Part 1: Securing Amazon RDS instances with identity-aware access proxy
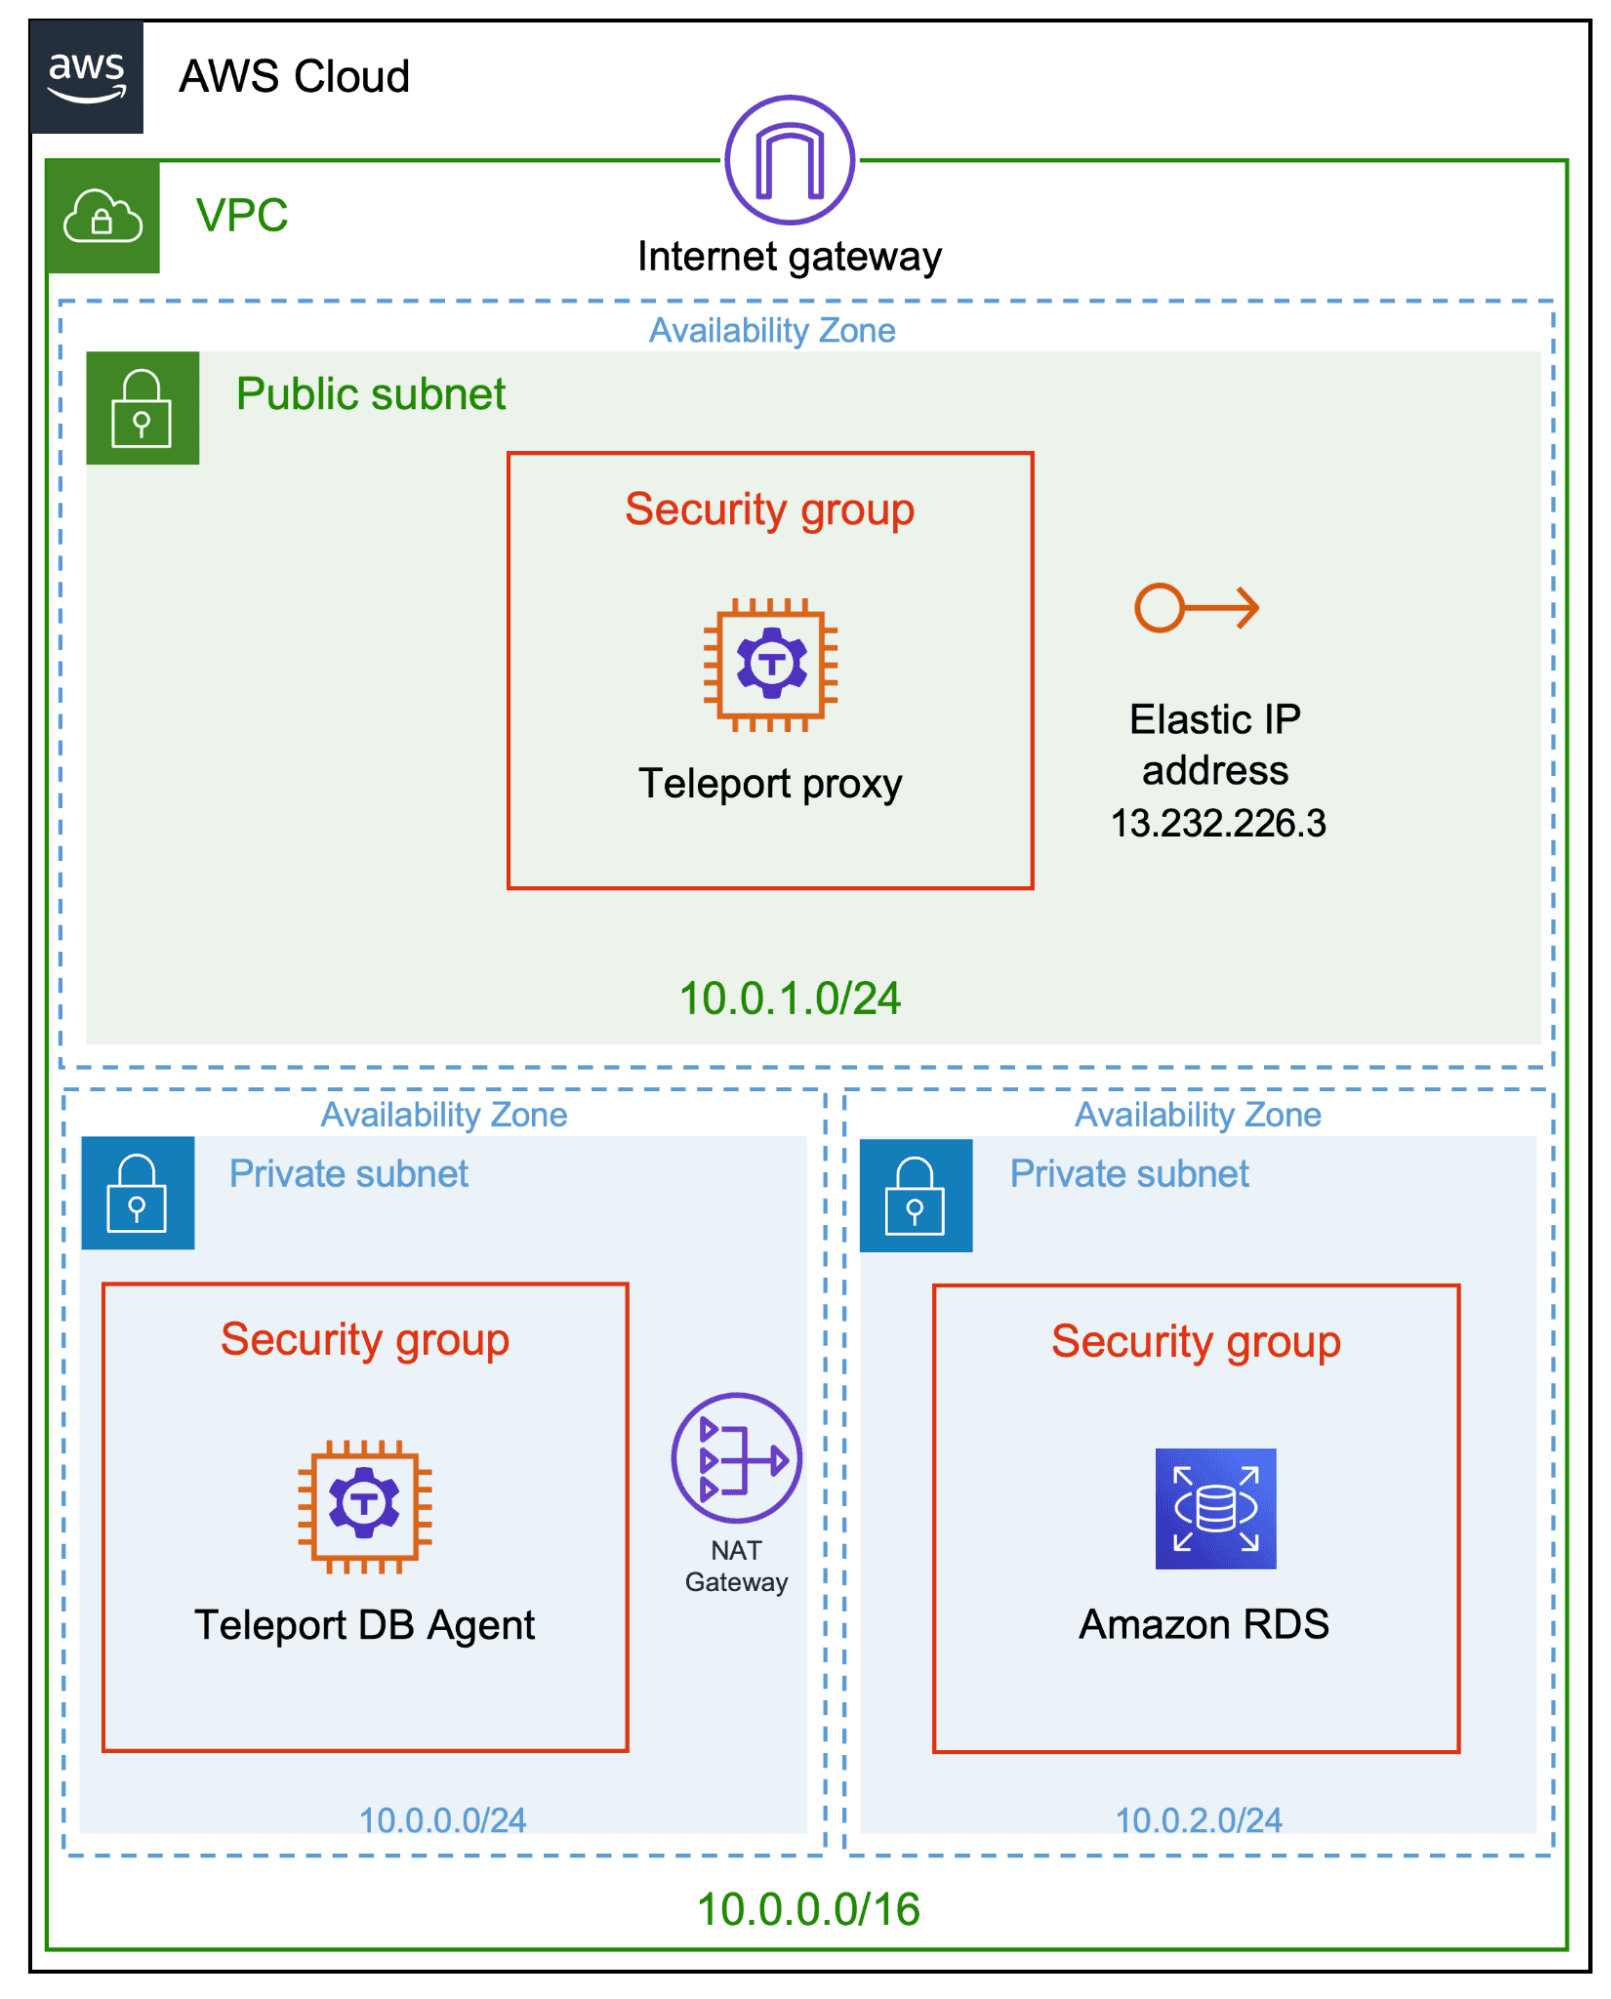
In the first part of this series on securing access to Amazon RDS databases, we will explore how Teleport brings in an additional layer of security to RDS resources provisioned in a private subnet of the Amazon virtual private cloud (Amazon VPC). It covers the steps of launching and configuring the Teleport proxy/auth server, the host for the database agent, and an Amazon RDS instance.
Below is a quick summary of the benefits of using Teleport to access managed and self-hosted database servers:
- Identity-based access - Enforces the use of auto-expiring x.509 certificates for users and applications.
- Access requests - Enables just-in-time privilege escalation for administrative tasks without the need to use administrator accounts
- Consolidated policy - Centralizes policy definitions based on RBAC across all environments
Step 1 - Configuring AWS resources and install Teleport
This tutorial is a follow-up to a recent tutorial on how to configure a SSH bastion host for Amazon EC2. Please refer to that post for the initial configuration details. Once you complete the first two steps of the tutorial, which involve the creation of the VPC, launching Amazon EC2 instances and installing Teleport, we will extend the configuration by adding another private subnet required for Amazon RDS.
Note: Although most of the configurations in this tutorial are done via AWS CLI, these configurations can also be performed over the AWS management console of your AWS account.
$ aws ec2 create-subnet \
   --vpc-id vpc-0469c1a208568e8c6 \
   --availability-zone ap-south-1b \
   --cidr-block 10.0.2.0/24
Your VPC should now have one public subnet and two private subnets.
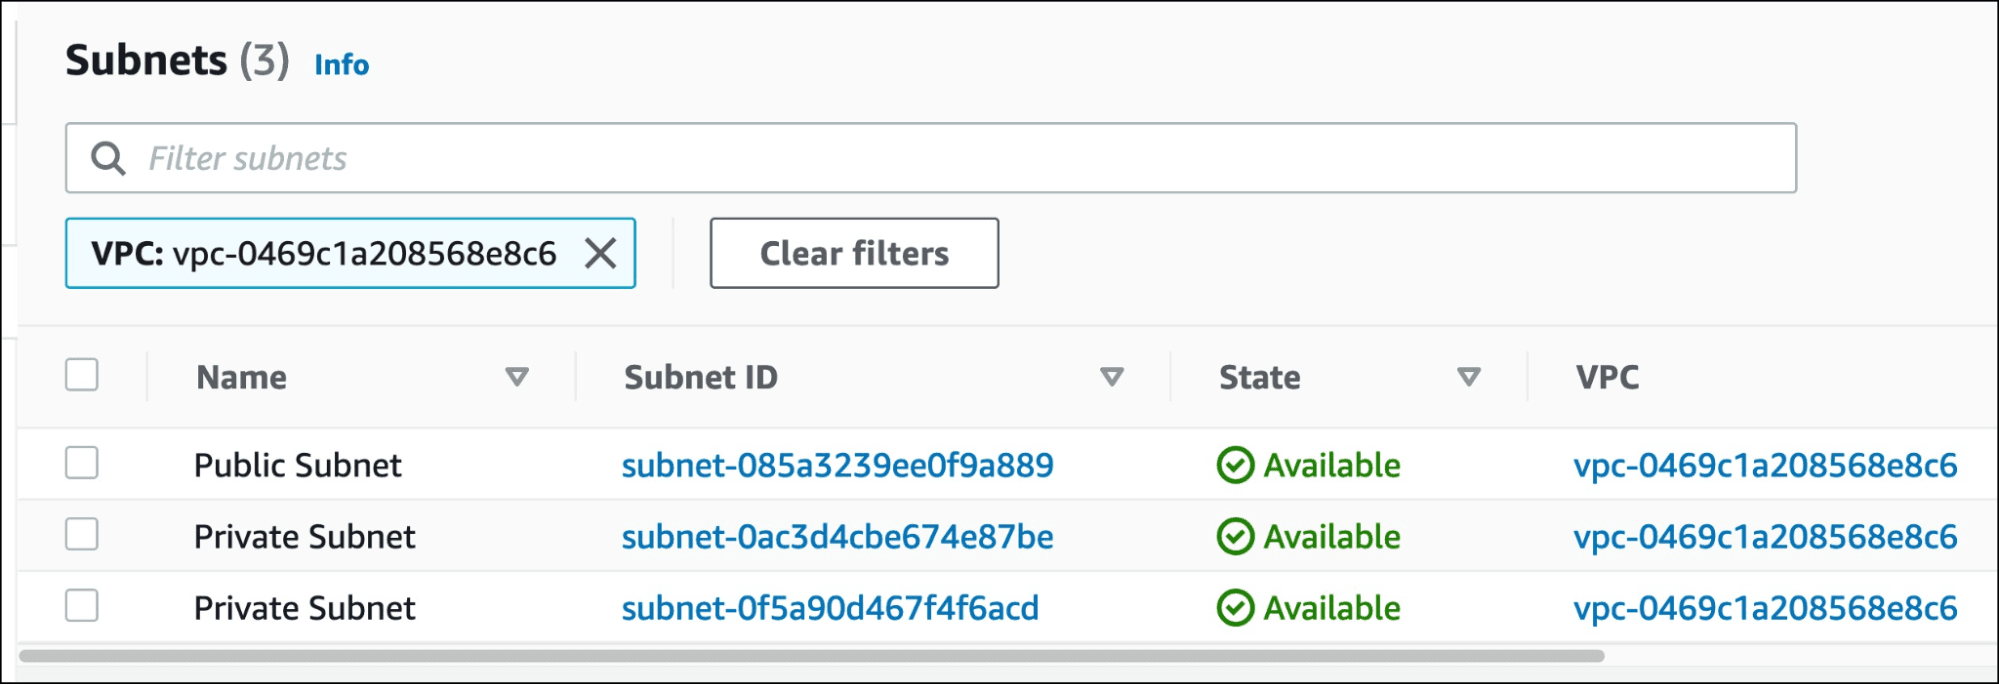
Once the subnet is created, let’s create a subnet group to include both the private subnets. Replace the resource identifiers with values from your environment.
$ aws rds create-db-subnet-group \
   --db-subnet-group-name rdssubnetgrp \
   --db-subnet-group-description "Demo DB subnet group" \
   --subnet-ids '["subnet-0ac3d4cbe674e87be","subnet-0f5a90d467f4f6acd"]'
With the subnet and subnet group in place, we need to open the ports for the DB agent host to access RDS. The security group created below opens port 5432 used by PostgreSQL to all the EC2 instances based on the security group sg-0e50c97f60606e1da.
$ aws ec2 authorize-security-group-ingress \
   --group-id sg-05924cd3be1f8789c \
   --protocol tcp \
   --port 5432 \
   --source-group sg-0e50c97f60606e1da
Let’s launch an Ubuntu 20.04 EC2 instance in one of the private subnets to run the Teleport DB agent.
$ aws ec2 run-instances \
   --image-id ami-0851b76e8b1bce90b \
   --count 1 \
   --instance-type t3.xlarge \
   --key-name teleport-demo \
   --security-group-ids sg-0e50c97f60606e1da \
   --subnet-id subnet-0ac3d4cbe674e87be \
   --tag-specifications \
   'ResourceType=instance,Tags=[{Key=Name,Value=Teleport-DB-Agent}]'
Finally, let’s launch an Amazon RDS DB instance within the VPC by passing the DB subnet group name.
$ aws rds create-db-instance \
   --db-instance-identifier teleport-demodb-rds \
   --db-instance-class db.t3.micro \
   --engine postgres \
   --master-username postgres \
   --master-user-password secret99 \
   --allocated-storage 20 \
   --db-subnet-group-name rdssubnetgrp \
   --vpc-security-group-ids sg-05924cd3be1f8789c
Note: For production use cases, implement proper network firewall, network access control and data encryption using RDS encryption for enhanced security.
At this point, we have two EC2 instances — one running the Teleport proxy/auth server and the other instance that will be configured as the Teleport DB agent.
Similar to a node joined to a cluster for remote access, the DB agent running on a host provides secure access to one or more database servers.
In the current scenario, we configured an EC2 instance to act as the DB agent, providing secure access to the Amazon RDS instance.
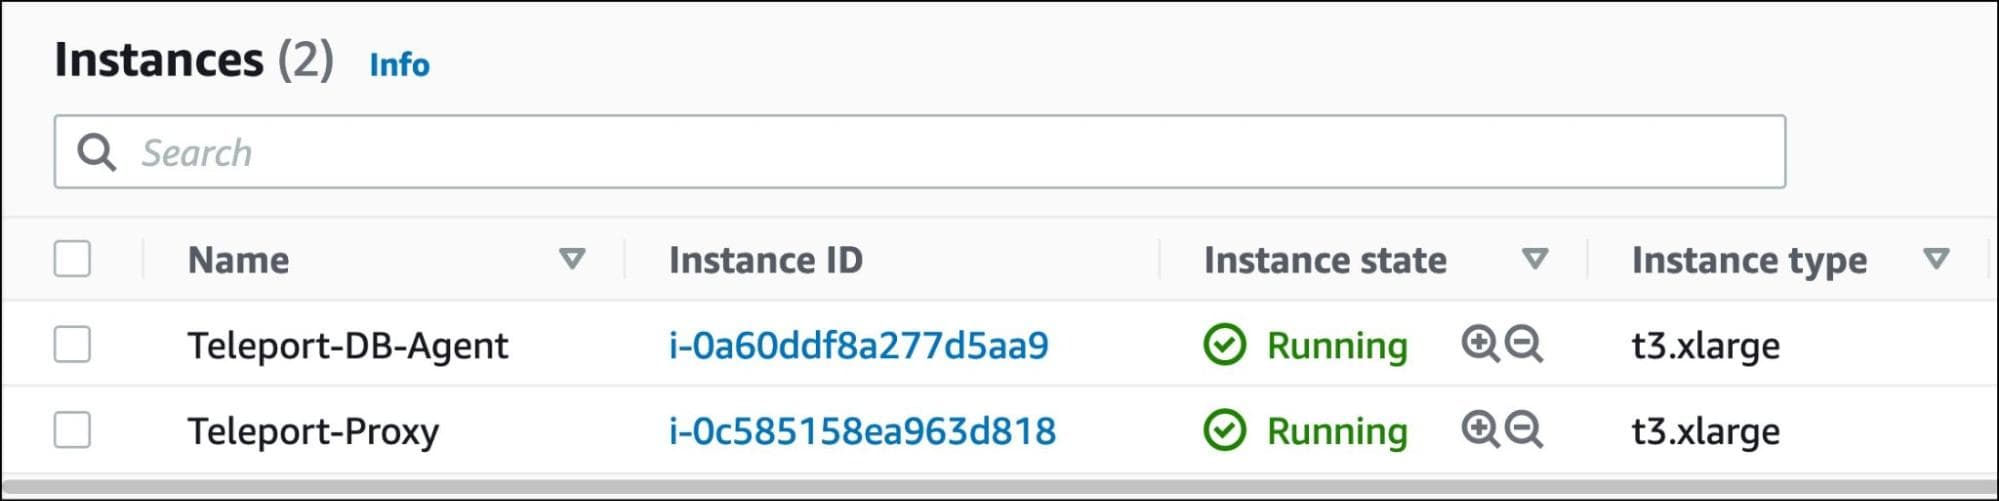
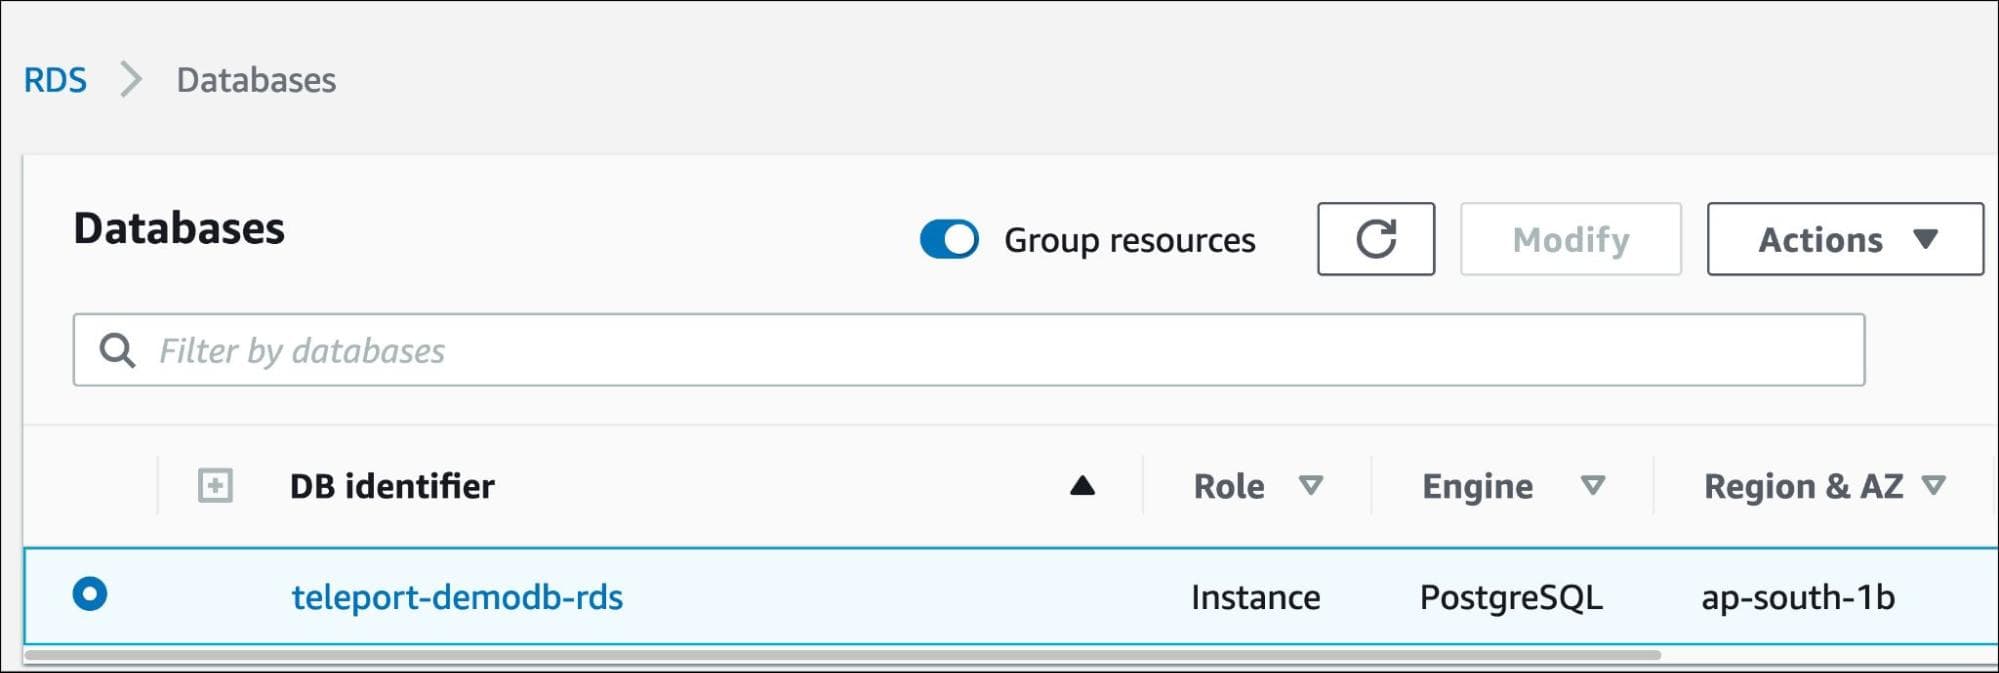
We also have a PostgreSQL RDS instance running in its own subnet.
Access the database from the EC2 instance, and run the below command to create a user, john, and allow IAM authentication.
> CREATE USER john;
> GRANT rds_iam TO john;
Assuming you have configured the Teleport proxy/auth server in the EC2 instance running in the public subnet and a local user based on the editor role, let’s go ahead with the configuration of the Teleport DB agent. Refer to the documentation to finish these steps.
Since the Teleport DB agent talks to the RDS service, we need to associate the EC2 instance running the agent with a couple of IAM roles. This provides the agent with sufficient permissions to the RDS APIs.
Create an AWS IAM policy named DatabaseAccess with the below content:
{
   "Version": "2012-10-17",
   "Statement": [
       {
           "Effect": "Allow",
           "Action": [
               "rds:DescribeDBInstances",
               "rds:ModifyDBInstance",
               "rds:DescribeDBClusters",
               "rds:ModifyDBCluster"
           ],
           "Resource": [
               "*"
           ]
       },
       {
           "Effect": "Allow",
           "Action": [
               "iam:GetUserPolicy",
               "iam:PutUserPolicy",
               "iam:DeleteUserPolicy"
           ],
           "Resource": [
               "*"
           ]
       }
   ]
}
Create another policy with the below content and call it DatabaseAccessBoundary:
{
   "Version": "2012-10-17",
   "Statement": [
       {
           "Effect": "Allow",
           "Action": [
               "rds:DescribeDBInstances",
               "rds:ModifyDBInstance",
               "rds:DescribeDBClusters",
               "rds:ModifyDBCluster",
               "rds-db:connect"
           ],
           "Resource": [
               "*"
           ]
       },
       {
           "Effect": "Allow",
           "Action": [
               "iam:GetUserPolicy",
               "iam:PutUserPolicy",
               "iam:DeleteUserPolicy"
           ],
           "Resource": [
               "*"
           ]
       }
   ]
}
Next, create a role for EC2 called Teleport-DB-Agent and assign the above policies.
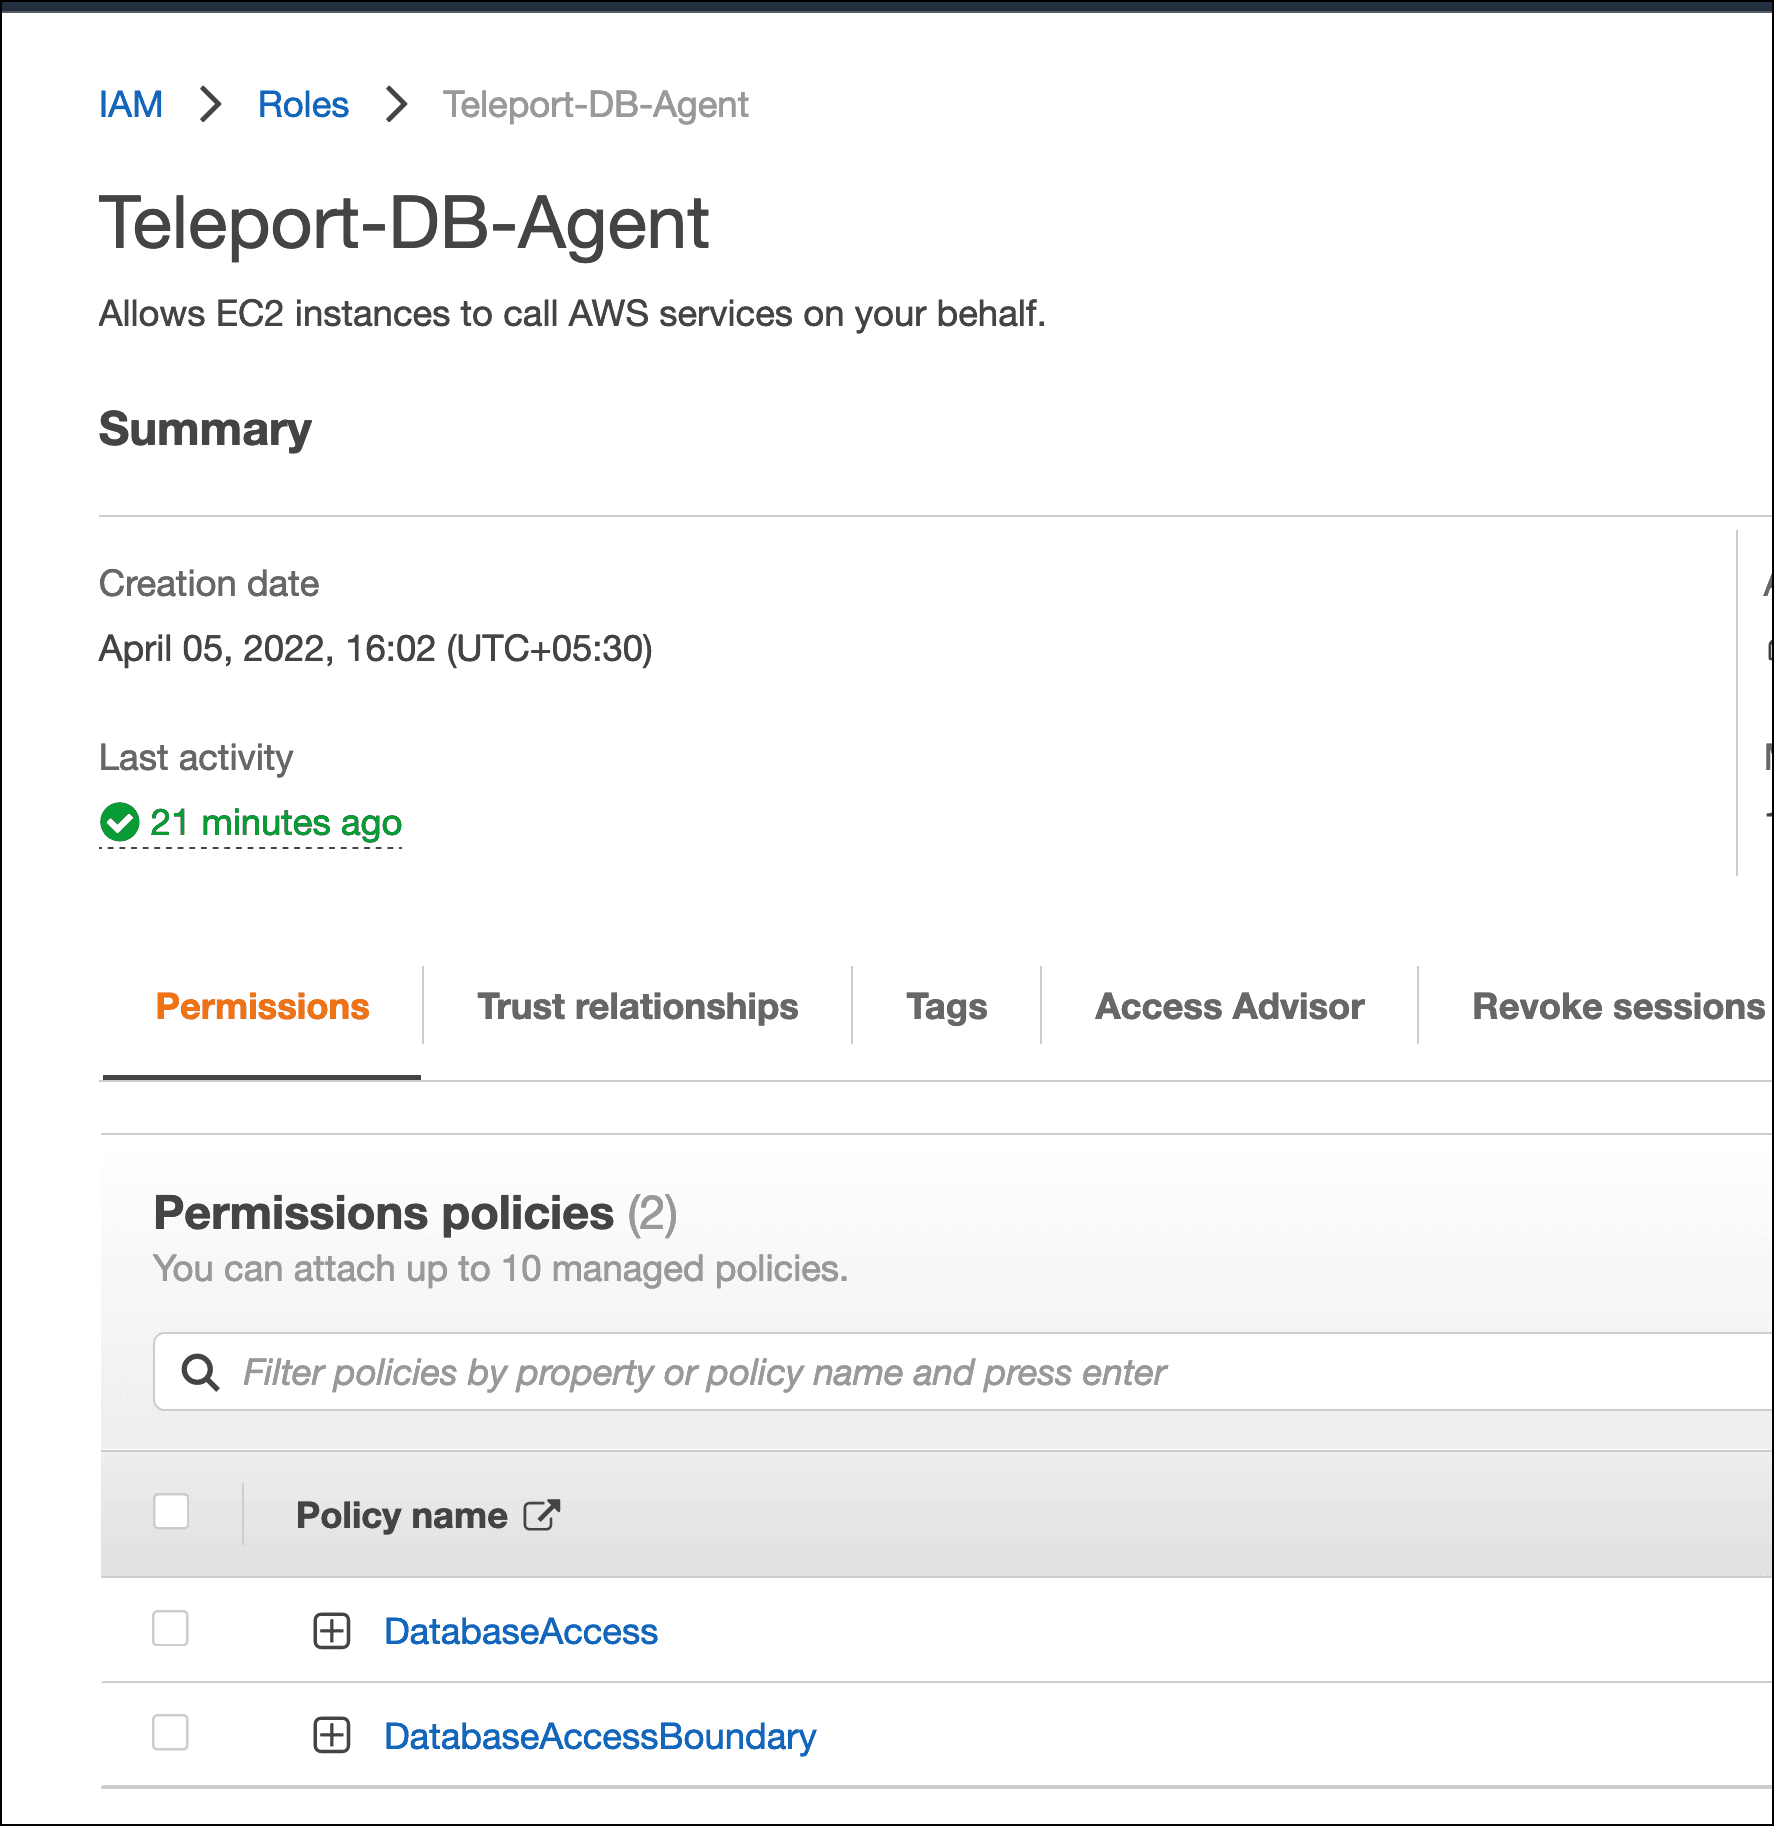
Side Note: This step can be automated by running the teleport db configure bootstrap command on the agent host. Refer to the documentation for more details.
Finally, assign the role to the EC2 instance responsible for running the Teleport DB agent.
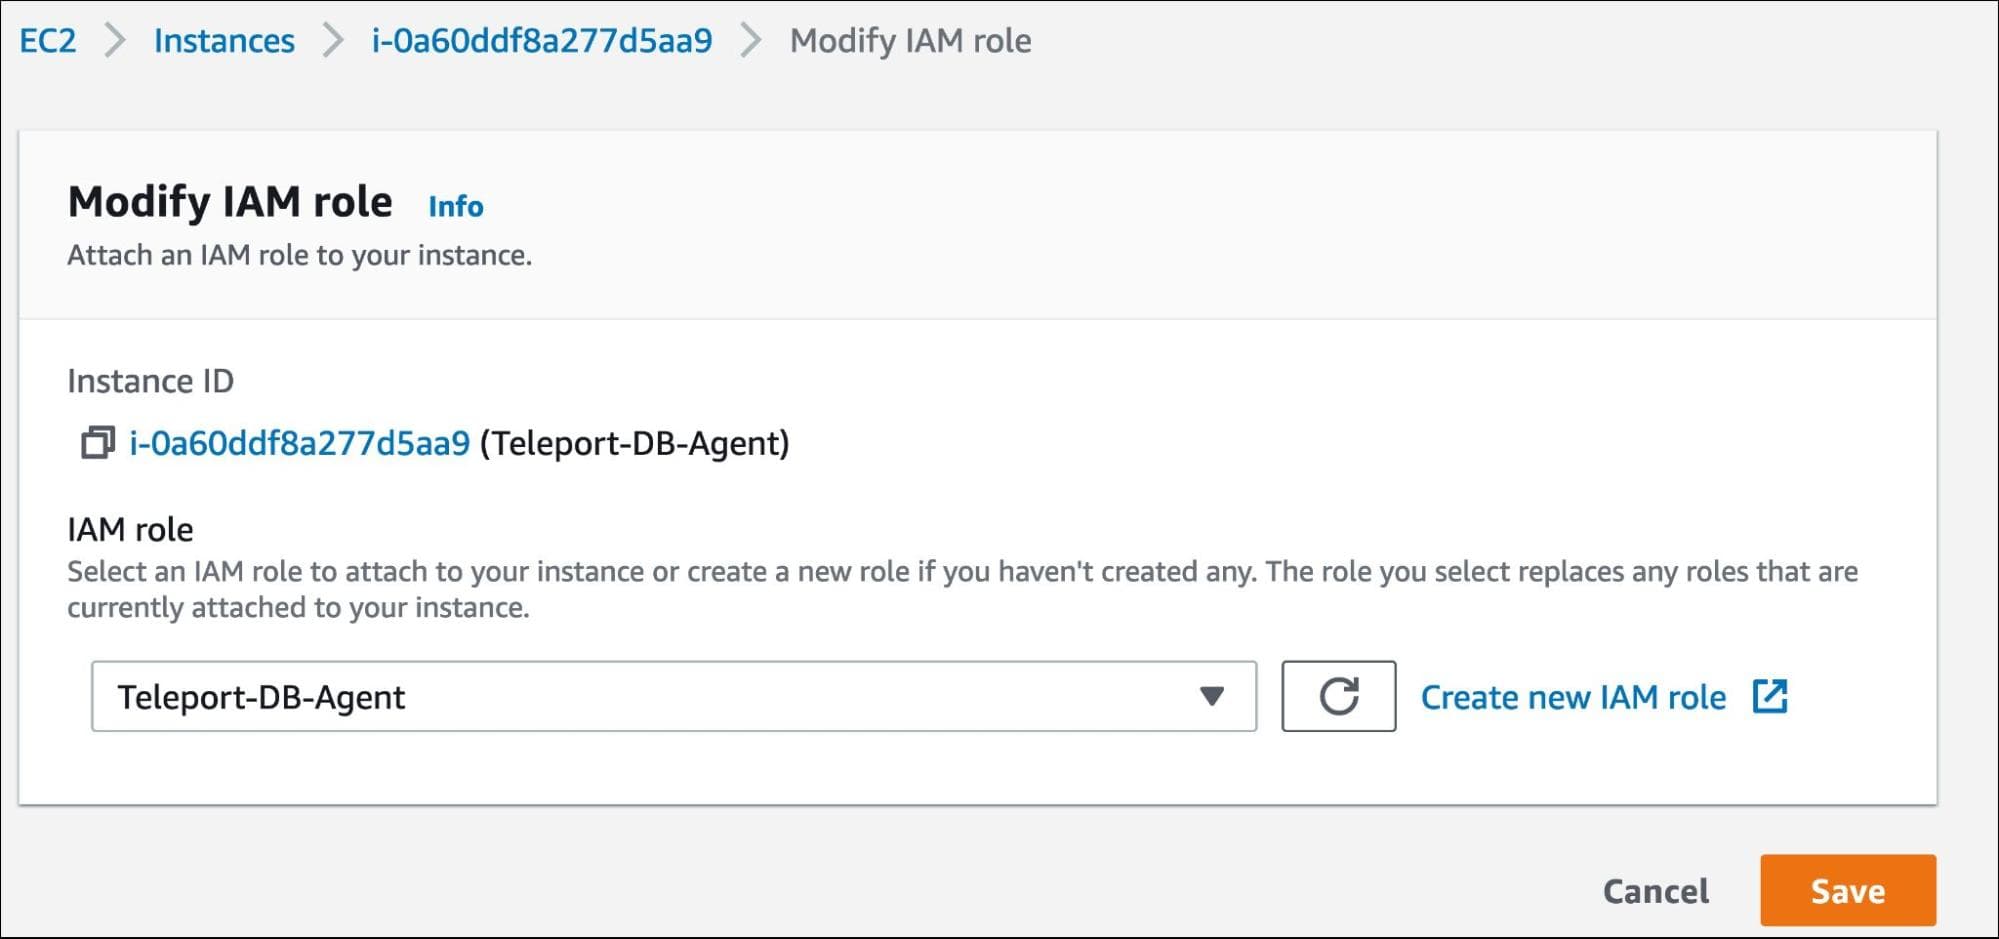
The Teleport DB agent will be able to access RDS through the implicit credentials exposed by the EC2 instance.
Step 2 - Installing and configuring the Teleport DB agent
Assuming you have installed a Teleport proxy in the public-facing subnet, login into it through tsh and add a new user by the name john.
$ sudo tctl users add --roles=access john
Once the user is created, we need to add the traits to support databases.
$ sudo tctl get users/john > john.yaml
Edit the file, john.yaml, to add the traits to the specification and apply the changes.
traits:
   db_users:
   - "*"
   db_names:
   - "*"

$ sudo tctl create -f john.yaml
Next, let’s generate a token required by the DB agent to join the Teleport cluster.
sudo tctl tokens add --type=db
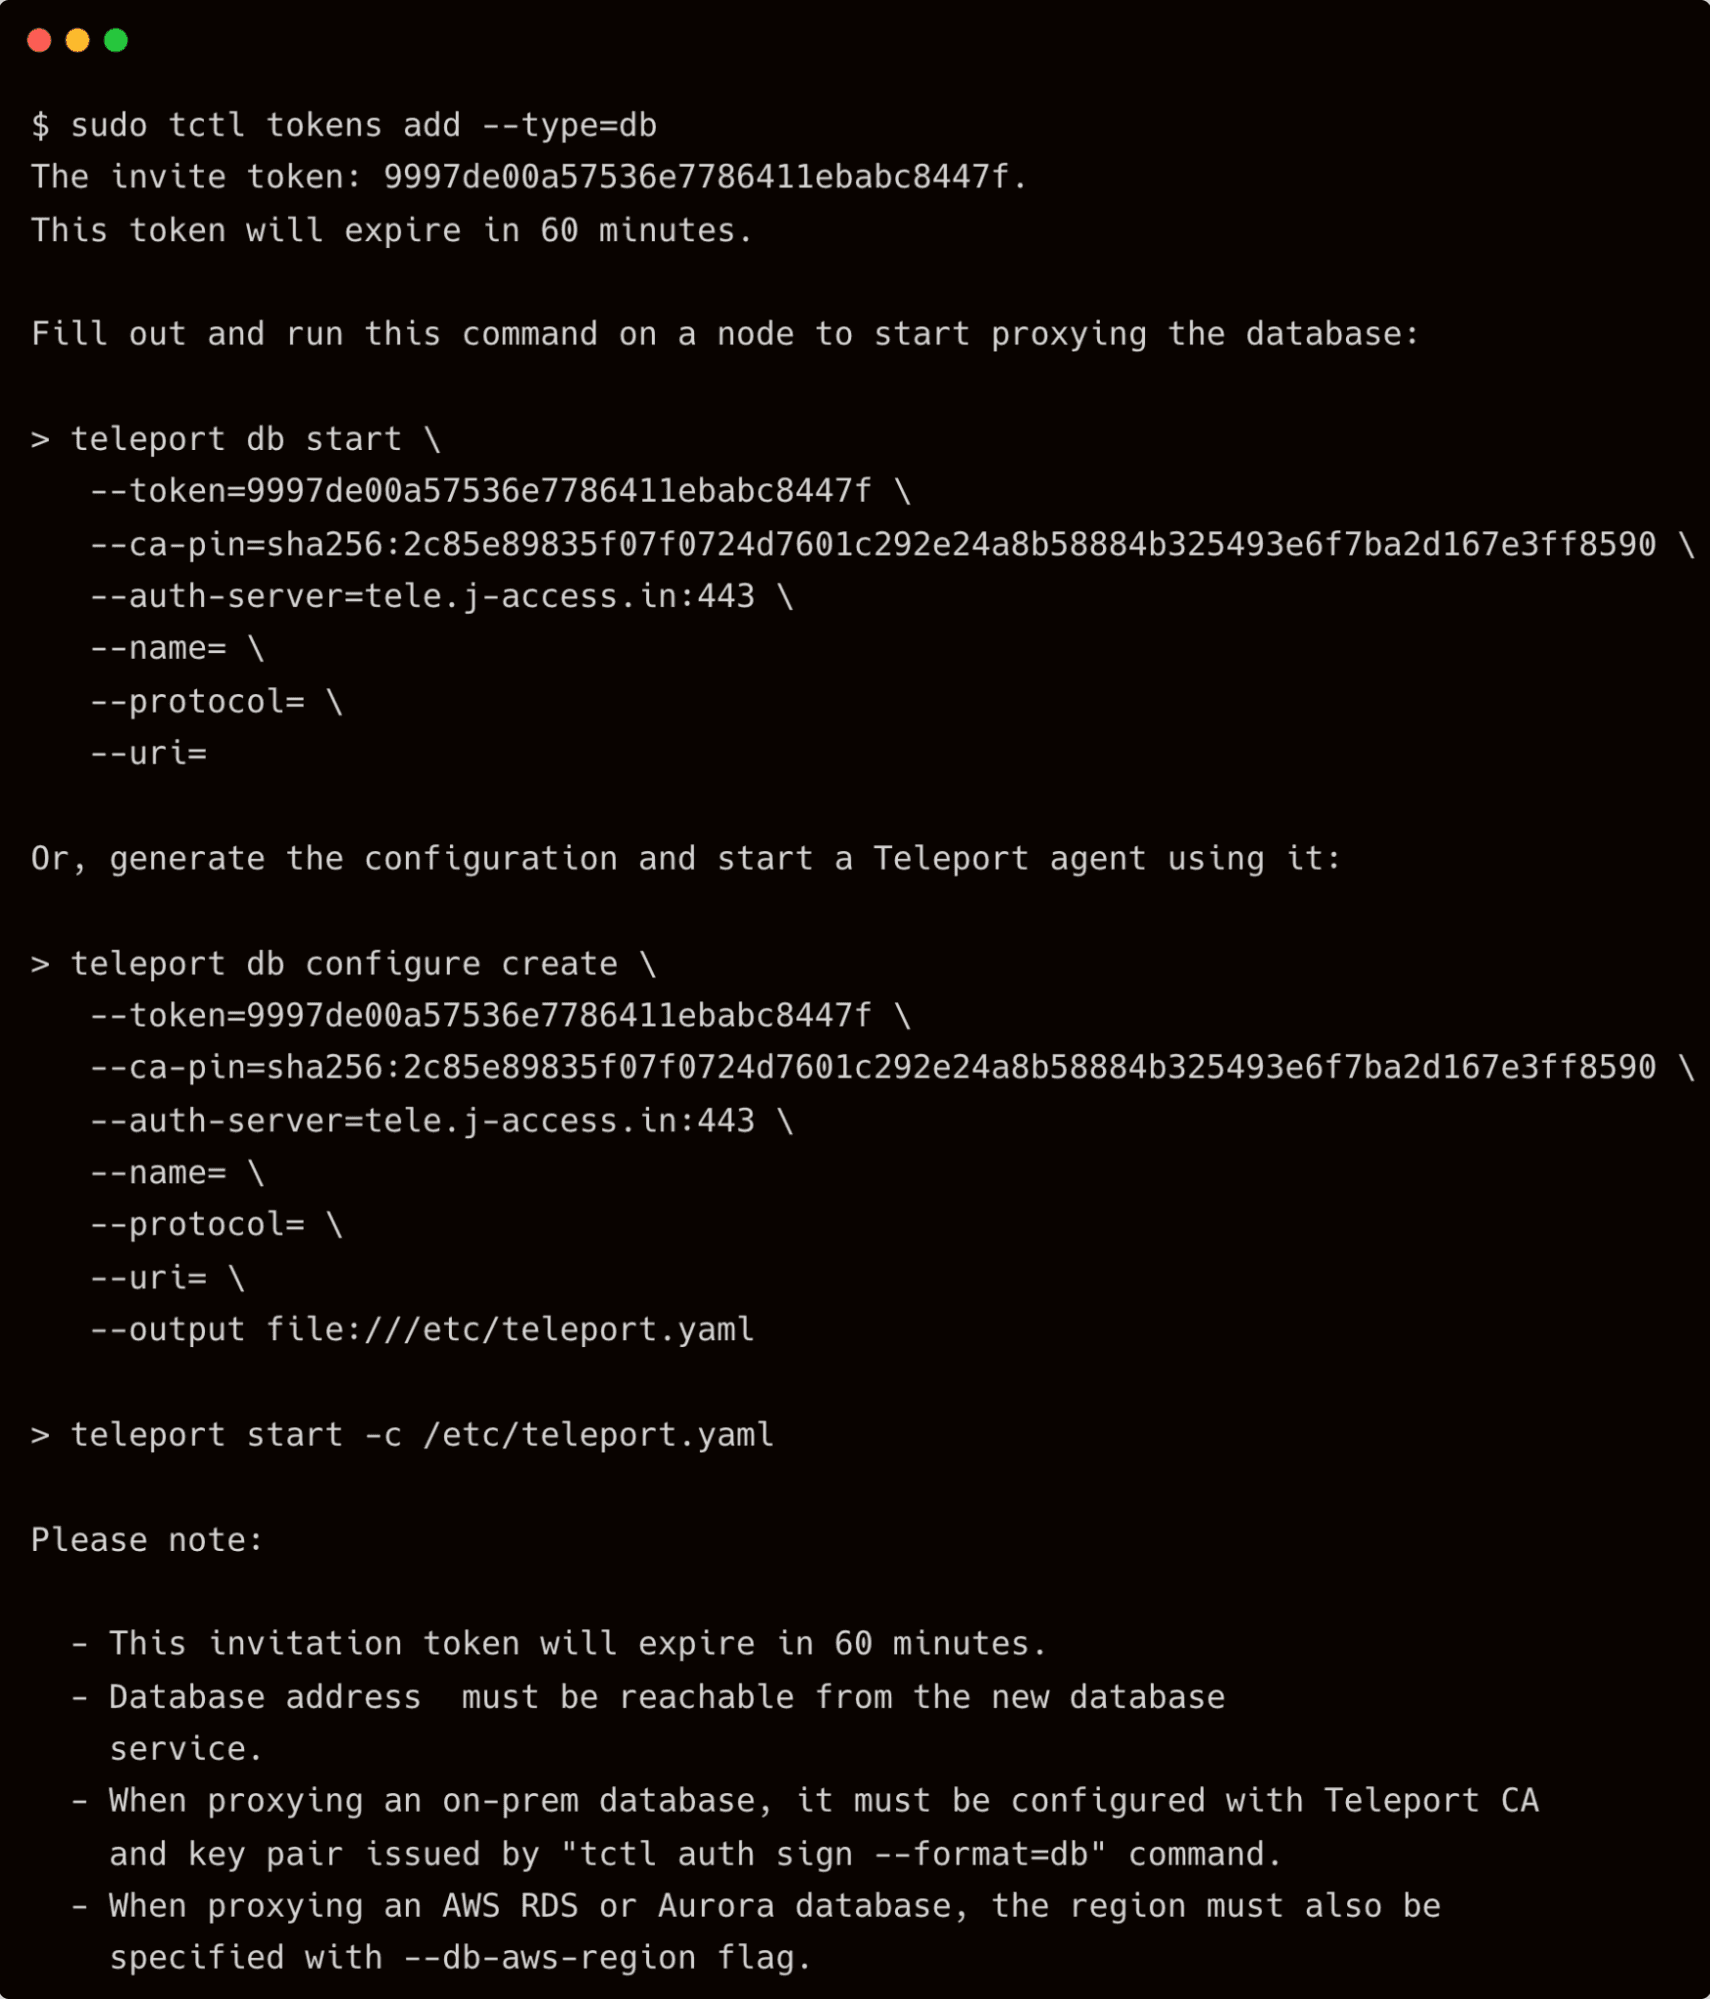
Now, SSH into the EC2 host that is provisioned to run the DB agent and create the file /opt/teleport/token.file with the token from the above command.
Download the install Teleport Enterprise binaries on the host, and then run the below command to generate the configuration file.
$ sudo teleport db configure create \
  -o file    \
  --proxy=tele.j-access.in:3080    \
  --token=/opt/teleport/token.file    \
  --rds-discovery=ap-south-1
This command generates a database agent configuration with RDS database auto-discovery enabled on the ap-south-1 region and places it at the /etc/teleport.yaml location.
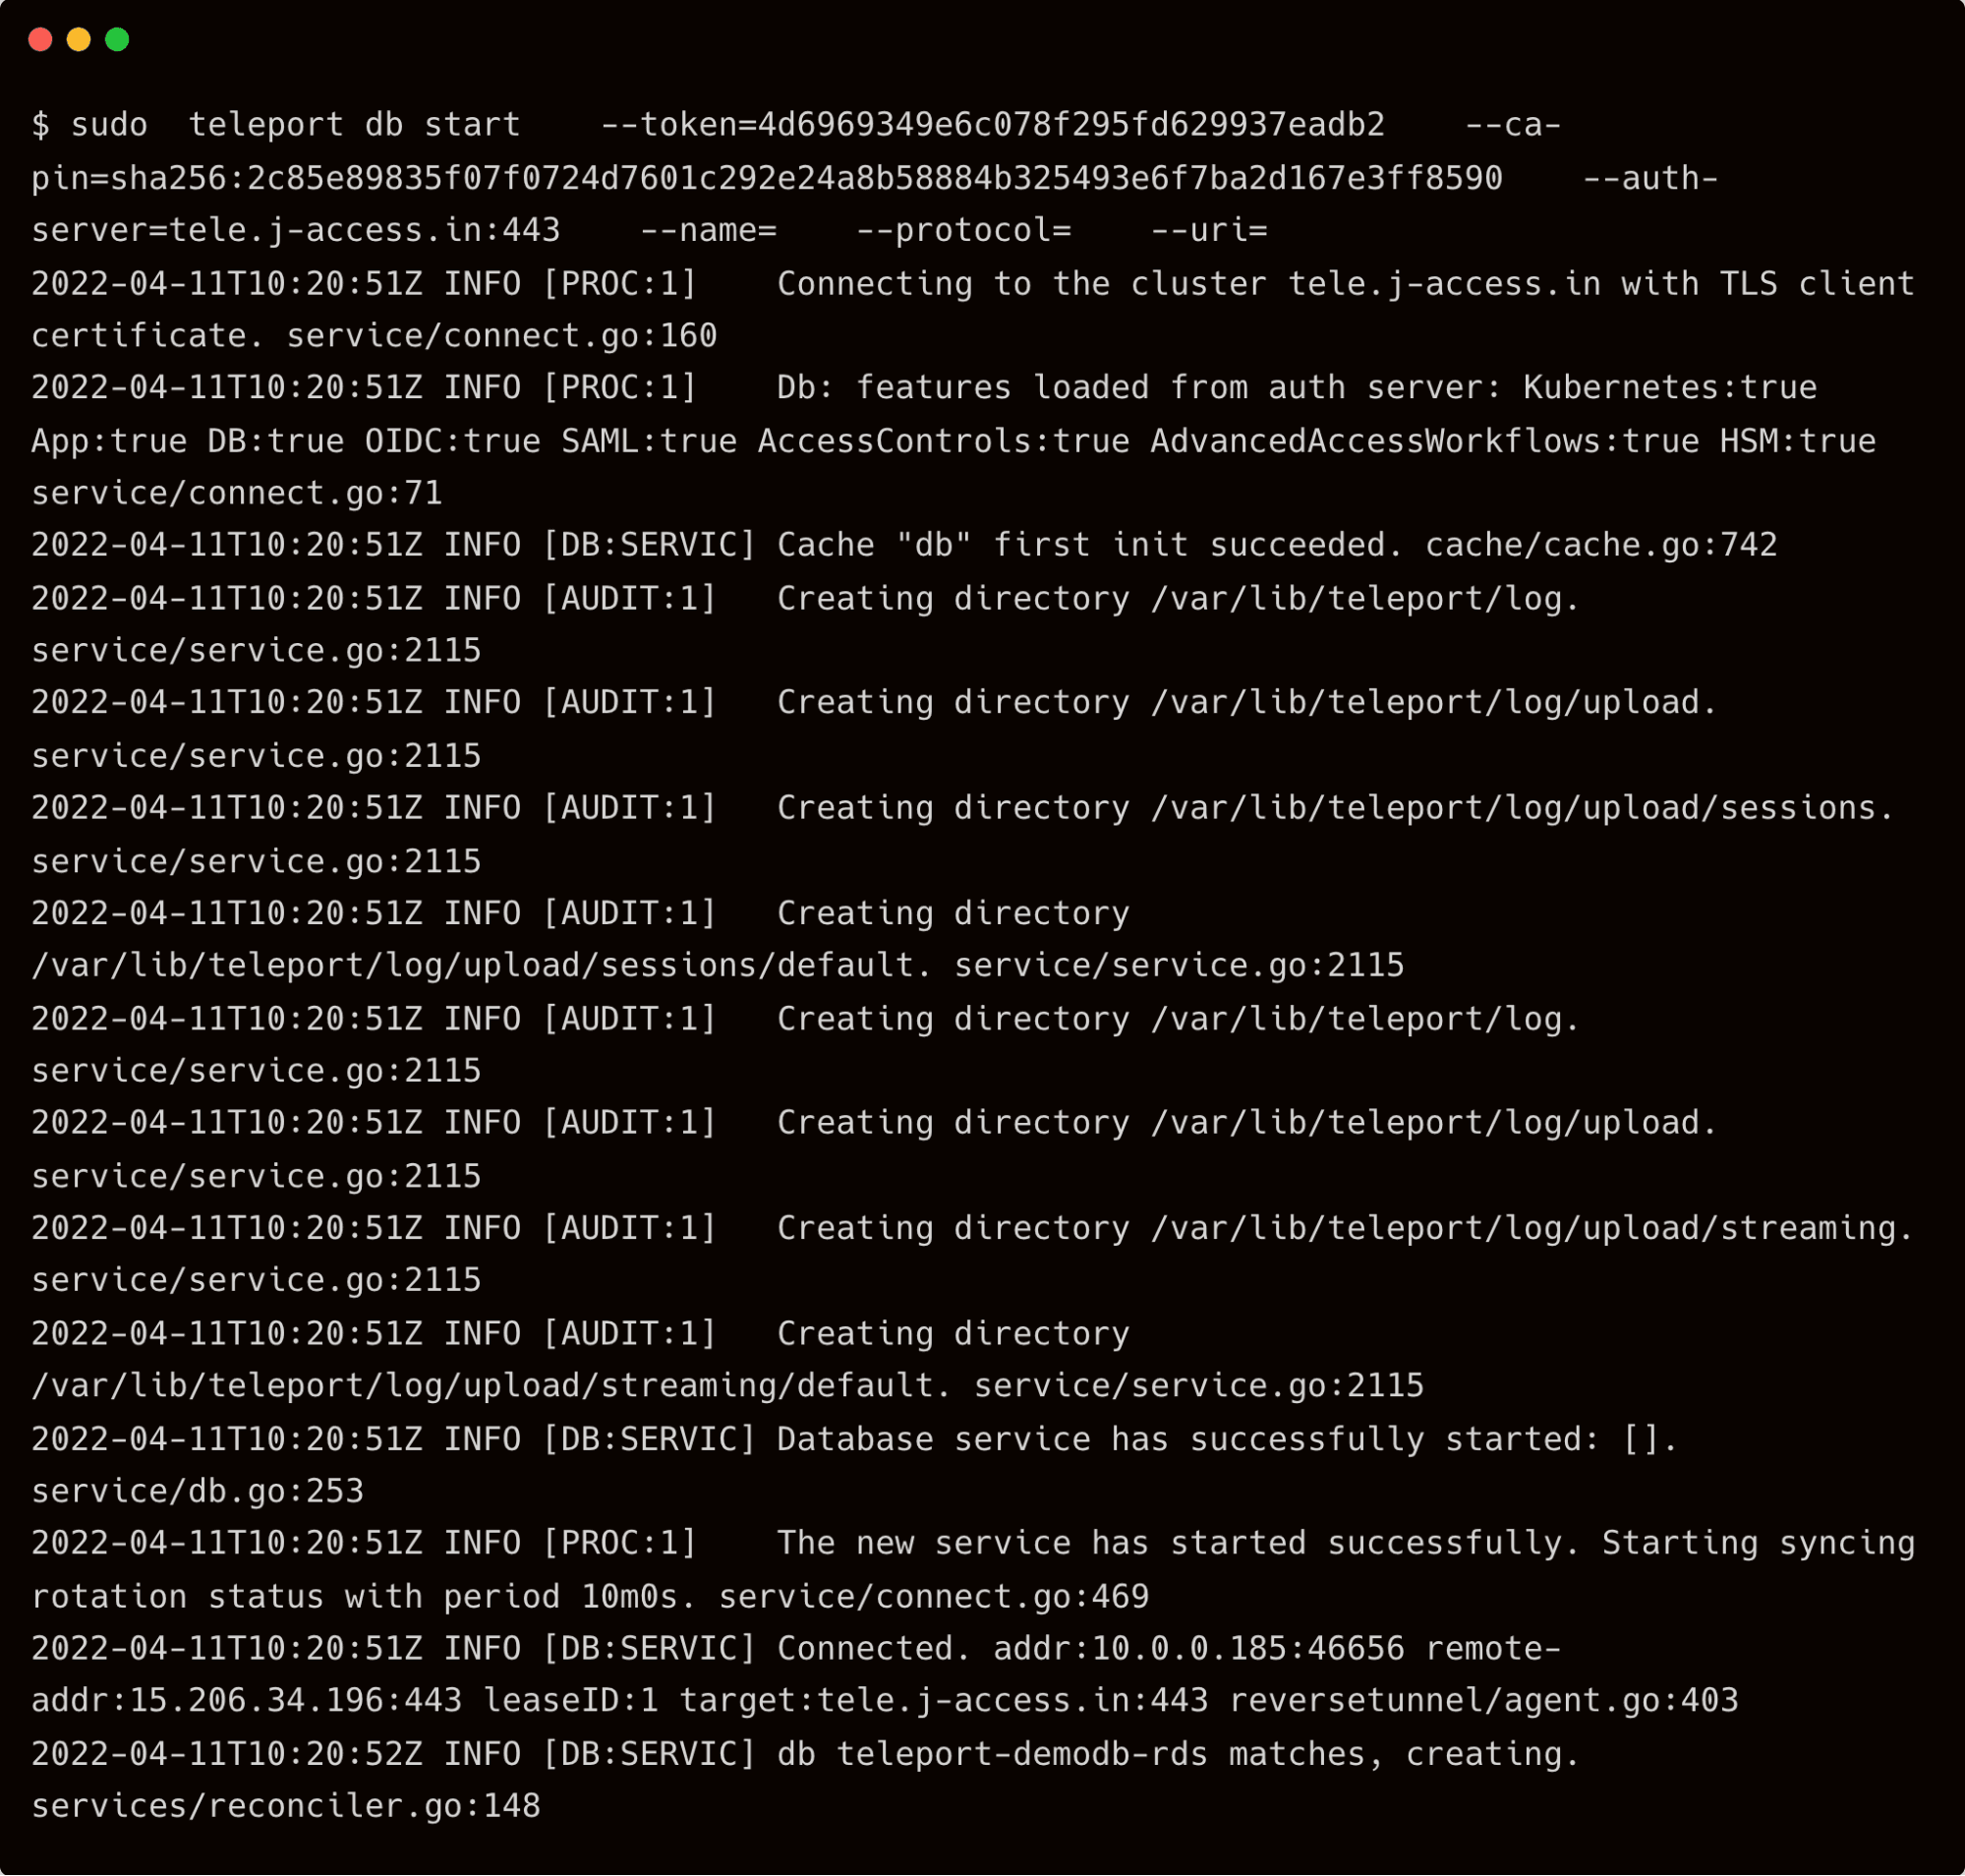
Finally, start the agent with the below command:
$ sudo  teleport db start    \
 --token=9997de00a57536e7786411ebabc8447f    \
 --ca-pin=sha256:2c85e89835f07f0724d7601c292e24a8b58884b325493e6f7ba2d167e3ff8590    \
 --auth-server=tele.j-access.in:443
Step 3 - Discovering and accessing the RDS database
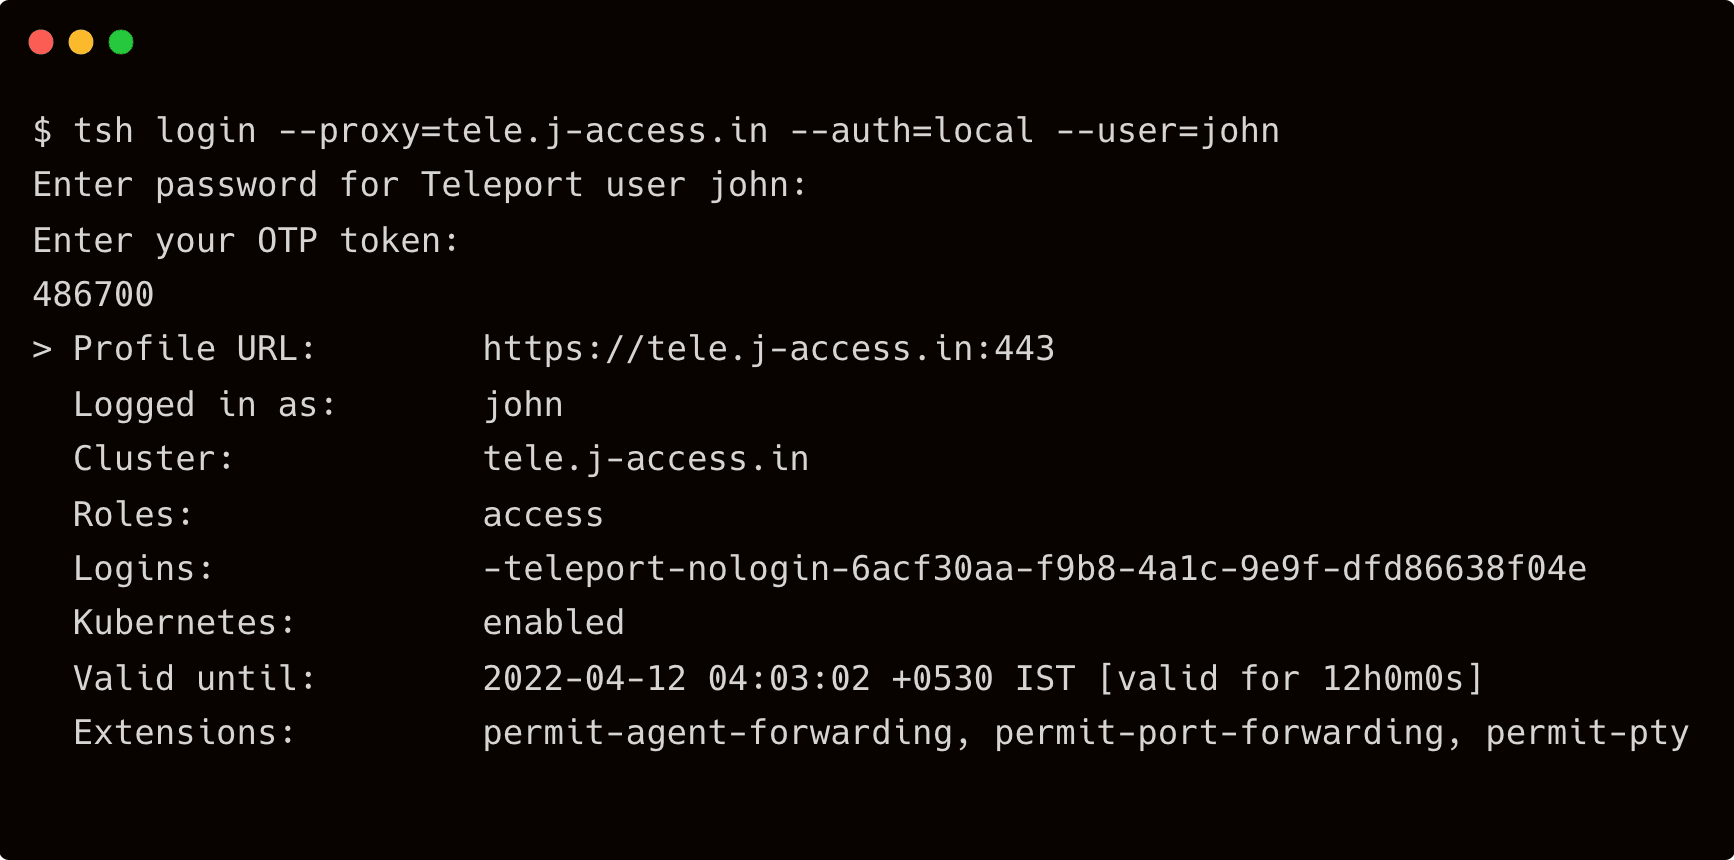
From your workstation, log in to Teleport as john.
$ tsh login --proxy=tele.j-access.in --auth=local --user=john
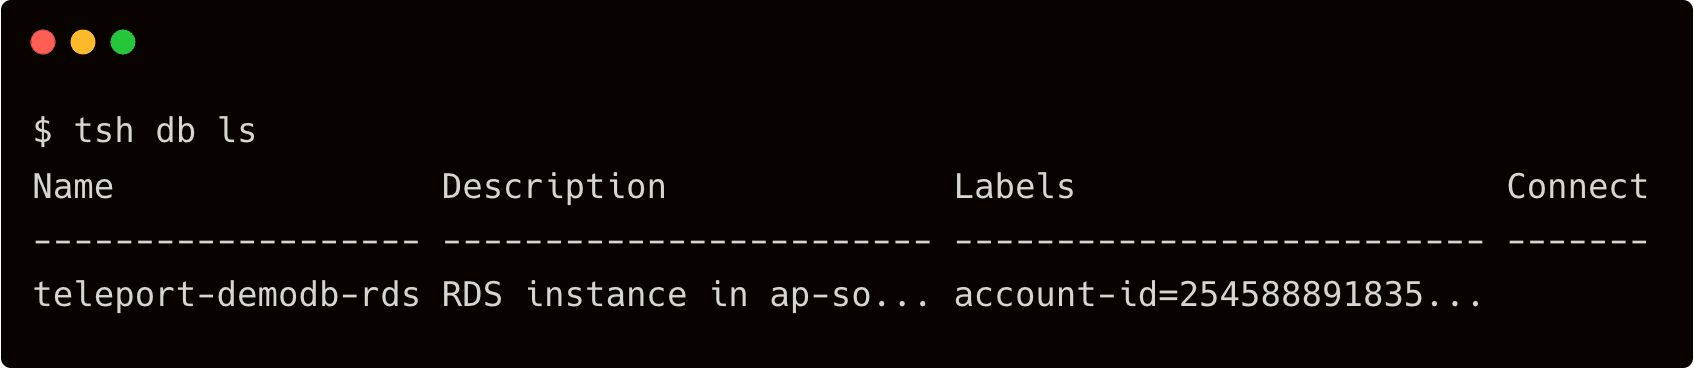
Discover the databases with the below command:
$ tsh db ls
Try accessing the database by logging into RDS.
$ tsh db login teleport-demodb-rds
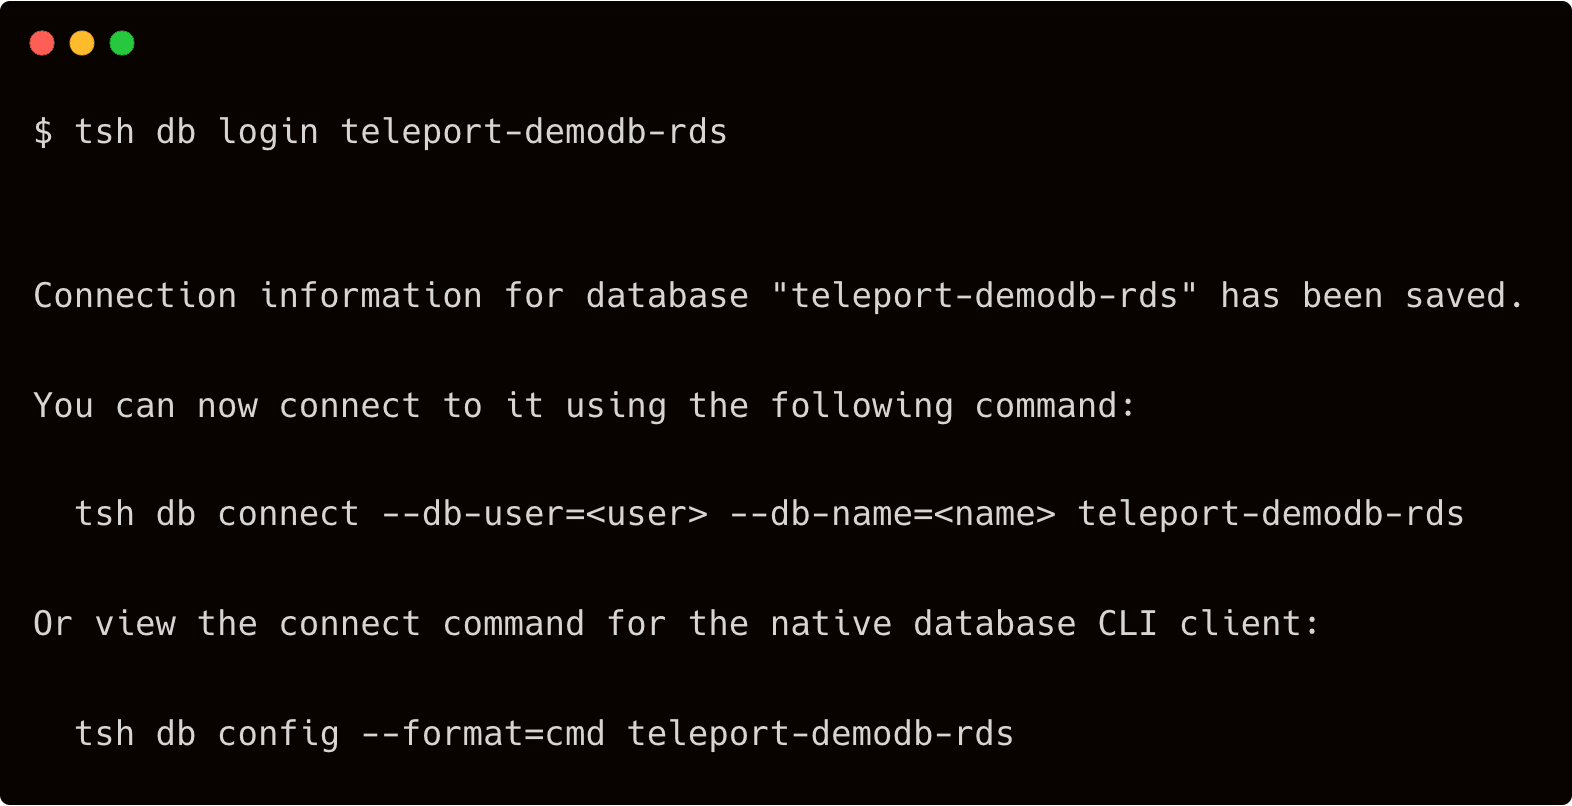
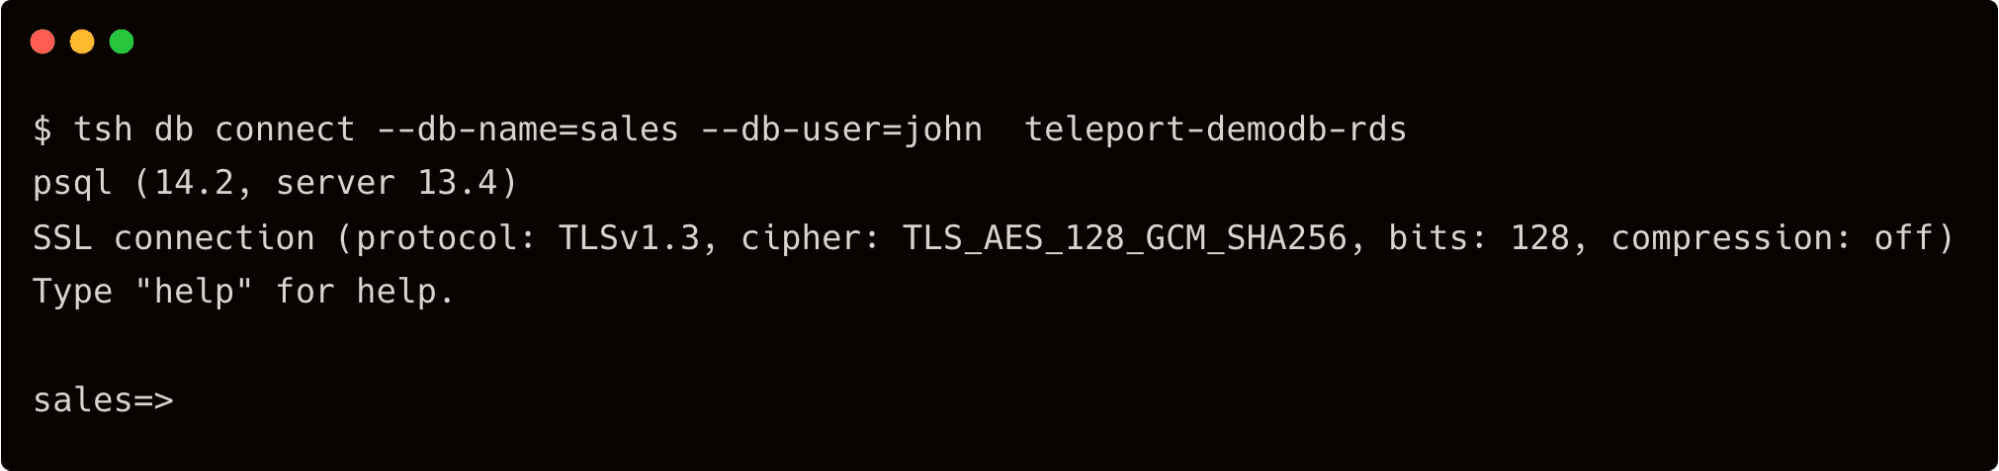
Assuming there is a database by name sales, you can provide that to tsh. Teleport expects the native database client to be available in the path. Ensure you installed the PostgreSQL client on your workstation before running the below command.
$ tsh db connect --db-name=sales --db-user=john teleport-demodb-rds
In this first part of the series, we explored Teleport Access to securely connect to Amazon RDS instances running in a private subnet with no inbound access. An Amazon EC2 instance running Teleport proxy and auth services provides the first line of defense while the second EC2 instance running the DB agent adds RBAC capabilities for fine-grained access control.
In the second part, we will cover how to add SSO for authenticating with RDS databases.
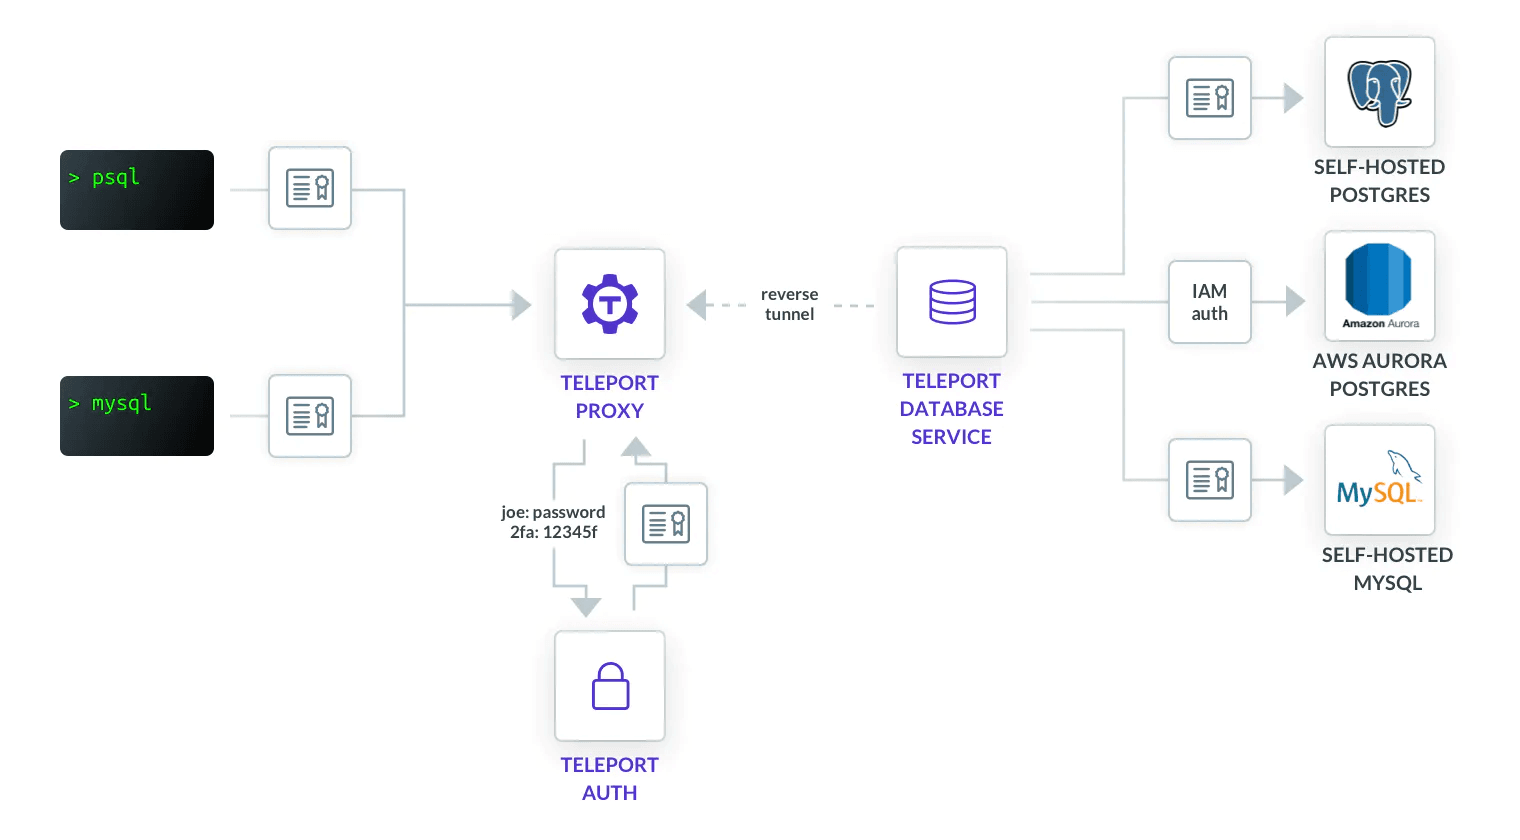
Try Teleport Database Access
Teleport implements native database wire protocols for supported SQL & NoSQL databases with certificate-based authentication, RBAC and database activity auditing features. Teleport supports various databases, including PostgreSQL, MySQL, MongoDB, Redis, Amazon Aurora, Amazon Redshift, Microsoft SQL Server and many more. Talk to our representatives to know more about how Teleport Database Access can help you enhance security and compliance without sacrificing engineering productivity.
Table Of Contents
Teleport Newsletter
Stay up-to-date with the newest Teleport releases by subscribing to our monthly updates.
Tags
Tags
Teleport Newsletter
Stay up-to-date with the newest Teleport releases by subscribing to our monthly updates.