Home - Teleport Blog - Connect Using EC2 Instance Connect via Teleport - Dec 6, 2023
Connect Using EC2 Instance Connect via Teleport
Note: This blog post references an obsolete Teleport feature. For streamlined auto-discovery of AWS EC2 instances, please see our documentation on Teleport Auto-Discovery.
Amazon EC2 is the most popular cloud computing environment and powers a great part of the Internet.
Accessing EC2 Instances is done using SSH, which typically involves generating and managing SSH Keys. This is not easy when you have a large fleet/team.
If you want to access private (VPN or within a private subnet) EC2 instances, you can use a bastion host which brings its own set of configuration and maintenance tasks:
- you need an additional host, which you must keep up to date
- the host requires a public IP
- another layer of security configuration is required, instead of relying on AWS IAM
Earlier this year, Amazon introduced a new feature that enables connectivity to EC2 Instances even when they are behind a private subnet. EC2 Instance Connect Endpoint (EICE) provides a simple way to connect to Linux EC2 instances, including those without public IPs, while using IAM policies to control access to them.
At Teleport, we went ahead and built an integration with EICE allowing you to seamlessly enroll and access your EC2 infrastructure without having to install or manage any agents.
Note: EC2 instances must have the EICE config tool installed.
For Ubuntu 20.04+, Amazon Linux 2023 and Amazon Linux 2 2.0.20190618+ AMIs, this tool is already installed.
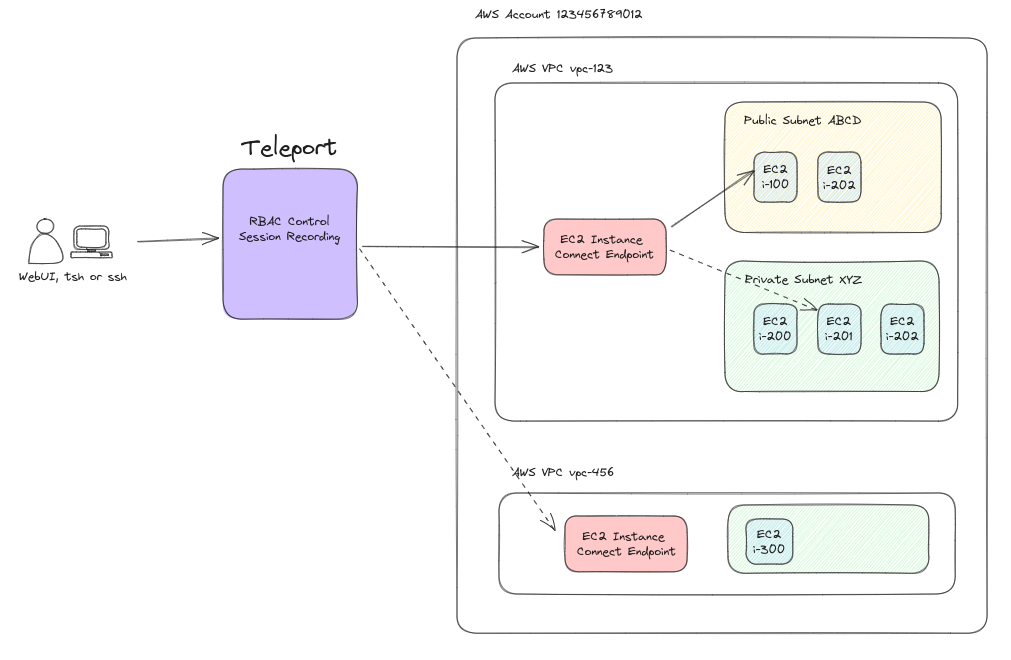

In this blog post, we will explore how EIC Teleport integration works and how Teleport users can take advantage of it.
How does EC2 Instance Connect Endpoint work?
EC2 Instance Connect Endpoint allows agentless access to public or private EC2 instances.
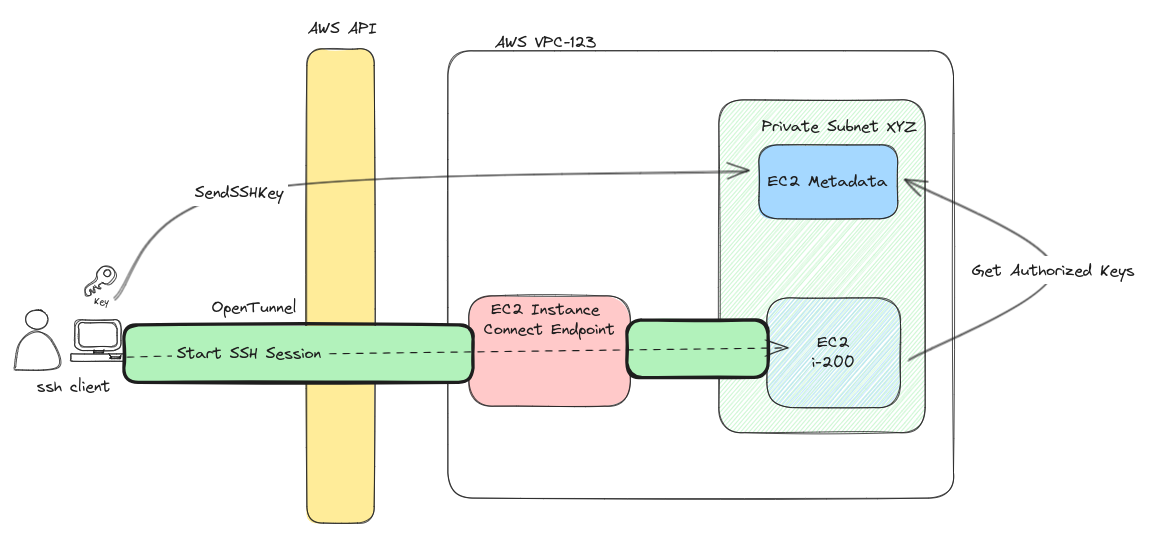

Send SSH public key
When connecting to an EICE-enabled instance, as a first step Teleport generates an SSH key pair and sends the public key to it using ec2-instance-connect:SendSSHPublicKey action.
After an SSH key is sent to the instance, it is valid for the next 60 seconds and automatically expires afterwards.
Open tunnel to target host
Next, to start an SSH session to the target host, Teleport creates a websocket connection to the EC2 Instance Connect Endpoint service. This websocket connection will, transparently, stream the TCP connection required for the SSH Client to communicate with the SSH server on the EC2 Instance.
Creating this connection requires ec2-instance-connect:OpenTunnel IAM permission.
Authenticate
After setting up the transport, Teleport uses the established TCP stream to connect to the server over SSH protocol using the previously generated keypair for authentication, the public part of which had been sent to the instance.
The OpenSSH daemon on the EC2 instance relies on AuthorizedKeysCommand sshd config option to call a custom command which validates the handshake.
This custom command in the OpenSSH server is configured by the installation of aws-ec2-instance-connect-config package.
The custom command itself is a script that fetches the authorized SSH Public Keys using the AWS Instance Metadata Service (IMDS), which are used to validate the incoming SSH connection.
After validation, the connection is established and becomes a regular SSH Session.
Access an EC2 instance using Teleport
In order to connect to an EC2 instance via EICE, you must have a Teleport Cluster with an AWS OIDC integration configured.
Using the Enroll New Resource step-by-step wizard will allow you to add the EC2 instance you want to access.
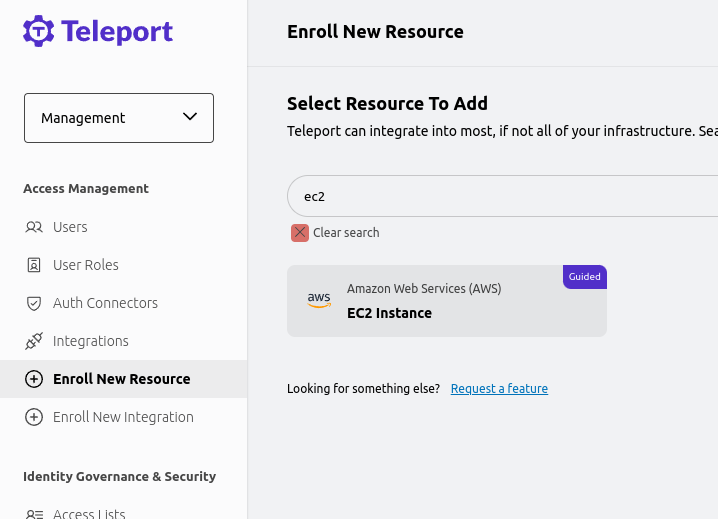

After selecting an Integration and an AWS Region, a list of EC2 instances will be displayed. Pick the one you want and click Next.
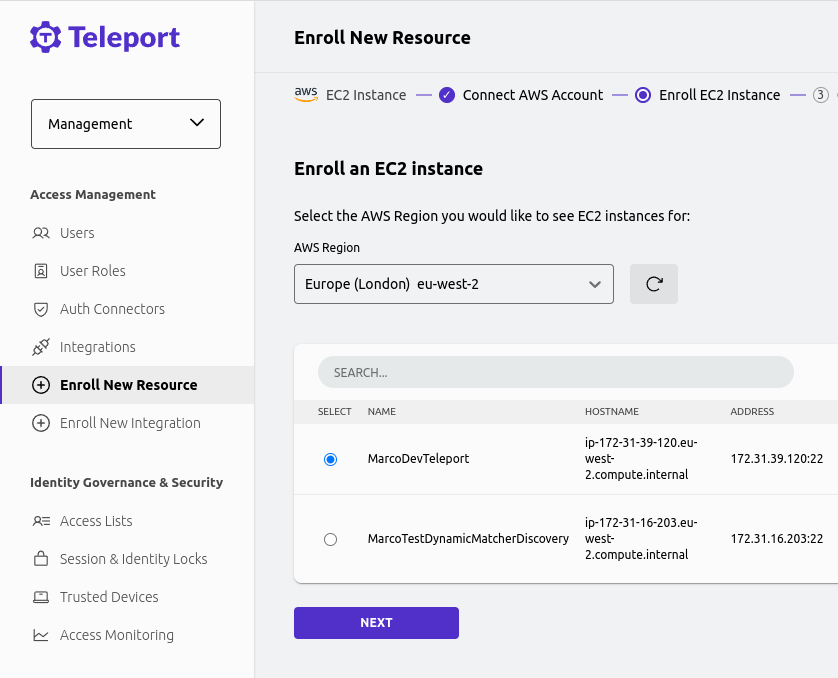

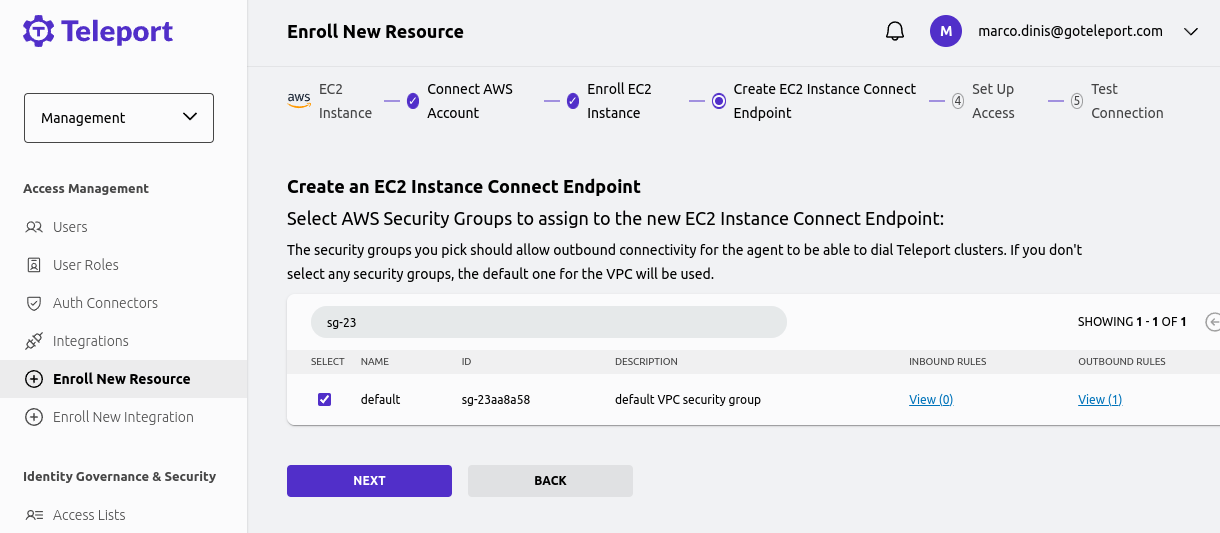
The next step is provisioning an actual EC2 Instance Connect Endpoint. Teleport will check if the Endpoint already exists in the instance's VPC and will attempt to automatically create one otherwise. Keep in mind that in order for Teleport to be able to connect to your EC2 instance via this Endpoint, the instance' Security Group must allow inbound traffic on port 22 from the Endpoints' Security Group or its Subnet's CIDR.
In addition, the Endpoint's Security Group must allow outbound traffic to port 22 in the instance' Security Group. Teleport's configuration wizard will allow you to select the Security Group before provisioning the Endpoint. You can read more in Security groups for EC2 Instance Connect Endpoint AWS Docs page.

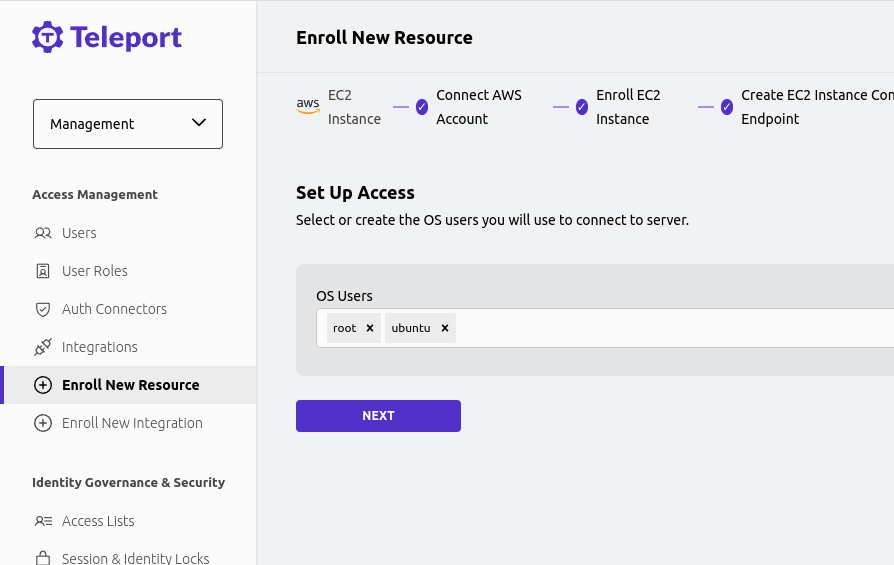
Next, you will be asked to specify any OS logins that you will be connecting to this instance, such as ubuntu or centos. This is required to configure your Teleport user with appropriate RBAC rules so Teleport allows these connections.

You can then, optionally, test the connection to verify everything is working as expected.
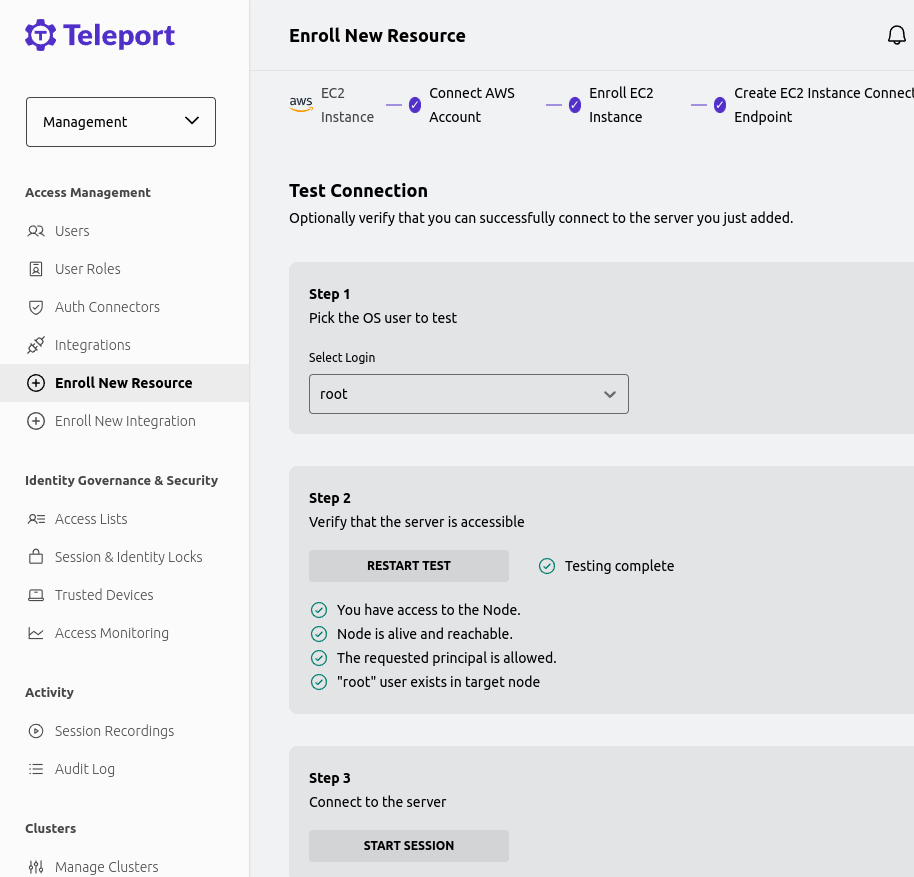

Starting a new session connects you to the EC2 Instance.


You can now access this EC2 Instance as a regular Teleport Node with any Teleport Client (WebUI, tsh and Connect).
Conclusion
Instance Connect Endpoint brings significant usability improvements in securely connecting to EC2 instances, and in this blog post, we took a look at how Teleport uses it to provide a smooth way to enroll and access all your EC2 fleet.
If you want to try EC2 Instance Connect integration or other Teleport features such as access to RDS and EKS with auto-discovery, access requests workflows and many others, sign up for a Teleport Enterprise 14-day Trial.
Tags
Teleport Newsletter
Stay up-to-date with the newest Teleport releases by subscribing to our monthly updates.

Subscribe to our newsletter

