Deploying Applications into Air Gapped Environments
Air gap security
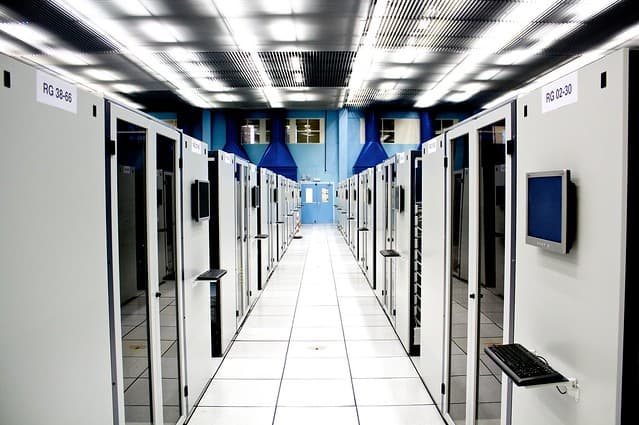
Server room by Torkild Retvedt under CC BY-SA 2.0
The cost of damages due to cybercrime is projected to cost over $6 trillion by 2021. The sad truth is that no matter how strong you think your network perimeter security is, you are playing a game of whack-a-mole. If sophisticated attackers want to get access to servers with external network access, they can usually find a way.
Hence, organizations “air gap” their most sensitive applications and data. The idea is straightforward – if the servers can only be accessed physically, they are more difficult to hack.
Developed initially as a strategy used by governments, air gapping is now also common in the private sector. With the rise in cybercrimes, security and compliance-minded organizations such as banking, health-care and utilities have embraced it as the ultimate defense.
In air gapped environments, data transfer is handled by USB, external media, or other sneakernet connections. Management of applications and systems is done by being physically plugged into the internal network. While more secure, the management of air gapped environments is typically considered to be more onerous and costly.
This article will demonstrate how to use our open source solution, Gravity, to deploy highly available, multi-tier applications into air gapped environments and reduce the operational overhead of managing those applications.
The challenge of using cloud native tech in air gapped environments
While there are many advances in containerization and multi-cluster deployment micro-service applications, USB install isn’t as easy at it
seems. In Kubernetes or Docker, many images need to pull from public or internal artifact repositories. For example, when you do a docker pull mysql:latest, you are reaching out to the public Docker Hub for that application image.
Gravity takes this into account through something called a Cluster Image Manifest -- a YAML file or Helm chart -- that describes the requirements of your cluster. When building an image, Gravity will package all the dependencies and specifies how applications are installed, updated, and configured.
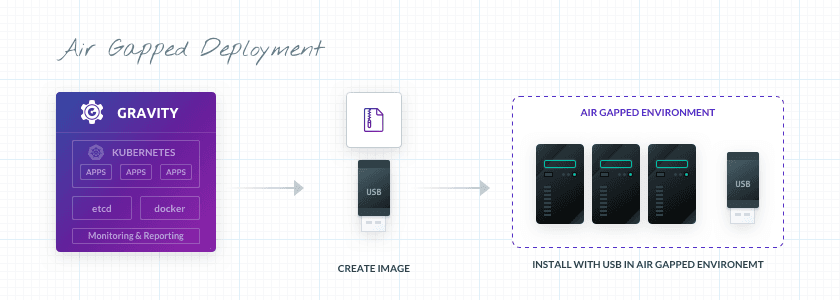
Gravity's cluster creation results in a tarball file with everything – all files and dependencies – you need to set up an air gap application quickly and efficiently. The resulting application bundle includes everything needed to run the application -- the binaries and their dependencies, a built-in container registry, the cluster orchestrator ready-built for high availability (HA), and an installation wizard.
Moreover, Gravity clusters are also idempotent, ie, identical. There is no configuration drift over time, so you can ensure applications deployed into different air gapped servers are all the same regardless of the environment they’re running in. Once you build your app, you can copy the cluster tarball image onto a USB stick... and that is it.
Air gap use cases
Air gapped environments aren’t just for increased security. Here are some other reasons why you may not have external network connectivity:
- Applications can be deployed in rural areas with no connectivity.
- Sales people in the field can demo their latest n-tier applications without internet access.
- Edge Computing where you want to conserve bandwidth.
For more use cases on Gravity, be it in an air gapped or public cloud, visit our multicloud solutions overview.
Installation and building an app
You can follow the Gravity Quick Start to go through more a more detailed tutorial of how to
build Cluster Images but the only Gravity specific file you need to create is a YAML file we call an Image Manifest that describes the
characteristics of your Cluster Image. Then run tele build with the name of what you want the Cluster Image to be called and the location
of the Image Manifest:
$ tele build -o mattermost.tar mattermost/resources/app.yaml

# the output:
* [1/6] Selecting application runtime
    Will use latest runtime version 5.2.4
* [2/6] Downloading dependencies from s3://hub.gravitational.io
    Still downloading dependencies from s3://hub.gravitational.io (10 seconds elapsed)
    Still downloading dependencies from s3://hub.gravitational.io (20 seconds elapsed)
* [3/6] Embedding application container images
    Detected application manifest app.yaml
    Detected resource file clusterDeprovision.yaml
    Detected resource file clusterProvision.yaml
    Detected resource file install.yaml
    Detected resource file nodesDeprovision.yaml
    Detected resource file nodesProvision.yaml
    Detected Helm chart charts/mattermost
    Using local image quay.io/gravitational/debian-tall:0.0.1
    Using local image quay.io/gravitational/debian-tall:0.0.1
    Using local image quay.io/gravitational/provisioner:ci.82
    Using local image mattermost-worker:2.2.0
    Using local image postgres:9.4.4
    Vendored image gravitational/debian-tall:0.0.1
    Vendored image gravitational/provisioner:ci.82
    Still embedding application container images (10 seconds elapsed)
    Vendored image mattermost-worker:2.2.0
    Vendored image postgres:9.4.4
* [4/6] Using runtime version 5.2.4
    Still using runtime version 5.2.4 (10 seconds elapsed)
* [5/6] Generating the cluster snapshot
* [6/6] Saving the snapshot as mattermost.tar
* [6/6] Build completed in 2 minutes=
You can also refer to the Gravity documentation for more information on building Cluster Images.
Air Gap Deployment
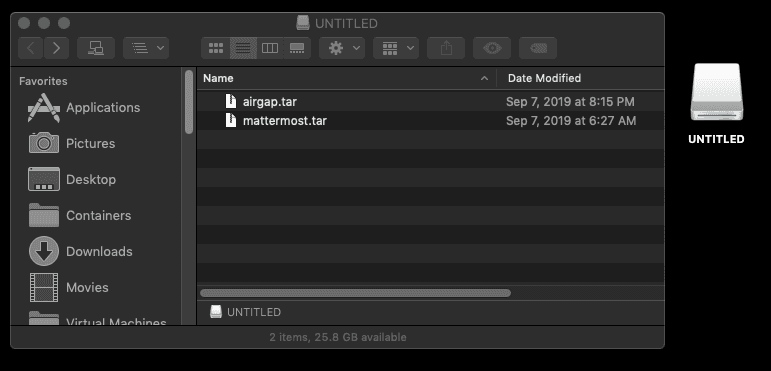
To deploy, scp (secure copy) or transfer your Cluster Image to a USB drive.
Next, you install the Cluster Image onto the destination server, unzip it and run gravity install. The Gravity install does not require
any internet access. You can run through the installation through a CLI or use the graphical installer through a browser on localhost.

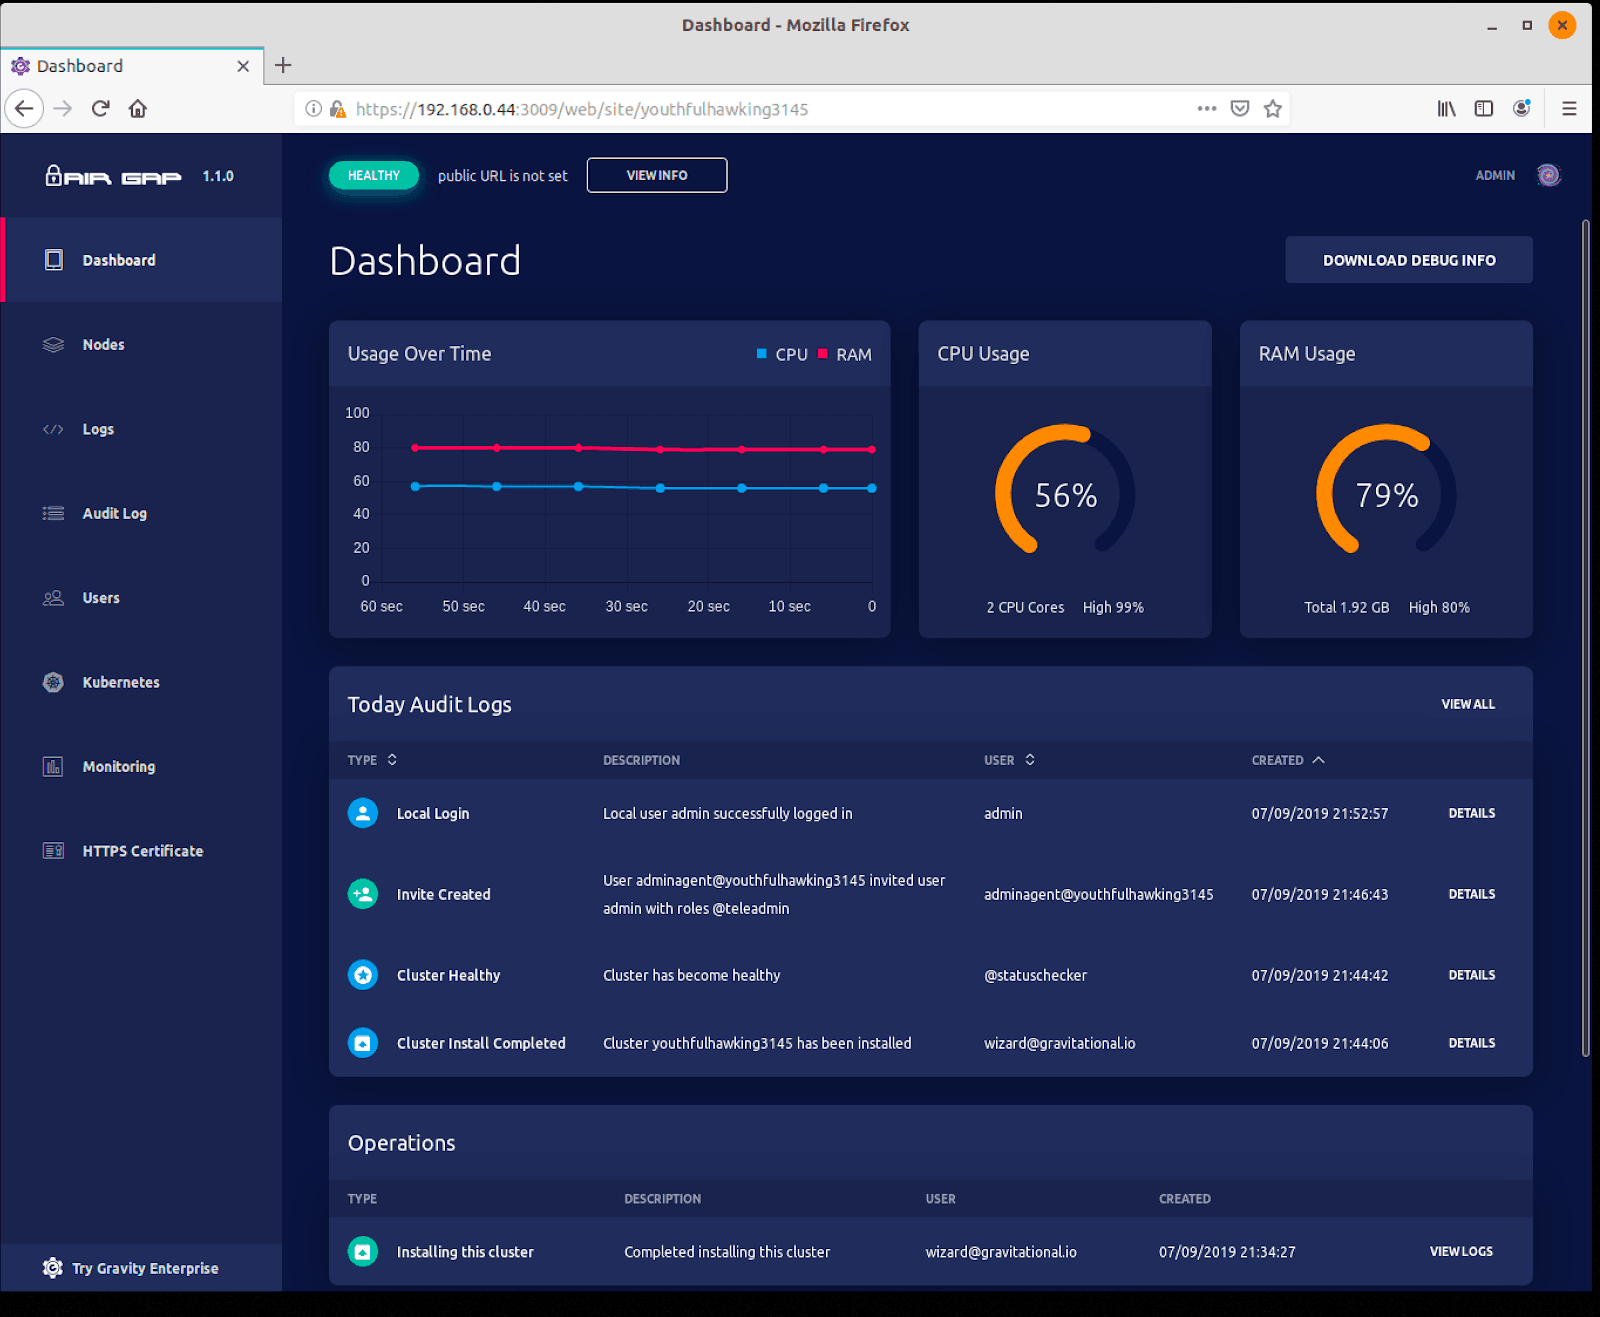
Once installed, the Gravity Cluster can server a dashboard that you can use to monitor and manage the Kubernetes applications.
Upgrading your cluster
Now let’s say we have released a new version of our application and want to upgrade our cluster to it. The upgrade process works exactly the same way as our initial install.
First, we need to build the cluster image with the new version of application inside it.
Then, we transfer it onto a cluster node and execute the gravity upgrade command.
Traditional Kubernetes clusters can be tenuous to update with nodes running multiple microservices. The system software, Kubernetes itself, and the deployed applications both need to be updated. Gravity simplifies these processes. Both the system and applications are performed via rolling updates.
We have more information on upgrading clusters in our docs.
Teleport cybersecurity blog posts and tech news
Every other week we'll send a newsletter with the latest cybersecurity news and Teleport updates.
Conclusion
Gravity facilitates application portability into air gapped environments. While an air gapped environment traditionally trades ease of maintenance for more robust security, Gravity reduces the operational burden to more easily manage complex applications even when you don’t have a remote connection.
Table Of Contents
Teleport Newsletter
Stay up-to-date with the newest Teleport releases by subscribing to our monthly updates.
Teleport Newsletter
Stay up-to-date with the newest Teleport releases by subscribing to our monthly updates.