Getting Started with Access Lists
This guide will help you:
- Create an access list
- Assign a member to it
- Verify permissions granted through the list membership
Prerequisites
-
A running Teleport cluster. If you want to get started with Teleport, sign up for a free trial.
-
The
tctladmin tool andtshclient tool.Visit Installation for instructions on downloading
tctlandtsh.
- To check that you can connect to your Teleport cluster, sign in with
tsh login, then verify that you can runtctlcommands using your current credentials. For example:If you can connect to the cluster and run thetsh login --proxy=teleport.example.com --user=[email protected]tctl statusCluster teleport.example.com
Version 16.5.18
CA pin sha256:abdc1245efgh5678abdc1245efgh5678abdc1245efgh5678abdc1245efgh5678
tctl statuscommand, you can use your current credentials to run subsequenttctlcommands from your workstation. If you host your own Teleport cluster, you can also runtctlcommands on the computer that hosts the Teleport Auth Service for full permissions. - A running Teleport cluster.
- A user with the preset
editorrole, which will have permissions to create Access Lists.
Step 1/4. Setting up the Application Service on the cluster for testing
One of the easiest ways to get resources on the cluster for testing is to set up a Teleport Application Service
instance with the debugging application enabled. To do this, add the following config to your teleport.yaml
configuration:
app_service:
  enabled: yes
  debug_app: true
And restart Teleport. The "dumper" app should show up in the resource list.
Step 2/4. Create a test user
We need to create a simple test user that has only the requester role, which has no default access
to anything within a cluster. This user will only be used for the purposes of this guide, so you may use
another user if you so choose. If you would rather use your own user, skip to the next step.
Navigate to the management pane and select "Users." Click on "Create New User" and fill in test-user as
the name and select requester as the role.
Click "Save," and then navigate to the provided URL in order to set up the credentials for your test user. Try logging into the cluster with the test user to verify that no resources show up in the resources page.
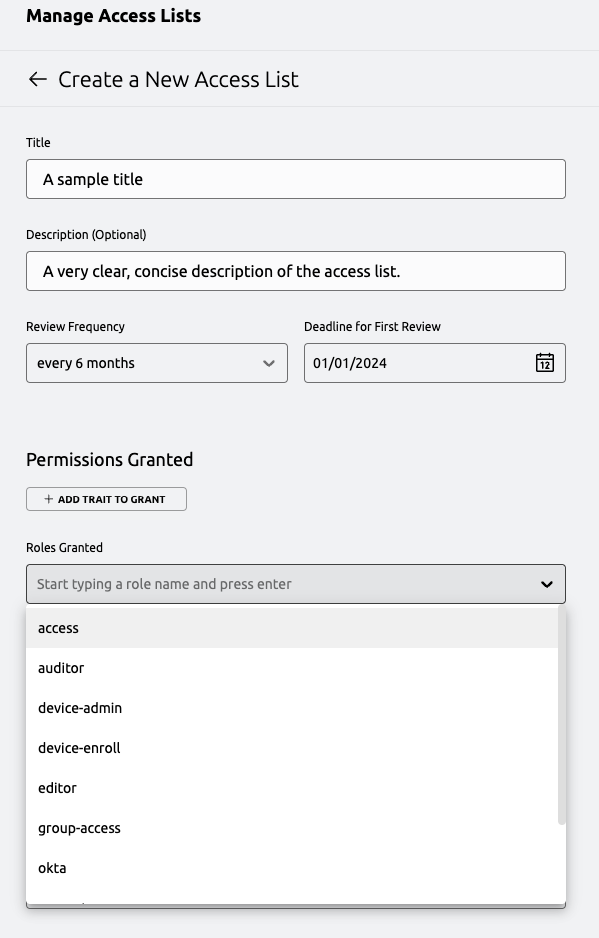
Step 3/4. Create an Access List
Next, we'll create a simple access list that will grant the access role to its members.
Login as the administrative user mentioned in the prerequisites. Navigate to the management pane and
click on access lists. Click on "Create an Access List."
Here, fill in a title, description, and grant the access role. Select a date in the future for the next
review date.
Under "List Owners" select editor as a required role, then add your administrative user under "Add
Eligible List Owners." By selecting editor as a required role, this will ensure that any owner of the list
must have the editor role in order to actually manage the list. If the user loses this role later, they will
not be able to manage the list, though they will still be reflected as an owner.

Under "Members" select requester as a required role, then add your test user to the access list. Similar to
the owner requirements, this will ensure that any member of the list must have the requester role in order to
be granted the access described in this list. If the user loses this role later, they will no be granted the
roles or traits described in the access list.
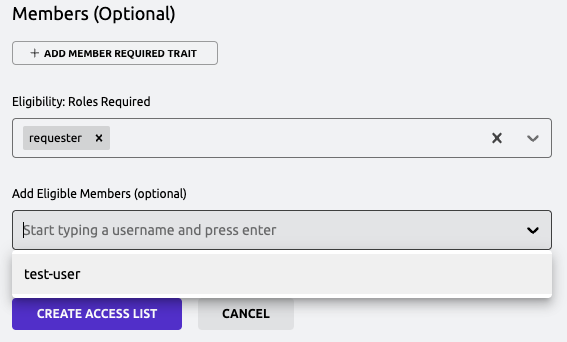
Finally, click "Create Access List" at the bottom of the page.
Step 4/4. Login as the test user
Again, login as the test user. When logging in now, you should now see the dumper application contained within the cluster, and should be able to interact with it as expected.
Next Steps
- Familiarize yourself with the CLI tooling available for managing access lists in the reference.