Teleport Authentication with Microsoft Entra ID (SAML)
In this guide, you will configure Microsoft Entra ID (formerly Azure AD) as a SAML identity provider to issue credentials to specific groups of users with a SAML Authentication Connector. When used in combination with role-based access control (RBAC), it allows Teleport administrators to define policies like:
- Only members of the "DBA" Microsoft Entra ID group can connect to PostgreSQL databases.
- Developers must never SSH into production servers.
The following steps configure an example SAML authentication connector matching Microsoft Entra ID groups with security roles. You can choose to configure other options.
An OIDC-based Entra ID IdP configuration version is available in this guide.
How it works
You can register your Teleport cluster as an application with Microsoft Entra ID, then create an authentication connector resource that provides Teleport with information about your application. When a user signs in to Teleport, Microsoft Entra ID executes its own authentication flow, then sends an HTTP request to your Teleport cluster to indicate that authentication has completed.
Teleport authenticates users to your infrastructure by issuing short-lived certificates. After a user completes an SSO authentication flow, Teleport issues short-lived TLS and SSH certificates to the user. Teleport also creates a temporary user on the Auth Service backend.
Teleport roles are encoded in the user's certificates. To assign Teleport roles to the user, the Auth Service inspects the role mapping within the authentication connector, which associates user data on Microsoft Entra ID with the names of one or more Teleport roles.
Prerequisites
Before you get started, you'll need:
- A Microsoft Entra ID admin account with access to creating non-gallery applications (P2 License).
- To register one or more users in the directory.
- To create at least two security groups in Microsoft Entra ID and assign one or more users to each group.
- A Teleport role with access to maintaining
samlresources. This is available in the defaulteditorrole.
-
A running Teleport Enterprise cluster. If you want to get started with Teleport, sign up for a free trial or set up a demo environment.
-
The
tctlandtshclients.Installing
tctlandtshclients-
Determine the version of your Teleport cluster. The
tctlandtshclients must be at most one major version behind your Teleport cluster version. Send a GET request to the Proxy Service at/v1/webapi/findand use a JSON query tool to obtain your cluster version. Replace teleport.example.com:443 with the web address of your Teleport Proxy Service:- Mac/Linux
- Windows - Powershell
TELEPORT_DOMAIN=teleport.example.com:443TELEPORT_VERSION="$(curl -s https://$TELEPORT_DOMAIN/v1/webapi/find | jq -r '.server_version')"$TELEPORT_DOMAIN = "teleport.example.com:443"$TELEPORT_VERSION = (Invoke-RestMethod -Uri "https://${TELEPORT_DOMAIN}/v1/webapi/find").server_version -
Follow the instructions for your platform to install
tctlandtshclients:- Mac
- Windows - Powershell
- Linux
Download the signed macOS .pkg installer for Teleport, which includes the
tctlandtshclients:curl -O https://cdn.teleport.dev/teleport-${TELEPORT_VERSION?}.pkgIn Finder double-click the
pkgfile to begin installation.dangerUsing Homebrew to install Teleport is not supported. The Teleport package in Homebrew is not maintained by Teleport and we can't guarantee its reliability or security.
curl.exe -O https://cdn.teleport.dev/teleport-v$TELEPORT_VERSION-windows-amd64-bin.zipUnzip the archive and move the `tctl` and `tsh` clients to your %PATH%
NOTE: Do not place the `tctl` and `tsh` clients in the System32 directory, as this can cause issues when using WinSCP.
Use %SystemRoot% (C:\Windows) or %USERPROFILE% (C:\Users\<username>) instead.
All of the Teleport binaries in Linux installations include the
tctlandtshclients. For more options (including RPM/DEB packages and downloads for i386/ARM/ARM64) see our installation page.curl -O https://cdn.teleport.dev/teleport-v${TELEPORT_VERSION?}-linux-amd64-bin.tar.gztar -xzf teleport-v${TELEPORT_VERSION?}-linux-amd64-bin.tar.gzcd teleportsudo ./installTeleport binaries have been copied to /usr/local/bin
-
- Check that you can connect to your Teleport cluster and verify that you can run
tctlandtshcommands using your current credentials.-
Assign teleport.example.com to the domain name of the Teleport Proxy Service in your cluster and [email protected] to your Teleport username.
-
Authenticate to your Teleport cluster. This depends on whether your shell is interactive or not.
In an interactive shell: Run the following command. By default, this triggers a multi-factor authentication prompt:
tsh login --proxy=teleport.example.com --user=[email protected]tctl statusCluster teleport.example.com
Version 18.10.0
CA pin sha256:abdc1245efgh5678abdc1245efgh5678abdc1245efgh5678abdc1245efgh5678
On non-interactive environments: If you are running
tshandtctlas an AI agent, in a CI/CD environment, or similar, make sure theTELEPORT_IDENTITY_FILEenvironment variable is assigned to a valid file path with credentials for your cluster.tshandtctlread the file path from the environment variable and do not require a separate authentication step. If there is no identity file available, we recommend that you set up Machine ID to provision one automatically.When executing
tctlcommands with an identity file, you must pass the--auth-serverflag to provide the Teleport Auth Service address, which is not included in the identity file. If you provide the Proxy Service address,tctlconnects to the Proxy Service, which forwards traffic to and from the Teleport Auth Service. Update 443 to3025if you are contacting the Auth Service directly withtctl:tctl status --auth-server=teleport.example.com:443For
tshcommands that read an identity file, you must pass the--proxyflag, which pointstshto the address of the Teleport Proxy Service:tsh status --proxy=teleport.example.comEnsure client commands can access your identity file. Replace path/to/identity/file with the path to your identity file:
export TELEPORT_IDENTITY_FILE="${TELEPORT_IDENTITY_FILE:-path/to/identity/file}"Add the
--auth-serveror--proxyflags to all subsequenttctlandtshcommands.
tctl statuscommand, you can use your current credentials to run subsequenttctlcommands from your workstation. If you host your own Teleport cluster, you can also runtctlcommands on the computer that hosts the Teleport Auth Service for full permissions. -
Step 1/3. Configure Microsoft Entra ID
Create an enterprise application
-
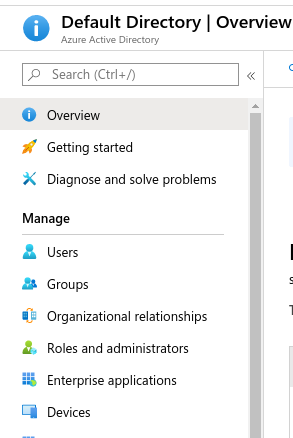
Select Entra ID -> Enterprise Applications
-
Select New application
-
Select Create your own application, enter the application name (for example, Teleport), and select Integrate any other application you don't find in the gallery (Non-gallery).
-
Select Properties under Manage and set Assignment required? to No
Click Save before proceeding to the next step.
Configure SAML
-
Select Single sign-on under Manage and choose SAML
-
Edit the Basic SAML Configuration
-
Enter the URL for your Teleport Proxy Service host in the Entity ID and Reply URL fields, for example:
https://mytenant.teleport.sh:443/v1/webapi/saml/acs/adIf you have a self-hosted cluster with multiple public addresses for the Teleport Proxy Service (the value of
proxy_service.public_addrin the Teleport configuration file), ensure that this address points to the first one listed.Click Save before proceeding to the next step.
-
In SAML Certificates section, copy the App Federation Metadata URL link and save it for use in our Teleport connector configuration:
Edit attributes & claims
-
Click on Unique User Identifier (Name ID) under Required claim.
-
Change the "name identifier format" to Default. Make sure the source attribute is
user.userprincipalname. -
Add a group claim to make user security groups available to the connector:
-
(optional) Add a claim that transforms the format of the Entra ID username to lower case, in order to use it inside Teleport roles as the
{{external.username}}property.Set the Source to "Transformation". In the new panel:
-
Set the Transformation value to "Extract()"
-
Set the Attribute name to
user.userprincipalname. -
Set the Value to
@. -
Click "Add Transformation" and set the Transformation to
ToLowercase().
-
Step 2/3. Connect Microsoft Entra ID to Teleport
In this section, you will create an authentication connector that provides Teleport with the information it needs to exchange OIDC messages with Microsoft Entra ID and issue certificates to users.
Assign a role mapping
When a user authenticates to Teleport, the Teleport Auth Service issues SSH and TLS certificates to the user that contain the user's Teleport roles.
For SSO authentication connectors, the Auth Service determines which roles to encode in the certificate by reading the authentication connector's role mapping. The role mapping indicates which Teleport roles to assign based on data that your identity provider stores about the user.
For this guide you will configure a mapping that, given an Entra ID security group (identified by its object ID), assigns one or more Teleport roles to any user who is a member of that group. Make sure that, in your role mapping, each attribute begins with the following namespace prefix:
http://schemas.microsoft.com/ws/2008/06/identity/claims/
You will use two separate mappings so that different groups can receive different levels of Teleport access:
- A more permissive mapping — for example, a
teleport-adminsgroup that receives theauditorandeditorroles. - A more restrictive mapping — for example, a
teleport-developersgroup that receives only theaccessrole.
Before continuing, gather the object IDs of the two Entra ID groups you want
to map, and decide which Teleport roles each group should receive. Both values
go into the tctl command in the next section.
Configure a SAML connector
Now, create a SAML connector resource using tctl.
tctl sso configure saml --preset ad \ --entity-descriptor "https://login.microsoftonline.com/tenant-id/federationmetadata/2007-06/federationmetadata.xml?appid=app-id" \ --attributes-to-roles "http://schemas.microsoft.com/ws/2008/06/identity/claims/groups,group-1-object-id,group-1-roles" \ --attributes-to-roles "http://schemas.microsoft.com/ws/2008/06/identity/claims/groups,group-2-object-id,group-2-roles" \ > azure-connector.yaml
Replace the following values in the example above:
| Placeholder | Description |
|---|---|
| tenant-id | Your Microsoft Entra ID tenant (directory) ID. |
| app-id | The application ID of the Microsoft Entra ID enterprise app. The --entity-descriptor flag specifies the app federation metadata URL saved in the previous step. |
| group-1-object-id | Object ID of the first Entra ID group to map. |
| group-1-roles | Comma-separated Teleport roles to assign to members of the first group (for example, auditor,editor). |
| group-2-object-id | Object ID of the second Entra ID group to map. |
| group-2-roles | Comma-separated Teleport roles to assign to members of the second group (for example, access). |
Add or remove --attributes-to-roles flags as needed for each group you want to
map.
The file azure-connector.yaml should now resemble the following:
kind: saml
metadata:
  name: ad
spec:
  acs: https://mytenant.teleport.sh/v1/webapi/saml/acs/ad
  attributes_to_roles:
  - name: http://schemas.microsoft.com/ws/2008/06/identity/claims/groups
    roles:
    - dev
    value: 41c94563...
  - name: http://schemas.microsoft.com/ws/2008/06/identity/claims/groups
    roles:
    - access
    value: 8adac502...
  audience: https://mytenant.teleport.sh/v1/webapi/saml/acs/ad
  cert: ""
  display: Microsoft
  entity_descriptor: ""
  entity_descriptor_url: https://login.microsoftonline.com/ff882432.../federationmetadata/2007-06/federationmetadata.xml?appid=b8d06e01...
  issuer: ""
  service_provider_issuer: https://mytenant.teleport.sh/v1/webapi/saml/acs/ad
  sso: ""
version: v2
IdP-initiated SSO
Enabling the spec.allow_idp_initiated flag in SAML connectors allows users to
log in to Teleport with one click from the dashboard provided by the IdP.
This feature is potentially unsafe and should be used with caution.
Enabling IdP-initiated login comes with notable security risks such as:
- Possibility of replay attacks on the SAML payload giving an attacker a secret web session
- Increased risk of session hijacking and impersonation attacks based on intercepting SAML communications
SAML Single Logout
Setting the spec.single_logout_url endpoint in SAML connectors enables SAML SLO (Single Logout).
If enabled, upon logging out of Teleport, users will also be logged out of the SAML provider session, which
may also log them out of any other non-Teleport applications which they are currently logged into using the same SAML provider.
For optimal user experience, we recommend keeping this disabled unless necessary.
Refer to your SAML provider's documentation for instructions on where to obtain this URL.
Test the connector
With the connector in place on the cluster, you can test it with tctl:
cat azure-connector.yaml | tctl sso test
Your browser should open and log you in to the Teleport cluster using your Entra ID credentials. If there are any problems, the CLI output will help you debug the connector configuration.
Create the connector
To create the connector using the tctl tool, run the following command:
tctl create -f azure-connector.yaml
(Optional) Groups overage
If a user's group membership exceeds the 150 group limit, Microsoft Entra ID issues a SAML assertion with a groups link attribute instead of the expected groups attribute. The groups link attribute contains an Azure AD Graph link which indicates that the user's group membership needs to be queried from the Microsoft Graph API.
If your users' group memberships do not exceed the 150 group limit, you can skip this step.
If the SAML connector was created using the Entra ID Integration, then Teleport will already be configured to authenticate to Microsoft Graph API and you can skip Configure connector credentials and go to Grant Microsoft Graph API permission. To check if the SAML connector was created using the Entra ID Integration, navigate to Zero Trust Access -> Integrations -> Microsoft Entra ID -> SSO Connector and look for the Enabled badge.
If the SAML connector was not created using the Entra ID Integration, then you will need to create client credentials in Entra ID and configure those credentials on the SAML connector to enable Teleport to authenticate to Microsoft Graph API.
Configure connector credentials
For the same app registration created in Step 1:
- Azure Portal
- Azure CLI
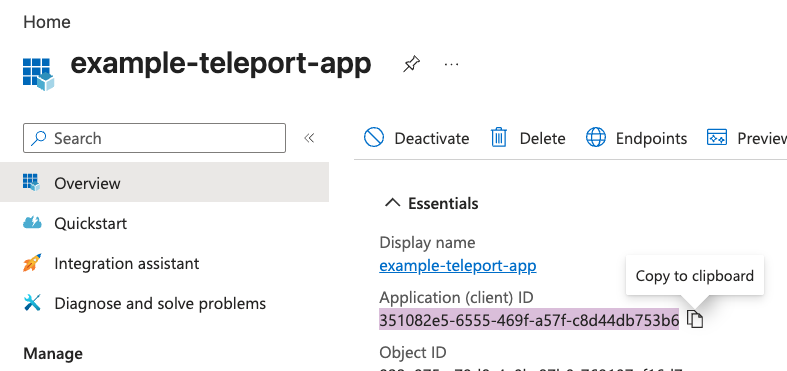
- From the Overview page, copy the Application (client) ID.
- Select Manage -> Certificates & secrets, click on New client secret, set a description and expiry, then click Add.
- Copy the secret value before moving to the next step, as it won't be shown again.
- Get the client ID, replacing app-name with the name of the Entra ID application.
az ad app list --display-name app-name --query "[0].appId" -o tsv
- Create a client secret, replacing client-id with the client ID from step 1 and display-name with a name for the client secret.
az ad app credential reset --append \ --id client-id\ --display-name display-name\ --query "password" \ -o tsv
- Copy the client secret value before moving to the next step, as it won't be shown again.
- Update the connector with the credentials.
kind: saml
metadata:
  name: entra-id
spec:
  ... # other fields not displayed for brevity
  credentials:
    oauth:
      client_id: <client_id>
      client_secret: <client_secret>
Grant Microsoft Graph API permission
To query user's group membership, Teleport requires User.ReadBasic.All permission.
To grant this permission, in the "App registrations" UI for the enterprise
application, from the "Manage" menu, select "API permissions".
Next, click + Add a permission button and then select "Microsoft APIs > Microsoft Graph >
Application permissions". In the permission filter search bar, type User.ReadBasic.All.
Select the permission and add it to the application by clicking on the Add permissions button.
Once you add the permission, you will need to grant an admin consent.
In the same "API permissions" UI, click the Grant admin consent button.
A consent confirmation prompt will appear, click "Yes" to grant the consent.
Should a user's group membership exceed 150 groups, Teleport will follow through the groups link attribute issued by Entra ID and fetch user's group details using the Microsoft Graph API.
Customize how Teleport follows the groups overage claim
Groups overage claim setting can be customized by using the entra_id_groups_provider
field in the Auth Connector spec.
kind: saml
metadata:
  name: entra-id
spec:
  ... # other fields not displayed for brevity
  entra_id_groups_provider:
    disabled: false # set value to "true" to turn off the groups overage claim
    group_type: "security-groups" # can be "directory-roles", "all-groups"
    graph_endpoint: "https://graph.microsoft.com" # update this value to point to another official Graph API endpoint
Step 3/3. Configure authentication preferences
Edit your cluster authentication preferences so you can make the authentication connector you configured in this guide the default authentication method for your Teleport cluster.
Open the Teleport Web UI. From the left sidebar, navigate to Zero Trust Access > Auth Connectors. Find the connector you would like to make the default and, from its three-dot menu, select Set as default.
If you are managing your Teleport resources as configuration files, you can
choose a default authentication connector using a dynamic resource. In this
case, use tctl to edit the cluster_auth_preference value:
tctl edit cluster_auth_preference
Set the value of spec.type to saml:
kind: cluster_auth_preference
metadata:
  ...
  name: cluster-auth-preference
spec:
  ...
  type: saml
  ...
version: v2
After you save and exit the editor, tctl will update the resource:
cluster auth preference has been updated
Additional ways to edit cluster auth preferences
The cluster auth preference is available as a Teleport Terraform provider resource. Find a list of configuration options in the Cluster Auth Preferences Resource Reference.
If you self-host Teleport, you can edit your Teleport Auth Service configuration file to include the following:
# Snippet from /etc/teleport.yaml
auth_service:
  authentication:
    type: saml
If you need to log in again before configuring your identity provider, use the
flag --auth=local
Token encryption (Optional)
Entra ID's SAML token encryption encrypts the SAML assertions sent to Teleport during SSO redirect.
Token encryption is a Microsoft Entra ID premium feature and requires a separate license. Since traffic between Entra ID and the Teleport Proxy Service already uses HTTPS, token encryption is optional. To determine whether you should enable token encryption, read the Entra ID documentation.
Set up Teleport token encryption
Start with generating a public/private key and a certificate. You will set up the public certificate with Entra ID and the private key with Teleport.
openssl req -nodes -new -x509 -keyout server.key -out server.cer
If you are modifying the existing connector, open it in your editor:
tctl edit saml
You will notice that Teleport has generated a signing_key_pair. This key pair
is used to sign responses.
kind: saml
metadata:
  name: ad
spec:
  acs: https://mytenant.teleport.sh/v1/webapi/saml/acs/azure-saml
  attributes_to_roles:
  - name: http://schemas.microsoft.com/ws/2008/06/identity/claims/groups
    roles:
    - editor
    - access
    - auditor
    value: '*'
  audience: https://mytenant.teleport.sh/v1/webapi/saml/acs/azure-saml
  cert: ""
  display: Microsoft
  entity_descriptor:
  entity_descriptor_url: https://login.microsoftonline.com/ff882432.../federationmetadata/2007-06/federationmetadata.xml?appid=b8d06e01...
  issuer: https://sts.windows.net/your-id-here/
  service_provider_issuer: https://mytenant.teleport.sh/v1/webapi/saml/acs/azure-saml
  signing_key_pair:
    cert: |
      -----BEGIN CERTIFICATE-----
      ...
      -----END CERTIFICATE-----
    private_key: |
      -----BEGIN RSA PRIVATE KEY-----
      ...
      -----END RSA PRIVATE KEY-----
  sso: https://login.microsoftonline.com/your-id-here/saml2
version: v2
Add assertion_key_pair using the data from server.key and server.cer.
kind: saml
metadata:
  name: azure-saml
spec:
  acs: https://mytenant.teleport.sh/v1/webapi/saml/acs/azure-saml
  attributes_to_roles:
  - name: http://schemas.microsoft.com/ws/2008/06/identity/claims/groups
    roles:
    - editor
    - access
    - auditor
    value: '*'
  audience: https://mytenant.teleport.sh/v1/webapi/saml/acs/azure-saml
  cert: ""
  display: Microsoft
  entity_descriptor:
  entity_descriptor_url: https://login.microsoftonline.com/ff882432.../federationmetadata/2007-06/federationmetadata.xml?appid=b8d06e01...
  issuer: https://sts.windows.net/your-id-here/
  service_provider_issuer: https://mytenant.teleport.sh/v1/webapi/saml/acs/azure-saml
  signing_key_pair:
    cert: |
      -----BEGIN CERTIFICATE-----
      ...
      -----END CERTIFICATE-----
    private_key: |
      -----BEGIN RSA PRIVATE KEY-----
      ...
      -----END RSA PRIVATE KEY-----
  sso: https://login.microsoftonline.com/your-id-here/saml2
version: v2
Make sure to have the same indentation for all lines of the certificate and key, otherwise Teleport will not parse the YAML file.
After your edits, the file will look like this:
kind: saml
metadata:
  name: azure-saml
spec:
  acs: https://mytenant.teleport.sh/v1/webapi/saml/acs/azure-saml
  attributes_to_roles:
  - name: http://schemas.microsoft.com/ws/2008/06/identity/claims/groups
    roles:
    - editor
    - access
    - auditor
    value: '*'
  audience: https://mytenant.teleport.sh/v1/webapi/saml/acs/azure-saml
  cert: ""
  display: Microsoft
  entity_descriptor:
  entity_descriptor_url: https://login.microsoftonline.com/ff882432.../federationmetadata/2007-06/federationmetadata.xml?appid=b8d06e01...
  issuer: https://sts.windows.net/your-id-here/
  service_provider_issuer: https://mytenant.teleport.sh/v1/webapi/saml/acs/azure-saml
  assertion_key_pair:
    cert: |
      -----BEGIN CERTIFICATE-----
      New CERT
      -----END CERTIFICATE-----
    private_key: |
      -----BEGIN RSA PRIVATE KEY-----
      New private key
      -----END RSA PRIVATE KEY-----
  signing_key_pair:
    cert: |
      -----BEGIN CERTIFICATE-----
      ...
      -----END CERTIFICATE-----
    private_key: |
      -----BEGIN RSA PRIVATE KEY-----
      ...
      -----END RSA PRIVATE KEY-----
  sso: https://login.microsoftonline.com/your-id-here/saml2
version: v2
Update the connector by saving and closing the file in your editor.
Activate token encryption
- Navigate to Token Encryption:
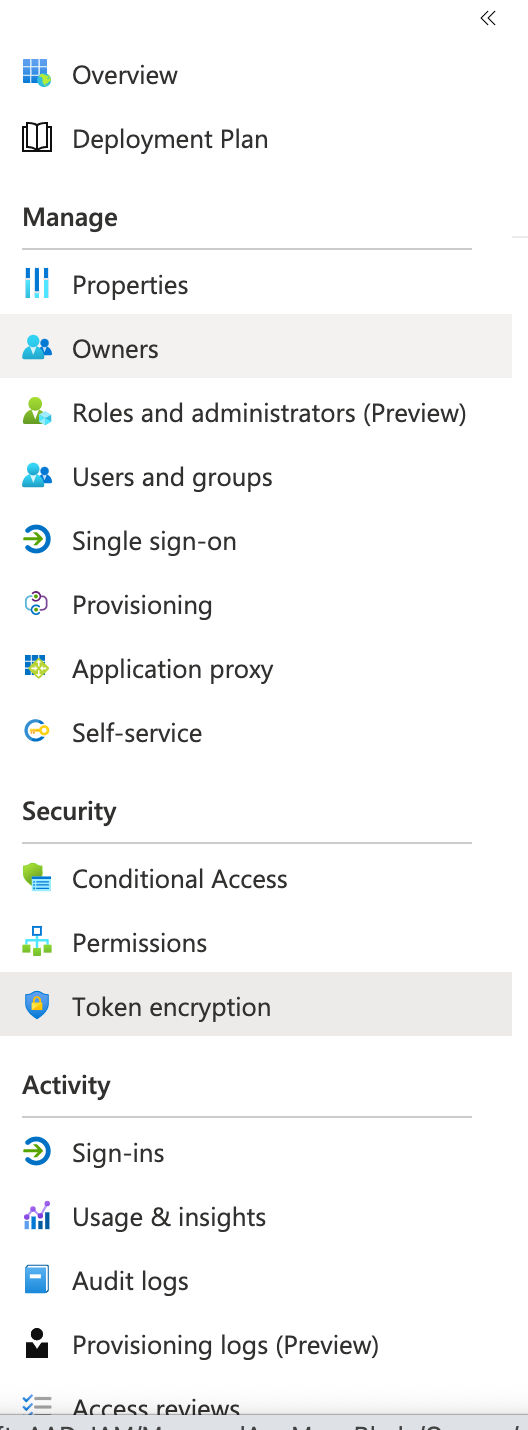
- Import certificate
- Activate it
If the SSO login with this connector is successful, the encryption works.
Next steps
Now that you know how to integrate Microsoft Entra ID with Teleport, you can refine your configuration to better suit your organization.
Integrate IdP traits in Teleport roles
Now that you have connected Teleport to your identity provider, you can customize the way Teleport includes IdP data in Teleport roles.
With role templates, you can include user data from your IdP directly in
Teleport roles. If you use the external template variable in the value of a
role field, Teleport passes that value from your IdP. In this example, all of
the role options you can use for allowing users to assume certain principals on
remote systems come from your IdP:
kind: role
version: v7
metadata:
  name: sso-users
spec:
  allow:
    logins: ['{{external.logins}}']
    aws_role_arns: ['{{external.aws_role_arns}}']
    azure_identities: ['{{external.azure_identities}}']
    db_names: ['{{external.db_names}}']
    db_roles: ['{{external.db_roles}}']
    db_users: ['{{external.db_users}}']
    desktop_groups: ['{{external.desktop_groups}}']
    gcp_service_accounts: ['{{external.gcp_service_accounts}}']
    host_groups: ['{{external.host_groups}}']
    host_sudoers: ['{{external.host_sudoers}}']
    kubernetes_groups: ['{{external.kubernetes_groups}}']
    kubernetes_users: ['{{external.kubernetes_users}}']
    windows_desktop_logins: ['{{external.windows_desktop_logins}}']
For more information on using the external template variable, see Role
Templates.
For an explanation of the fields listed above, see the Role Reference.
If you need to transform your IdP user data before you include it in Teleport roles, you can do so using Login Rules. Login Rules allow you to include external traits within Teleport roles even if your IdP provides user data in a different format than the one expected by Teleport. Read more about Login Rules.
Refer to Microsoft Entra ID traits in Teleport roles
Note that to reference a trait from Microsoft Entra ID with its full namespace
prefix, you must use an external template variable with the following
notation:
kind: role
version: v5
metadata:
  name: dev
spec:
  options:
    max_session_ttl: 24h
  allow:
    # only allow login as either ubuntu or the 'windowsaccountname' claim
    logins: [ '{{external["http://schemas.microsoft.com/ws/2008/06/identity/claims/windowsaccountname"]}}', ubuntu ]
    node_labels:
      access: relaxed
The login
{{external["http://schemas.microsoft.com/ws/2008/06/identity/claims/windowsaccountname"]}}http://schemas.microsoft.com/ws/2008/06/identity/claims/windowsaccountname
attribute and use that field as an allowed login for each user. Since the name
of the attribute contains characters besides letters, numbers, and underscores,
you must use double quotes (") and square brackets ([]) around the name of
the attribute.
Troubleshooting
Troubleshooting SSO configuration can be challenging. Usually a Teleport administrator must be able to:
- Be able to see what SAML/OIDC claims and values are getting exported and passed by the SSO provider to Teleport.
- Be able to see how Teleport maps the received claims to role mappings as defined in the connector.
- For self-hosted Teleport Enterprise clusters, ensure that HTTP/TLS certificates are configured properly for both the Teleport Proxy Service and the SSO provider.
If something is not working, we recommend to:
- Double-check the host names, tokens and TCP ports in a connector definition.
Using the Web UI
If you get "access denied" or other login errors, the number one place to check is the Audit Log. To view the recording, select Audit in the Teleport Web UI, then click Session Recordings in the menu.
Example of a user being denied because the role clusteradmin wasn't set up:
{
  "code": "T1001W",
  "error": "role clusteradmin is not found",
  "event": "user.login",
  "message": "Failed to calculate user attributes.\n\trole clusteradmin is not found",
  "method": "oidc",
  "success": false,
  "time": "2024-11-07T15:41:25.584Z",
  "uid": "71e46f17-d611-48bb-bf5e-effd90016c13"
}
Teleport does not show the expected Nodes
When the Teleport Auth Service receives a request to list Teleport-connected
resources (e.g., to display resources in the Web UI or via tsh ls), it only
returns the resources that the current user is authorized to view.
For each resource in the user's Teleport cluster, the Auth Service applies the following checks in order and, if one check fails, hides the resource from the user:
- None of the user's roles contain a
denyrule that matches the resource's labels. - At least one of the user's roles contains an
allowrule that matches the resource's labels.
If you are not seeing resources when expected, make sure that your user's roles
include the appropriate allow and deny rules as documented in the Access
Controls Reference.
When configuring SSO, ensure that the identity provider is populating each user's
traits correctly. For a user to see a Node in Teleport, the result of populating a
template variable in a role's allow.logins must match at least one of a user's
traits.logins.
In this example a user will have usernames ubuntu, debian and usernames from the SSO trait logins for Nodes that have a env: dev label. If the SSO trait username is bob then the usernames would include ubuntu, debian, and bob.
kind: role
metadata:
  name: example-role
spec:
  allow:
    logins: ['{{external.logins}}', ubuntu, debian]
    node_labels:
      'env': 'dev'
version: v5
Checkpoint: Verify SSO login works
Log in to Teleport using the Entra ID connector you just created. The Teleport Web UI should redirect you to Entra ID, accept your credentials, and return you to Teleport authenticated as your user.
If login fails, check the Teleport audit log for a Failed to process SAML callback error. The message resembles:
Special characters are not allowed in resource names. Use a name composed only from
alphanumeric characters, hyphens, and dots: /web/users/ops_example.com#EXT#@opsexample.onmicrosoft.com/params
This error means the Name ID returned by Entra ID contains characters that Teleport does not allow in resource names.
Teleport maps each external SSO identity to an internal user resource, and those resources must use only alphanumeric characters (a-z, A-Z, 0-9), hyphens (-), and dots (.).
To resolve this, change the Name ID format in the Entra ID application's Single sign-on settings to Email address so the assertion contains a clean user identifier:
You can reach out to our Slack community or customer support for help.