
Teleport
Automatically Discover Azure Virtual Machines
- Version 16.x
- Version 15.x
- Version 14.x
- Version 13.x
- Older Versions
The Teleport Discovery Service can connect to Azure and automatically discover and enroll virtual machines matching configured labels. It will then execute a script on these discovered instances that will install Teleport, start it and join the cluster.
Prerequisites
-
A running Teleport cluster. If you want to get started with Teleport, sign up for a free trial or set up a demo environment.
-
The
tctladmin tool andtshclient tool version >= 15.2.2.On Teleport Enterprise, you must use the Enterprise version of
tctl, which you can download from your Teleport account workspace. Otherwise, visit Installation for instructions on downloadingtctlandtshfor Teleport Community Edition.
- Azure subscription with virtual machines and permissions to create and attach managed identities.
- Azure virtual machines to join the Teleport cluster, running Ubuntu/Debian/RHEL if making use of the default Teleport install script. (For other Linux distributions, you can install Teleport manually.)
- To check that you can connect to your Teleport cluster, sign in with
tsh login, then verify that you can runtctlcommands using your current credentials.tctlis supported on macOS and Linux machines. For example:If you can connect to the cluster and run thetsh login --proxy=teleport.example.com --user=[email protected]tctl statusCluster teleport.example.com
Version 15.2.2
CA pin sha256:abdc1245efgh5678abdc1245efgh5678abdc1245efgh5678abdc1245efgh5678
tctl statuscommand, you can use your current credentials to run subsequenttctlcommands from your workstation. If you host your own Teleport cluster, you can also runtctlcommands on the computer that hosts the Teleport Auth Service for full permissions.
Step 1/6. Create an Azure invite token
When discovering Azure virtual machines, Teleport makes use of Azure invite tokens for authenticating joining SSH Service instances.
Create a file called token.yaml:
# token.yaml
kind: token
version: v2
metadata:
  # the token name is not a secret because instances must prove that they are
  # running in your Azure subscription to use this token
  name: azure-discovery-token
  # set a long expiry time, as the default for tokens is only 30 minutes
  expires: "3000-01-01T00:00:00Z"
spec:
  # use the minimal set of roles required
  roles: [Node]

  # set the join method allowed for this token
  join_method: azure

  azure:
    allow:
    # specify the Azure subscription which Nodes may join from
    - subscription: "123456789"
Assign the subscription field to your Azure subscription ID.
Add the token to the Teleport cluster with:
tctl create -f token.yaml
Step 2/6. Configure IAM permissions for Teleport
The Teleport Discovery Service needs Azure IAM permissions to discover and register Azure virtual machines.
Configure an Azure service principal
There are a couple of ways for the Teleport Discovery Service to access Azure resources:
- The Discovery Service can run on an Azure VM with attached managed identity. This is the recommended way of deploying the Discovery Service in production since it eliminates the need to manage Azure credentials.
- The Discovery Service can be registered as an Azure AD application (via AD's "App registrations") and configured with its credentials. This is only recommended for development and testing purposes since it requires Azure credentials to be present in the Discovery Service's environment.
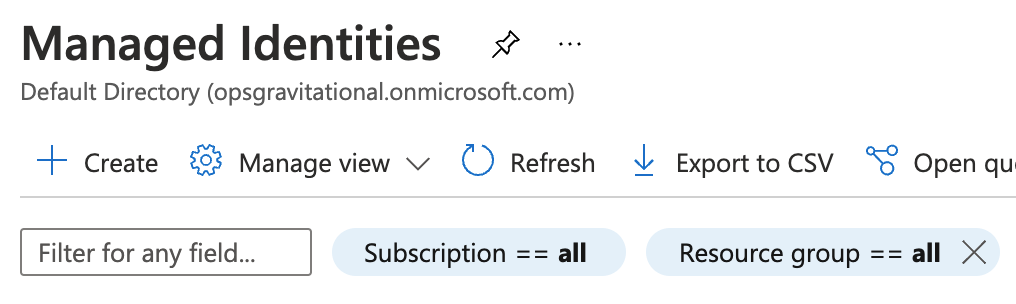
Go to the Managed Identities page in your Azure portal and click Create to create a new user-assigned managed identity:
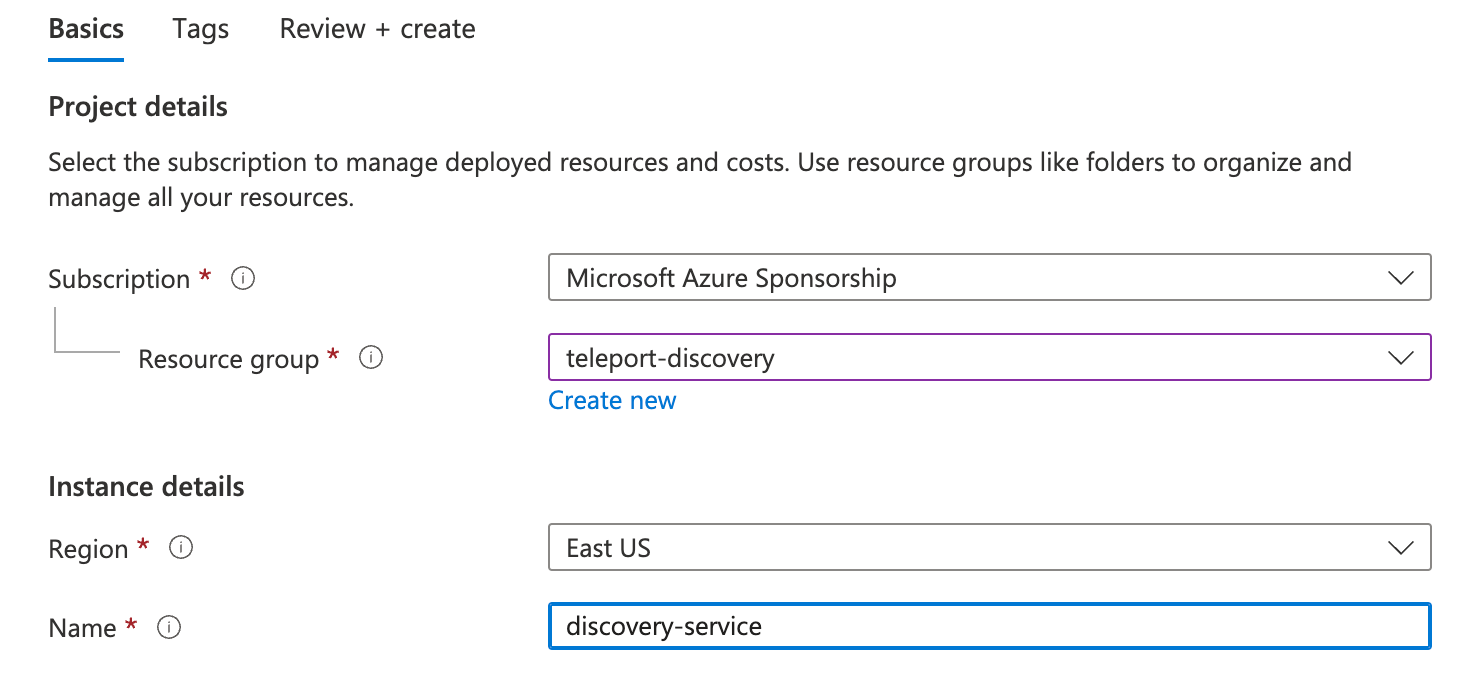
Pick a name and resource group for the new identity and create it:
Take note of the created identity's Client ID:
Next, navigate to the Azure VM that will run your Discovery Service instance and add the identity you've just created to it:
Attach this identity to all Azure VMs that will be running the Discovery Service.
Registering the Discovery Service as Azure AD application is suitable for test and development scenarios, or if your Discovery Service does not run on an Azure VM. For production scenarios prefer to use the managed identity approach.
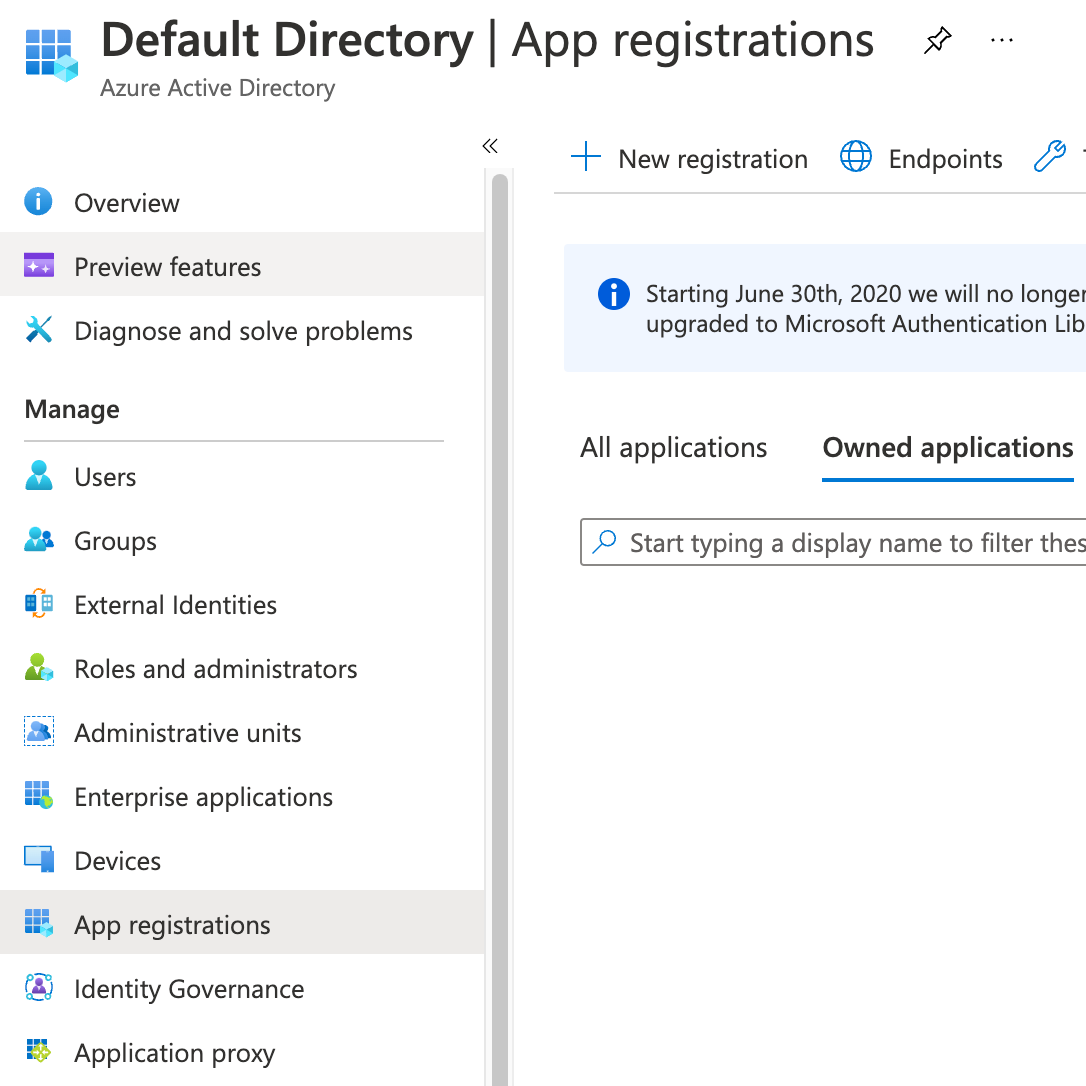
Go the the App registrations page of your Azure Active Directory and click on New registration:
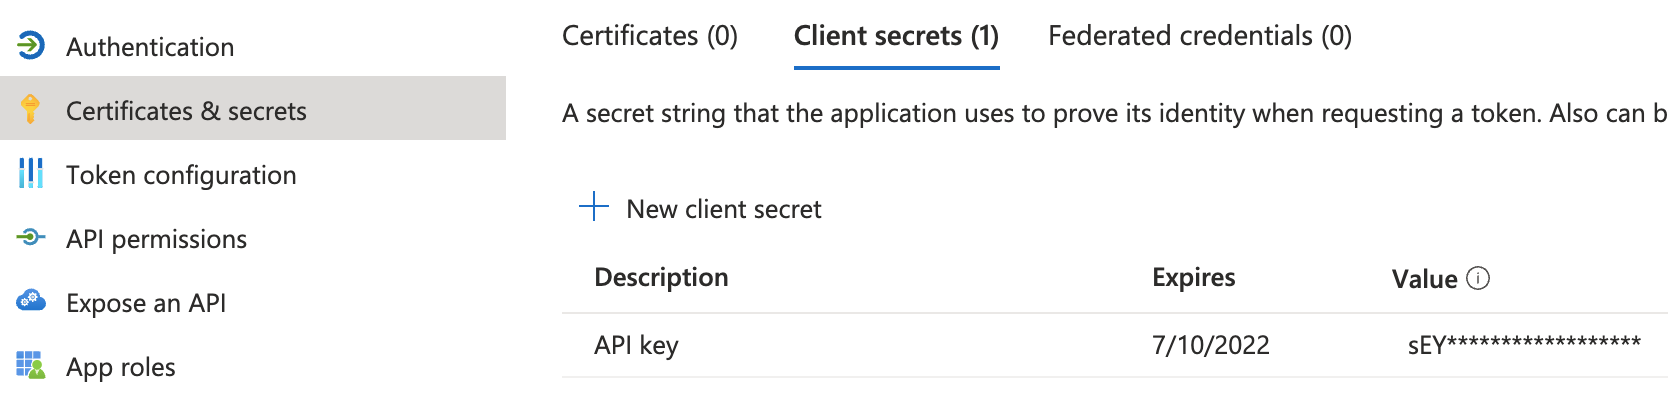
Pick a name (e.g. DiscoveryService) and register a new application. Once the app has been created, take note of its Application (client) ID and click on Add a certificate or secret:
Create a new client secret that the Discovery Service agent will use to authenticate with the Azure API:
The Teleport Discovery Service uses Azure SDK's default credential provider chain to look for credentials. Refer to Azure SDK Authorization to pick a method suitable for your use-case. For example, to use environment-based authentication with a client secret, the Discovery Service should have the following environment variables set:
export AZURE_TENANT_ID=
export AZURE_CLIENT_ID=
export AZURE_CLIENT_SECRET=
Create a custom role
Teleport requires the following permissions to discover and enroll Azure VMs:
Microsoft.Compute/virtualMachines/readMicrosoft.Compute/virtualMachines/runCommand/actionMicrosoft.Compute/virtualMachines/runCommands/writeMicrosoft.Compute/virtualMachines/runCommands/readMicrosoft.Compute/virtualMachines/runCommands/delete
Here is a sample role definition allowing Teleport to read and run commands on Azure virtual machines:
{
    "properties": {
        "roleName": "TeleportDiscovery",
        "description": "Allows Teleport to discover Azure virtual machines",
        "assignableScopes": [
            "/subscriptions/11111111-2222-3333-4444-555555555555"
        ],
        "permissions": [
            {
                "actions": [
                    "Microsoft.Compute/virtualMachines/read",
                    "Microsoft.Compute/virtualMachines/runCommand/action",
                    "Microsoft.Compute/virtualMachines/runCommands/write",
                    "Microsoft.Compute/virtualMachines/runCommands/read",
                    "Microsoft.Compute/virtualMachines/runCommands/delete"
                ],
                "notActions": [],
                "dataActions": [],
                "notDataActions": []
            }
        ]
    }
}
The assignableScopes field above includes a subscription
/subscriptions/<subscription>, allowing the role to be assigned at any
resource scope within that subscription or the subscription scope itself. If
you want to further limit the assignableScopes, you can use a resource group
/subscriptions/<subscription>/resourceGroups/<group> or a management group
/providers/Microsoft.Management/managementGroups/<group> instead.
Now go to the Subscriptions page and select a subscription.
Click on Access control (IAM) in the subscription and select Add > Add custom role:
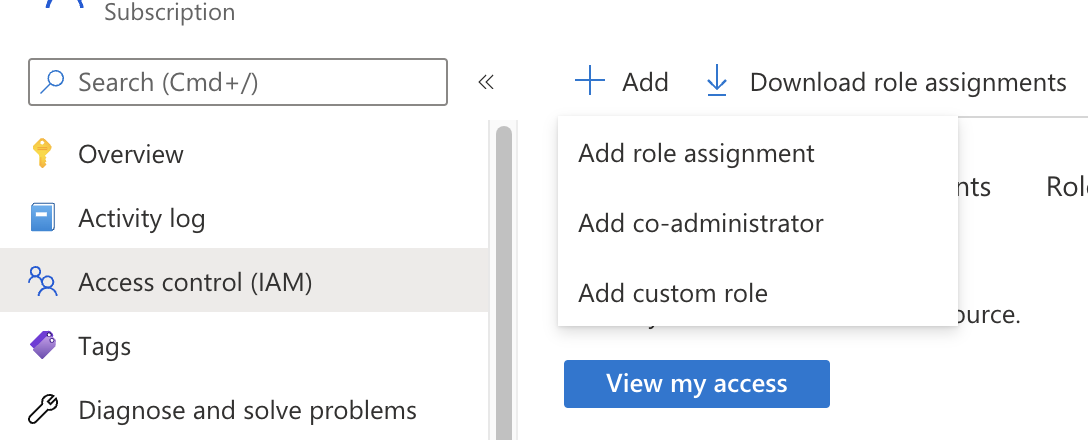
In the custom role creation page, click the JSON tab and click Edit, then paste the JSON example
and replace the subscription in assignableScopes with your own subscription id:
Create a role assignment for the Teleport Discovery Service principal
To grant Teleport permissions, the custom role you created must be assigned to the Teleport service principal - either the managed identity or the app registration you created earlier.
Navigate to the resource scope where you want to make the role assignment. Click Access control (IAM) and select Add > Add role assignment. Choose the custom role you created as the role and the Teleport service principal as a member.
The role assignment should be at a high enough scope to allow the Teleport Discovery Service to discover all matching virtual machines. See Identify the needed scope for more information about Azure scopes and creating role assignments.
Step 3/6. Set up managed identities for discovered nodes
Every Azure VM to be discovered must have a managed identity assigned to it
with at least the Microsoft.Compute/virtualMachines/read permission.
Create a custom role
Enter the name of your Azure resource group in the Azure Portal search box and visit the page for that resource group. On the left navigation sidebar, click the Access control (IAM) tab. In the row of buttons at the top of the Access control (IAM) panel, click Add > Add custom role.
In the Custom role name field, enter teleport-read-vm.
Click the Permissions tab, then within the Permissions view, click +Add permissions.
Enter Microsoft.Compute/virtualMachines/read in the search box. Click the
Microsoft Compute box, then enable Read: Get Virtual Machine. Click
Add.
Click Review + create, then Create.
Create an Azure managed identity
Visit the Managed Identities view in Azure Portal.
Click Create.
Under Subscription, Resource group, and Region, choose the ones that your VM belongs to.
In the Name field, enter teleport-azure.
Click Review + create, then Create.
Once creation finishes, click Go to resource. On the page for the new identity, copy the value for the Client ID so you can use it later in this guide.
Assign the teleport-read-vm role to the teleport-azure identity
Enter the name of your Azure resource group in the Azure Portal search box and visit the page for that resource group. On the left navigation sidebar, click the Access control (IAM) tab. In the row of buttons at the top of the Access control (IAM) panel, click Add > Add role assignment.
Within the Add role assignment screen, click teleport-read-vm.
Scroll to the bottom of the screen and click Next.
Within the Members tab, in the Assign access to field, choose Managed identity. Click Select members.
On the right sidebar, find the Managed identity dropdown menu and select
User-assigned managed identity. Choose the teleport-azure identity you
created earlier.
Click Select, then Review + assign.
Verify that your Role is teleport-read-vm, the Scope matches your
chosen resource group, and the Members field includes the teleport-azure
managed identity you created earlier.
Click Review + assign again.
Attach an identity to your Azure VM
In the Virtual machines view of Azure Portal, click on the name of the VM you are using to host the Teleport Application Service.
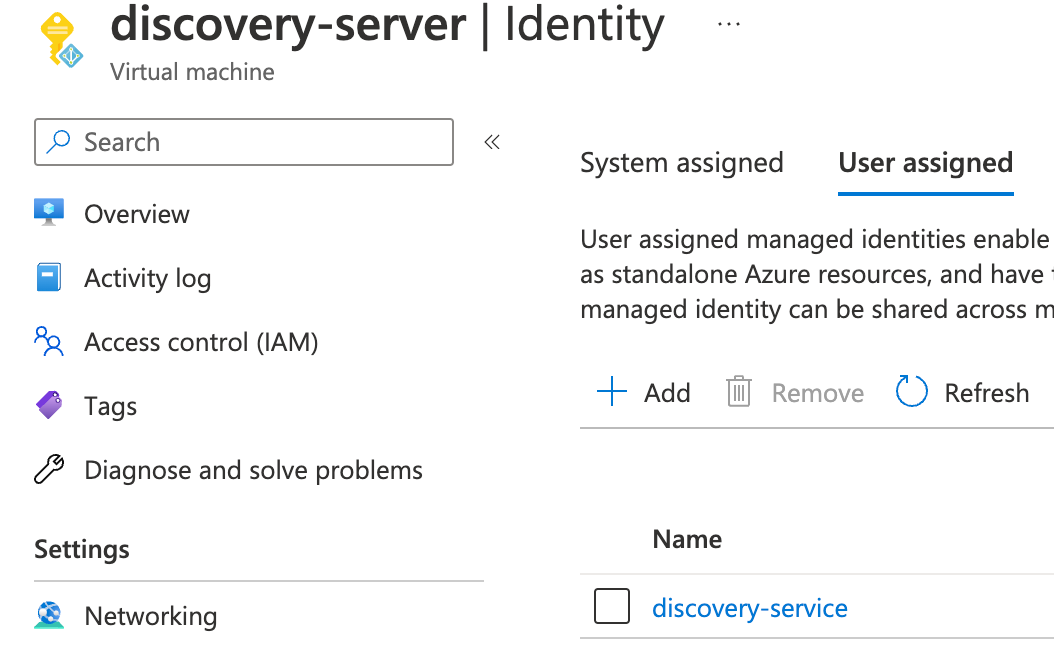
On the right side panel, click the Identity tab, then within the
Identity view, click the User assigned tab. Click +Add, then select
the teleport-azure identity. Click Add.
Navigate back to Identity tab in the page for your Azure VM. You should see the new identity listed in the User assigned sub-tab:
As part of authentication, Teleport will be able to do anything allowed by the identity. If you use a managed identity other than the one created in this guide, we strongly recommend limiting its permissions and scope.
Create a file named teleport-create-identity.json and copy the following into
it:
{
  "$schema": "https://schema.management.azure.com/schemas/2019-04-01/deploymentTemplate.json#",
  "contentVersion": "1.0.0.0",
  "metadata": {
    "_generator": {
      "name": "bicep",
      "version": "0.5.6.12127",
      "templateHash": "2227781763411200690"
    }
  },
  "parameters": {
    "roleName": {
      "type": "string",
      "defaultValue": "teleport-read-vm",
      "metadata": {
        "description": "Friendly name of the role definition"
      }
    },
    "identityName": {
      "type": "string",
      "defaultValue": "teleport-azure",
      "metadata": {
        "description": "Name of the managed identity"
      }
    }
  },
  "variables": {
    "roleDefName": "[guid(resourceGroup().id, string('Microsoft.Compute/virtualMachines/read'))]"
  },
  "resources": [
    {
      "type": "Microsoft.Authorization/roleDefinitions",
      "apiVersion": "2022-04-01",
      "name": "[variables('roleDefName')]",
      "properties": {
        "roleName": "[parameters('roleName')]",
        "description": "A role to allow reading information about Virtual Machines, to be used for Teleport.",
        "type": "customRole",
        "permissions": [
          {
            "actions": [
              "Microsoft.Compute/virtualMachines/read"
            ],
            "notActions": []
          }
        ],
        "assignableScopes": [
          "[resourceGroup().id]"
        ]
      }
    },
    {
      "type": "Microsoft.ManagedIdentity/userAssignedIdentities",
      "name": "[parameters('identityName')]",
      "apiVersion": "2018-11-30",
      "location": "[resourceGroup().location]"
    }
  ],
  "outputs": {
    "principalID": {
      "type": "string",
      "value": "[reference(resourceId('Microsoft.ManagedIdentity/userAssignedIdentities', parameters('identityName'))).principalId]"
    },
    "clientID": {
      "type": "string",
      "value": "[reference(resourceId('Microsoft.ManagedIdentity/userAssignedIdentities', parameters('identityName'))).clientId]"
    },
    "roleName": {
      "type": "string",
      "value": "[variables('roleDefName')]"
    }
  }
}
Then run the following commands to create the custom role and managed identity:
DEPLOY_OUTPUT=$(az deployment group create \--resource-group <your-resource-group> \--template-file teleport-create-identity.json)PRINCIPAL_ID=$(echo $DEPLOY_OUTPUT | jq -r '.properties.outputs.principalID.value')CLIENT_ID=$(echo $DEPLOY_OUTPUT | jq -r '.properties.outputs.principalID.value')ROLE_NAME=$(echo $DEPLOY_OUTPUT | jq -r '.properties.outputs.roleName.value')
This command requires jq to be installed on your workstation, which you can do
via the jq download page.
Next, create another file named teleport-assign-identity.json and copy the
following into it:
{
  "$schema": "https://schema.management.azure.com/schemas/2019-04-01/deploymentTemplate.json#",
  "contentVersion": "1.0.0.0",
  "metadata": {
    "_generator": {
      "name": "bicep",
      "version": "0.5.6.12127",
      "templateHash": "2227781763411200690"
    }
  },
  "parameters": {
    "identityName": {
      "type": "string",
      "defaultValue": "teleport-azure"
    },
    "principalId": {
      "type": "string"
    },
    "roleName": {
      "type": "string"
    },
    "vmNames": {
      "type": "array"
    }
  },
  "resources": [
    {
      "type": "Microsoft.Authorization/roleAssignments",
      "apiVersion": "2022-04-01",
      "name": "[guid(resourceGroup().id)]",
      "properties": {
        "roleDefinitionId": "[concat('/subscriptions/', subscription().subscriptionId, '/providers/Microsoft.Authorization/roleDefinitions/', parameters('roleName'))]",
        "principalId": "[parameters('principalId')]"
      }
    },
    {
      "apiVersion": "2018-06-01",
      "type": "Microsoft.Compute/virtualMachines",
      "name": "[parameters('vmNames')[copyIndex('vmcopy')]]",
      "location": "[resourceGroup().location]",
      "identity": {
        "type": "userAssigned",
        "userAssignedIdentities": {
          "[resourceID('Microsoft.ManagedIdentity/userAssignedIdentities/',parameters('identityName'))]": {}
        }
      },
      "copy": {
        "name": "vmcopy",
        "count": "[length(parameters('vmNames'))]"
      }
    }
  ]
}
Run the following command to assign your custom role to your managed identity and assign the identity to your virtual machines:
az deployment group create \--resource-group <your-resource-group> \--template-file teleport-assign-identity.json \-- parameters principalId="$PRINCIPAL_ID" roleName="$ROLE_NAME" \vmNames='<list-of-vm-names>'
Use the value of CLIENT_ID in Step 3.
If the VMs to be discovered have more than one managed identity assigned to them, save the client ID of the identity you just created for step 5.
Step 4/6. Install the Teleport Discovery Service
If you plan on running the Discovery Service on a host that is already running another Teleport service (Auth or Proxy, for example), you can skip this step.
Install Teleport on the virtual machine that will run the Discovery Service:
Install Teleport on your Linux server:
-
Assign edition to one of the following, depending on your Teleport edition:
Edition Value Teleport Enterprise Cloud cloudTeleport Enterprise (Self-Hosted) enterpriseTeleport Community Edition oss -
Get the version of Teleport to install. If you have automatic agent updates enabled in your cluster, query the latest Teleport version that is compatible with the updater:
TELEPORT_DOMAIN=example.teleport.comTELEPORT_VERSION="$(curl https://$TELEPORT_DOMAIN/v1/webapi/automaticupgrades/channel/default/version | sed 's/v//')"Otherwise, get the version of your Teleport cluster:
TELEPORT_DOMAIN=example.teleport.comTELEPORT_VERSION="$(curl https://$TELEPORT_DOMAIN/v1/webapi/ping | jq -r '.server_version')" -
Install Teleport on your Linux server:
curl https://goteleport.com/static/install.sh | bash -s ${TELEPORT_VERSION} editionThe installation script detects the package manager on your Linux server and uses it to install Teleport binaries. To customize your installation, learn about the Teleport package repositories in the installation guide.
Step 5/6. Configure Teleport to discover Azure instances
If you are running the Discovery Service on its own host, the service requires a valid invite token to connect to the cluster. Generate one by running the following command against your Teleport Auth Service:
tctl tokens add --type=discovery
Save the generated token in /tmp/token on the virtual machine that will run
the Discovery Service.
In order to enable Azure instance discovery the discovery_service.azure section
of teleport.yaml must include at least one entry:
version: v2
teleport:
  join_params:
    token_name: "/tmp/token"
    method: token
  auth_servers:
  - "teleport.example.com:3080"
auth_service:
  enabled: off
proxy_service:
  enabled: off
ssh_service:
  enabled: off
discovery_service:
  enabled: "yes"
  azure:
    - types: ["vm"]
      subscriptions: ["<subscription>"]
      resource_groups: ["<resource-group>"]
      regions: ["<region>"]
      tags:
        "env": "prod" # Match virtual machines where tag:env=prod
      install:
        azure:
          # Optional: If the VMs to discover have more than one managed
          # identity assigned to them, set the client ID here to the client
          # ID of the identity created in step 3.
          client_id: "<client-id>"
- Edit the
teleport.auth_serverskey to match your Auth Service or Proxy Service's URI and port. - Adjust the keys under
discovery_service.azureto match your Azure environment, specifically the regions and tags you want to associate with the Discovery Service.
Step 6/6. [Optional] Customize the default installer script
To customize the default installer script, execute the following command on your workstation:
tctl get installer/default-installer > teleport-default-installer.yaml
The resulting teleport-default-installer.yaml can be edited to
change what gets executed when enrolling discovered instances.
After making the desired changes to the default installer, the resource can be updated by executing:
tctl create -f teleport-default-installer.yaml
Multiple installer resources can exist and be specified in the
azure.install.script_name section of a discovery_service.azure list item in
teleport.yaml:
discovery_service:
  azure:
    - types: ["vm"]
      tags:
       - "env": "prod"
      install: # optional section when default-installer is used.
        script_name: "default-installer"
    - types: ["vm"]
      tags:
       - "env": "devel"
      install:
        script_name: "devel-installer"
The installer resource has the following templating options:
{{ .MajorVersion }}: the major version of Teleport to use when installing from the repository.{{ .PublicProxyAddr }}: the public address of the Teleport Proxy Service to connect to.{{ .RepoChannel }}: Optional package repository (apt/yum) channel name. Has format<channel>/<version>e.g. stable/v15. See installation for more details.{{ .AutomaticUpgrades }}: indicates whether Automatic Updates are enabled or disabled. Its value is eithertrueorfalse. See self-hosted automatic agent updates for more information.{{ .TeleportPackage }}: the Teleport package to use. Its value is eitherteleport-entorteleportdepending on whether the cluster is enterprise or not.
These can be used as follows:
kind: installer
metadata:
  name: default-installer
spec:
  script: |
    echo {{ .PublicProxyAddr }}
    echo Teleport-{{ .MajorVersion }}
    echo Repository Channel: {{ .RepoChannel }}
version: v1
Which, when retrieved for installation, will evaluate to a script with the following contents:
echo teleport.example.com
echo Teleport-15.2.2
echo Repository Channel: stable/v15.2.2
The default installer will take the following actions:
- Add an official Teleport repository to supported Linux distributions.
- Install Teleport via
aptoryum. - Generate the Teleport config file and write it to
/etc/teleport.yaml. - Enable and start the Teleport service.
If client_id is set in the Discovery Service config, custom installers will
also have the {{ .AzureClientID }} templating option.
Troubleshooting
No credential providers error
If you see the error DefaultAzureCredential: failed to acquire a token. in Discovery Service logs then Teleport
is not detecting the required credentials to connect to the Azure SDK. Check whether
the credentials have been applied in the machine running the Teleport Discovery Service and restart
the Teleport Discovery Service.
Refer to Azure SDK Authorization
for more information.
Teleport reports no error but VM does not join
Check your Discovery Service config and make sure that the VM you want to discover matches. In debug mode, Teleport will log the Subscription IDs and names of VMs it discovers.
The Azure run command API does not report the output of commands,
so Teleport has no way of knowing if a command succeeded or failed. Run command
logs can be found on the targeted VM at
/var/log/azure/run-command-handler/handler.log.
Next steps
- Read Joining Nodes via Azure Managed Identity for more information on Azure tokens.
- Full documentation on Azure discovery configuration can be found through the config file reference documentation.
- The complete default installer can be found with the Teleport source .