
Teleport
Database Access GUI Clients
- Version 16.x
- Version 15.x
- Version 14.x
- Version 13.x
- Older Versions
This guide describes how to configure popular graphical database clients to work with Teleport.
Setting up your Teleport environment
Prerequisites
-
A running Teleport cluster. If you want to get started with Teleport, sign up for a free trial or set up a demo environment.
-
The
tctladmin tool andtshclient tool version >= 15.2.2.On Teleport Enterprise, you must use the Enterprise version of
tctl, which you can download from your Teleport account workspace. Otherwise, visit Installation for instructions on downloadingtctlandtshfor Teleport Community Edition.
- To check that you can connect to your Teleport cluster, sign in with
tsh login, then verify that you can runtctlcommands using your current credentials.tctlis supported on macOS and Linux machines. For example:If you can connect to the cluster and run thetsh login --proxy=teleport.example.com --user=[email protected]tctl statusCluster teleport.example.com
Version 15.2.2
CA pin sha256:abdc1245efgh5678abdc1245efgh5678abdc1245efgh5678abdc1245efgh5678
tctl statuscommand, you can use your current credentials to run subsequenttctlcommands from your workstation. If you host your own Teleport cluster, you can also runtctlcommands on the computer that hosts the Teleport Auth Service for full permissions. - The Teleport Database Service configured to access a database. See one of our guides for how to set up the Teleport Database Service for your database.
Get connection information
Starting the local database proxy with the --tunnel flag will create an
authenticated tunnel that you can use to connect to your database instances.
You won't need to configure any credentials when connecting to this tunnel.
Here is an example on how to start the proxy:
# Start the local proxy.
$ tsh proxy db --tunnel <database-name>
Started authenticated tunnel for the <engine> database "<database-name>" in cluster "<cluster-name>" on 127.0.0.1:62652.
You can optionally specify the database name and the user to use by default when connecting to the database:
tsh proxy db --db-user=my-database-user --db-name=my-schema --tunnel <database-name>
Now, you can connect to the address the proxy command returns. In our example it
is 127.0.0.1:62652.
If you're using Teleport in TLS routing mode where each database protocol is multiplexed on the same web proxy port, use the following command to start a local TLS proxy your GUI database client will be connecting to:
tsh proxy db <database-name>Started DB proxy on 127.0.0.1:61740
Use following credentials to connect to the <database-name> proxy:  ca_file=/Users/r0mant/.tsh/keys/root.gravitational.io/certs.pem  cert_file=/Users/r0mant/.tsh/keys/root.gravitational.io/alice-db/root/<database-name>-x509.pem  key_file=/Users/r0mant/.tsh/keys/root.gravitational.io/alice
Use the displayed local proxy host/port and credentials paths when configuring
your GUI client below. When entering the hostname, use localhost rather than
127.0.0.1.
If you're not using TLS routing, run the following command to see the database connection information:
View configuration for the database you're logged in to.
tsh db configView configuration for the specific database when you're logged into multiple.
tsh db config example
It will display the path to your locally cached certificate and key files:
Name:      example
Host:      teleport.example.com
Port:      3080
User:      postgres
Database:  postgres
CA:        /Users/alice/.tsh/keys/teleport.example.com/certs.pem
Cert:      /Users/alice/.tsh/keys/teleport.example.com/alice-db/root/example-x509.pem
Key:       /Users/alice/.tsh/keys/teleport.example.com/alice
The displayed CA, Cert, and Key files are used to connect through pgAdmin
4, MySQL Workbench, and other graphical database clients that support mutual
TLS authentication.
Use the following command to start a local TLS proxy your GUI database client will be connecting to:
tsh proxy db <database-name>Started DB proxy on 127.0.0.1:61740
Use following credentials to connect to the <database-name> proxy:  ca_file=/Users/r0mant/.tsh/keys/root.gravitational.io/certs.pem  cert_file=/Users/r0mant/.tsh/keys/root.gravitational.io/alice-db/root/<database-name>-x509.pem  key_file=/Users/r0mant/.tsh/keys/root.gravitational.io/alice
Use the displayed local proxy host/port and credentials paths when configuring
your GUI client below. When entering the hostname, use localhost rather than
127.0.0.1.
MongoDB Compass
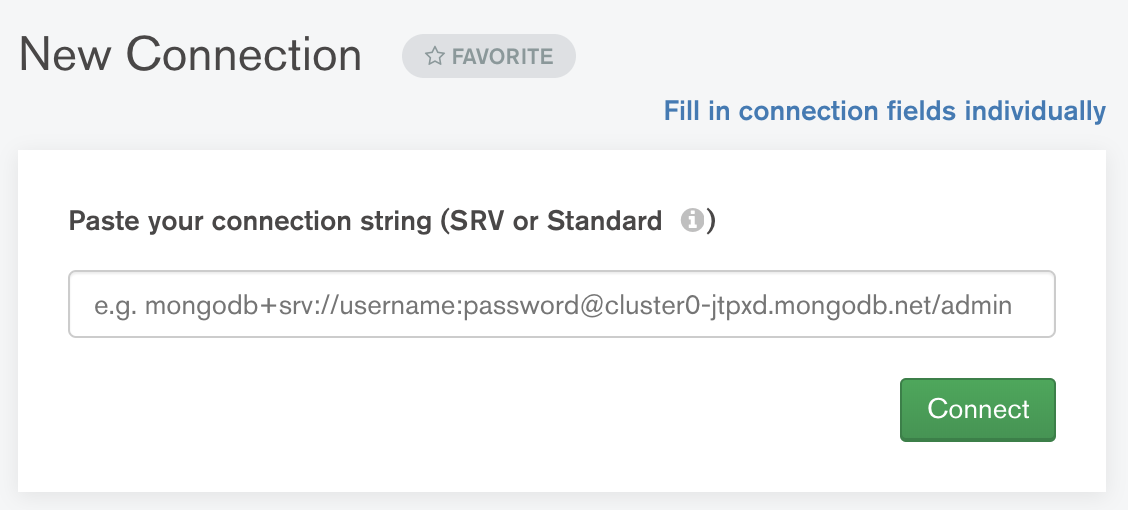
Compass is the official MongoDB graphical client.
On the "New Connection" panel, click on "Fill in connection fields individually".
On the "Hostname" tab, enter the hostname and port of the proxy you will use to access the database (see Get connection information). Leave "Authentication" as None.
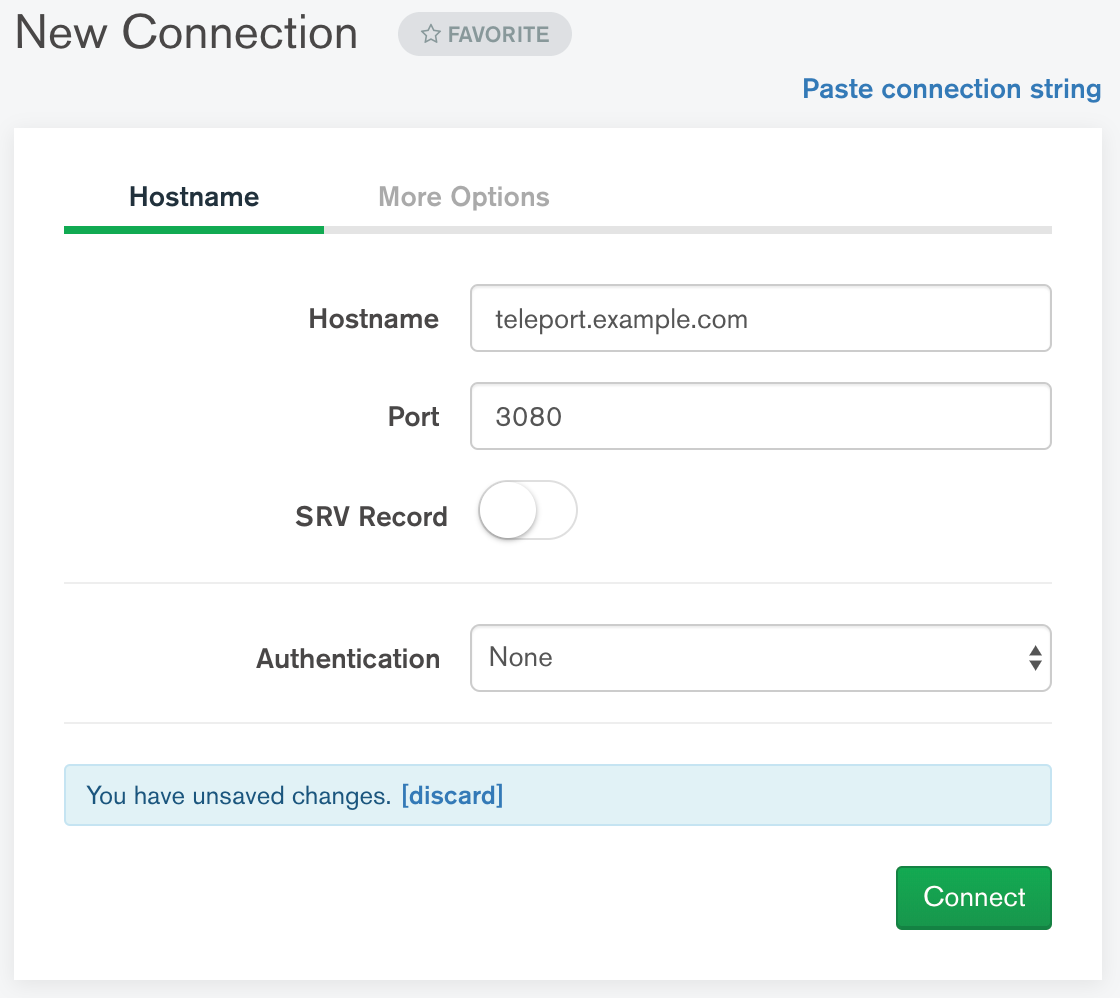
On the "More Options" tab, set SSL to "Client and Server Validation" and set the CA as well as the client key and certificate. Note that a CA path must be provided and be able to validate the certificate presented by your Teleport Proxy Service's web endpoint.

Click on the "Connect" button.
MySQL DBeaver
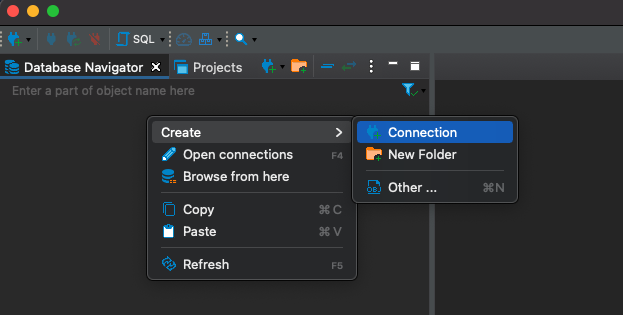
Right-click in the "Database Navigator" menu in the main view and select Create > Connection:
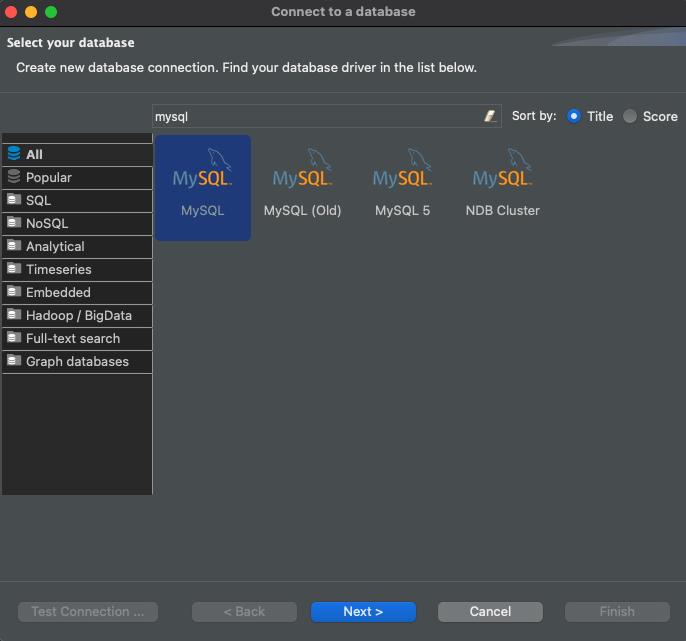
In the search bar of the "Connect to a database" window that opens up, type "mysql", select the MySQL driver, and click "Next":
In the newly-opened "Connection Settings" tab, use the Host as localhost and
Port as the one returned by the proxy command (62652 in the example above):
In that same tab, set the username to match the one that you are connecting to using Teleport and uncheck the "Save password locally" box:

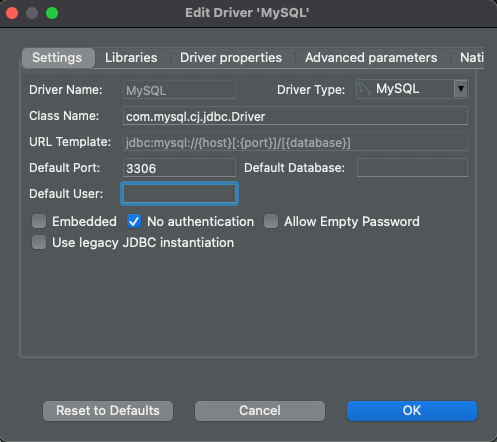
Click the "Edit Driver Settings" button on the "Main" tab, check the "No Authentication" box, and click "Ok" to save:
Once you are back in the "Connection Settings" window, click "Ok" to finish and DBeaver should connect to the remote MySQL server automatically.
MySQL Workbench
MySQL Workbench is a GUI application that provides comprehensive MySQL administration and SQL development tools.
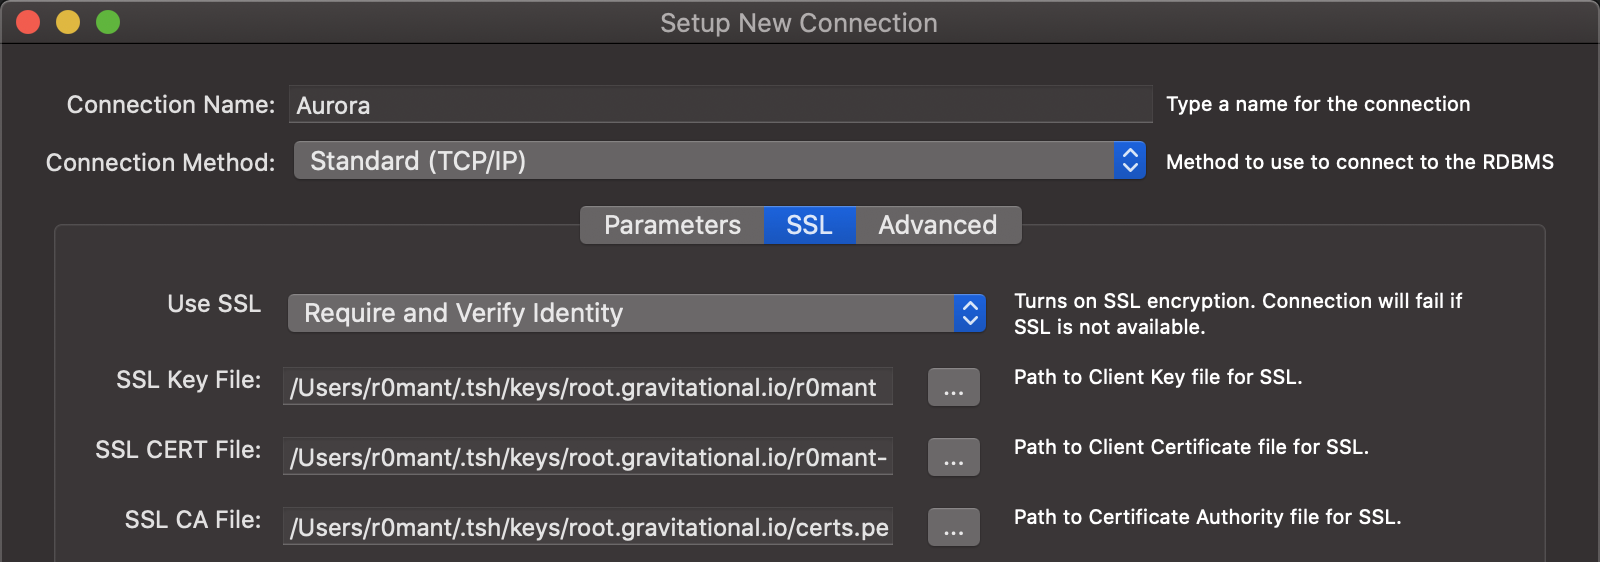
In the MySQL Workbench "Setup New Connection" dialog, fill out "Connection Name", "Hostname", "Port", and "Username":

In the "SSL" tab, set "Use SSL" to Require and Verify Identity and enter the
paths to your CA, certificate, and private key files (see
Get connection information):
Optionally, click "Test Connection" to verify connectivity:
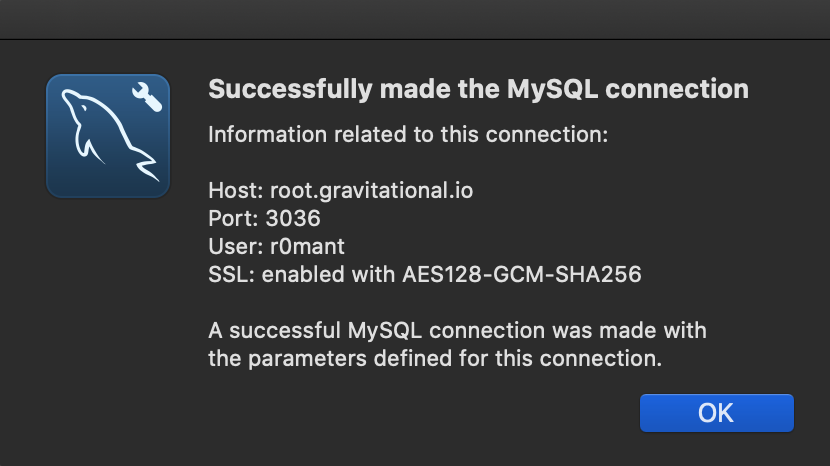
Save the connection and connect to the database.
NoSQL Workbench
From the NoSQL Workbench launch screen, click Launch next to Amazon DynamoDB.
From the left-side menu select Operation builder, then + Add connection.
Choose the DynamoDB local tab, and point to your proxy's endpoint. This is
localhost:62652 in the example above. (See
Get connection information for
more information.)
SQL Server with Azure Data Studio
In Azure Data Studio create a connection using your proxy's endpoint. This is
localhost,62652 in the example above. On a Windows machine, using an address in
the format 127.0.0.1,62652 could be required instead of localhost. (See
Get connection information for
more information.)
Create a connection with Microsoft SQL Server with these settings:
| Connection Detail | Value |
|---|---|
| Server | host,port of proxy endpoint |
| Authentication Type | SQL Login |
| Password | empty |
| Encrypt | False |
Example:
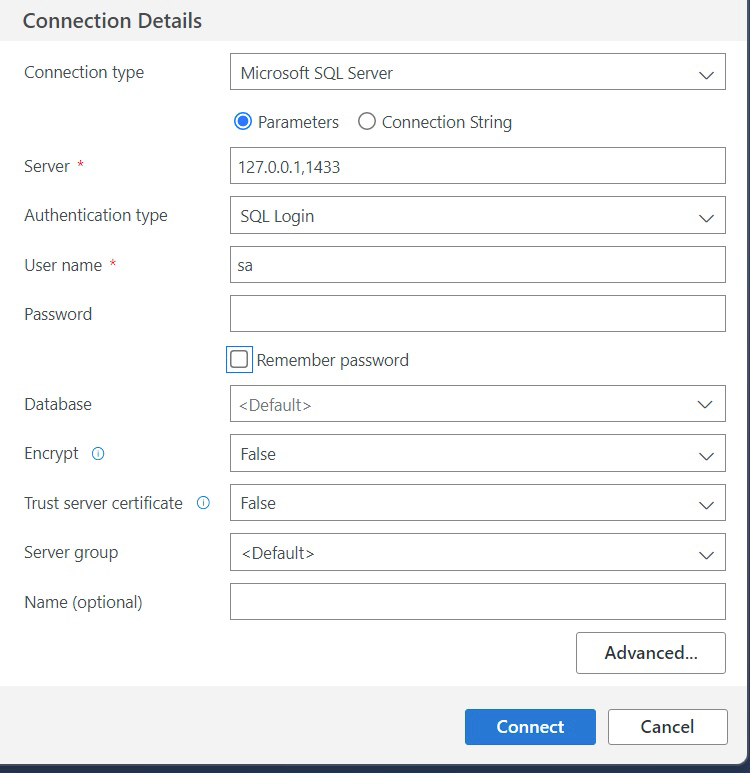
Click Connect to connect.
PostgreSQL DBeaver
To connect to your PostgreSQL instance, use the authenticated proxy address.
This is 127.0.0.1:62652 in the example above (see the “Authenticated Proxy”
section on Get connection information
for more information).
Use the "Database native" authentication with an empty password:
Clicking on "Test connection" should return a connection success message. Then, click on "Finish" to save the configuration.
PostgreSQL pgAdmin 4
pgAdmin 4 is a popular graphical client for PostgreSQL servers.
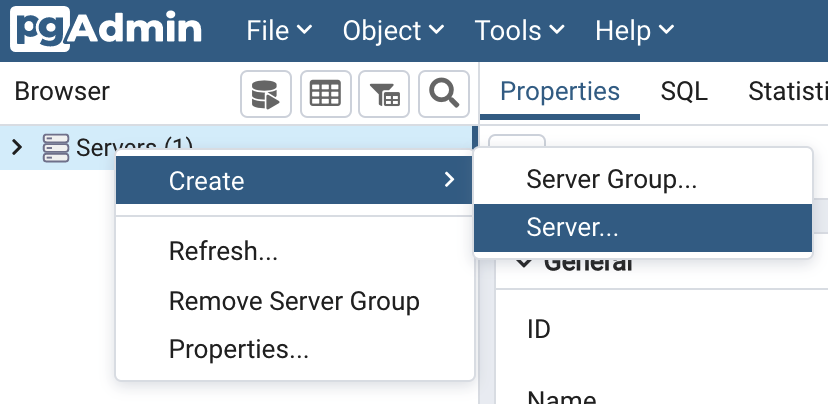
To configure a new connection, right-click on "Servers" in the main browser view and create a new server:
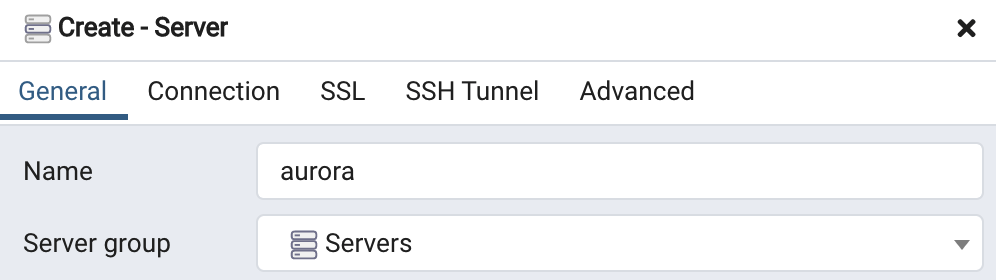
In the "General" tab of the new server dialog, enter the server connection name:
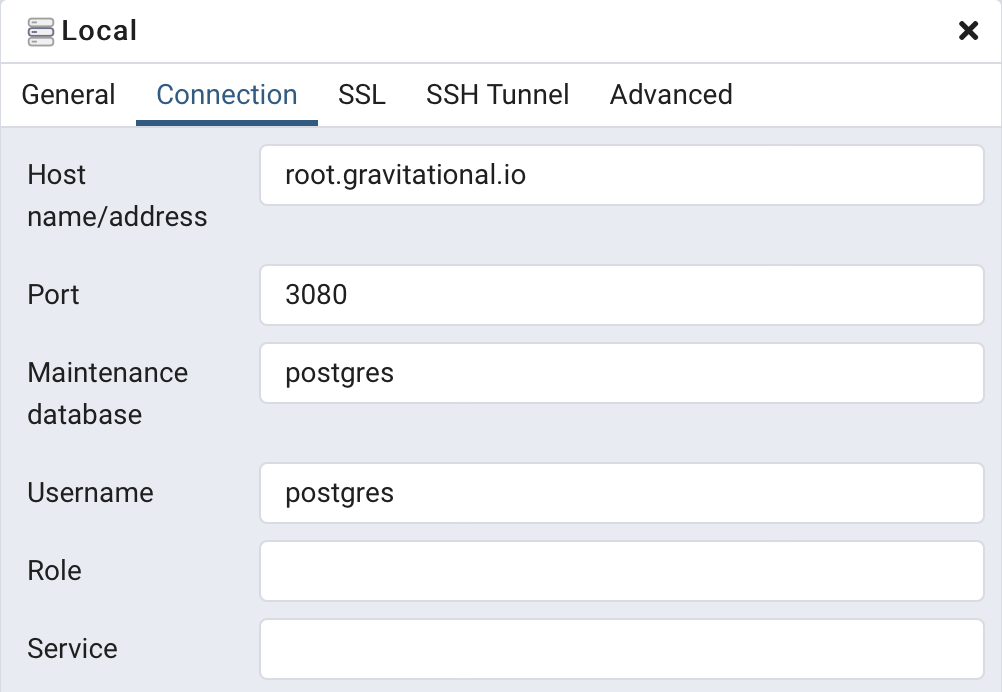
In the "Connection" tab, fill in the hostname, port, user and database name from the configuration above:
In the "SSL" tab, set "SSL Mode" to Verify-Full and fill in paths for client
certificate, key and root certificate from the configuration above:
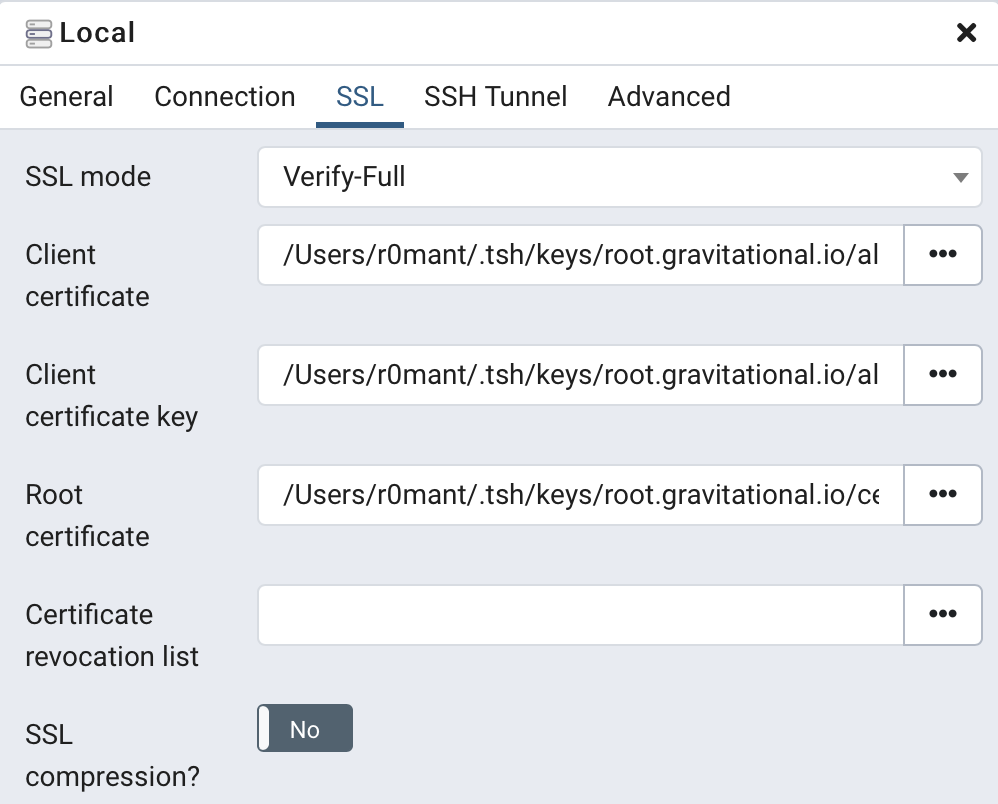
Click "Save", and pgAdmin should immediately connect. If pgAdmin prompts you for password, leave the password field empty and click OK.
Microsoft SQL Server Management Studio
In Microsoft SQL Server Management Studio connect to a database engine using
your proxy's endpoint. This is localhost,62652 in the example above. Using
the IP 127.0.0.1,62652 connection could be required on a Windows machine
instead of localhost. (See Get connection information for
more information.)
Create a connection with Microsoft SQL Server with these settings:
| Connection Detail | Value |
|---|---|
| Server type | Database Engine |
| Server name | host,port of proxy endpoint |
| Authentication | SQL Server Authentication |
| Password | empty |
| Encryption | do not enable |
Example:

Click Connect to connect.
Redis Insight
Teleport's Redis Insight integration only supports Redis standalone instances.
After opening Redis Insight click ADD REDIS DATABASE.
Now start a local proxy to your Redis instance:
tsh proxy db --db-user=alice redis-db-name.
Click Add Database Manually. Use 127.0.0.1 as the Host. Use the port printed by
the tsh command you ran in Get connection information.
Provide your Redis username as Username and password as Password.
Next, check the Use TLS and Verify TLS Certificates boxes and copy the CA certificate returned by tsh proxy db.
Copy the private key and certificate to corresponding fields.
Click Add Redis Database.
Congratulations! You have just connected to your Redis instance.
Snowflake: DBeaver
The Snowflake integration works only in the authenticated proxy mode. Start a local proxy for connections to your Snowflake database by using the command below:
tsh proxy db --tunnel --port 2000 snowflake
Add a new database by clicking the "add" icon in the top-left corner:
In the search bar of the "Connect to a database" window that opens up, type "snowflake", select the Snowflake driver, and click "Next":
Set "Host" to localhost and "Port" to the port returned by the tsh proxy db command you ran earlier (2000 in the example above).
In the "Authentication" section set the "Username" to match the database username passed to Teleport with --db-user
and enter any value (e.g., "teleport") in the "Password" field (the value of
"Password" will be ignored when establishing a connection but is required by DBeaver to register your database):
Next, click the "Driver properties" tab and set "account" to any value (e.g., "teleport"; as with "Password", the value of
"account" will be ignored when establishing a connection but is required by DBeaver to register your database). In "User properties", set "ssl" to off:
Teleport ignores the provided password and the account name as internally it uses values from the Database Agent configuration.
SSL set to off disables only encryption on local machine. Connection to Snowflake is encrypted by Teleport.
Now you can click on "Test Connection..." in the bottom-left corner:
Congratulations! You have just connected to your Snowflake instance.
Snowflake: JetBrains (IntelliJ, Goland, DataGrip, PyCharm, etc.)
The Snowflake integration works only in the authenticated proxy mode. Start a local proxy for connections to your Snowflake database by using the command below:
tsh proxy db --tunnel --port 2000 snowflake
In "Database Explorer" click the "add" button, pick "Data Source", and then pick "Snowflake":
Next, set "Host" to localhost and "Port" to the port returned by the tsh proxy db command you ran earlier (2000 in the example above).
Set the "Username" to match the one that you are assuming when you connect to Snowflake
via Teleport and enter any value (e.g., "teleport") in the "Password" field (the value of
"Password" will be ignored but is required to create a data source in your IDE):
Switch to the "Advanced" tab, set any value (e.g., "teleport") for "account", and add a new record named ssl with value off (as with "Password", "account" is ignored while establishing the connection but required by your IDE):
Teleport ignores the provided password and the account name as internally it uses values from the Database Agent configuration.
Setting "SSL" to off only disables encryption on your local machine. The connection to Snowflake is encrypted by Teleport.
Now you can click "Test Connection" to check your configuration.
Congratulations! You have just connected to your Snowflake instance.
SQL Server DataGrip
In the DataGrip connection configuration menu, use your proxy's endpoint. This
is localhost:4242 in the example below. (See
Get connection information for
more information.)
Select the "User & Password" authentication option and keep the "Password" field empty:
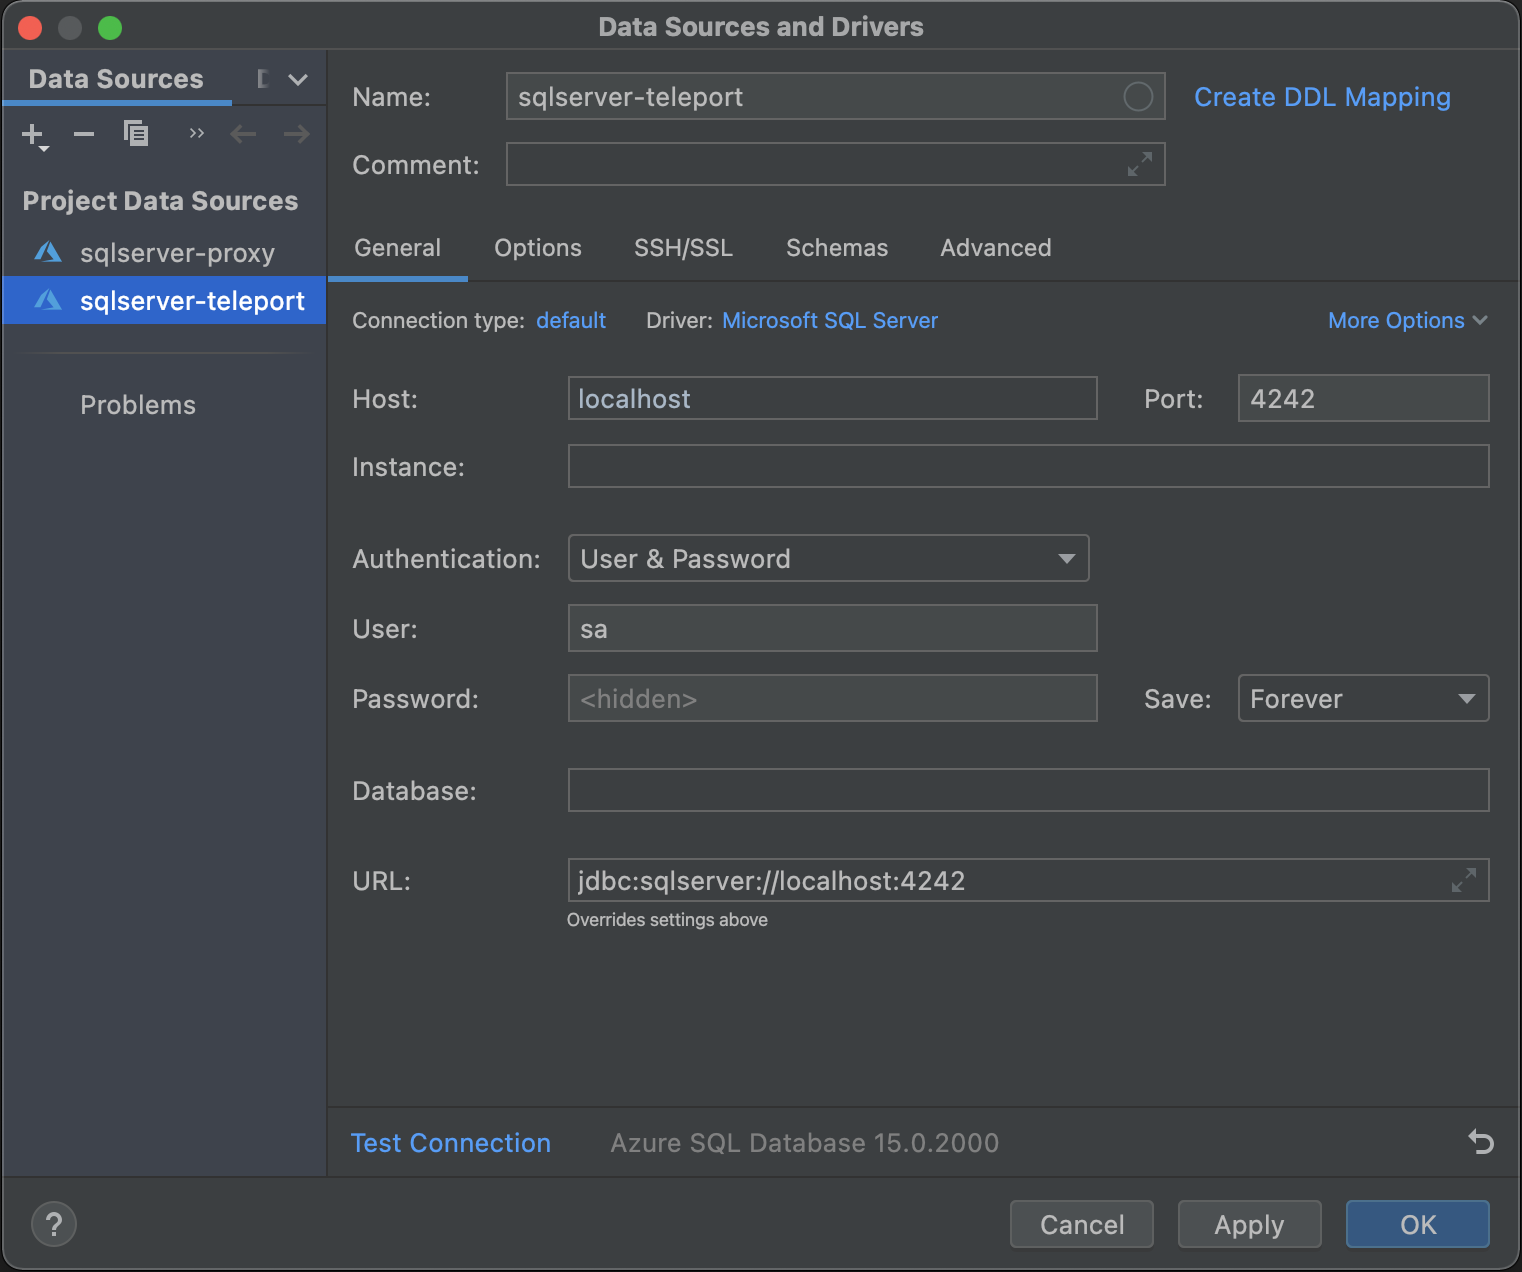
Click "OK" to connect.
SQL Server DBeaver
In the DBeaver connection configuration menu, use your proxy's endpoint. This is
localhost:62652 in the example above. (See
Get connection information for
more information.)
Use the SQL Server Authentication option and keep the Password field empty:
Click OK to connect.